


20
Using the RMP-5 with Additional Pads
You can connect other Roland V-Drums Series pads as well.
Depending on the trigger parameters, you can use two pads, or a single rim-capable pad.
Because each pad has its own individual characteristics, you must first set the “trigger types” that
correspond to the pad you are using in order for it to function correctly.
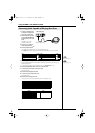
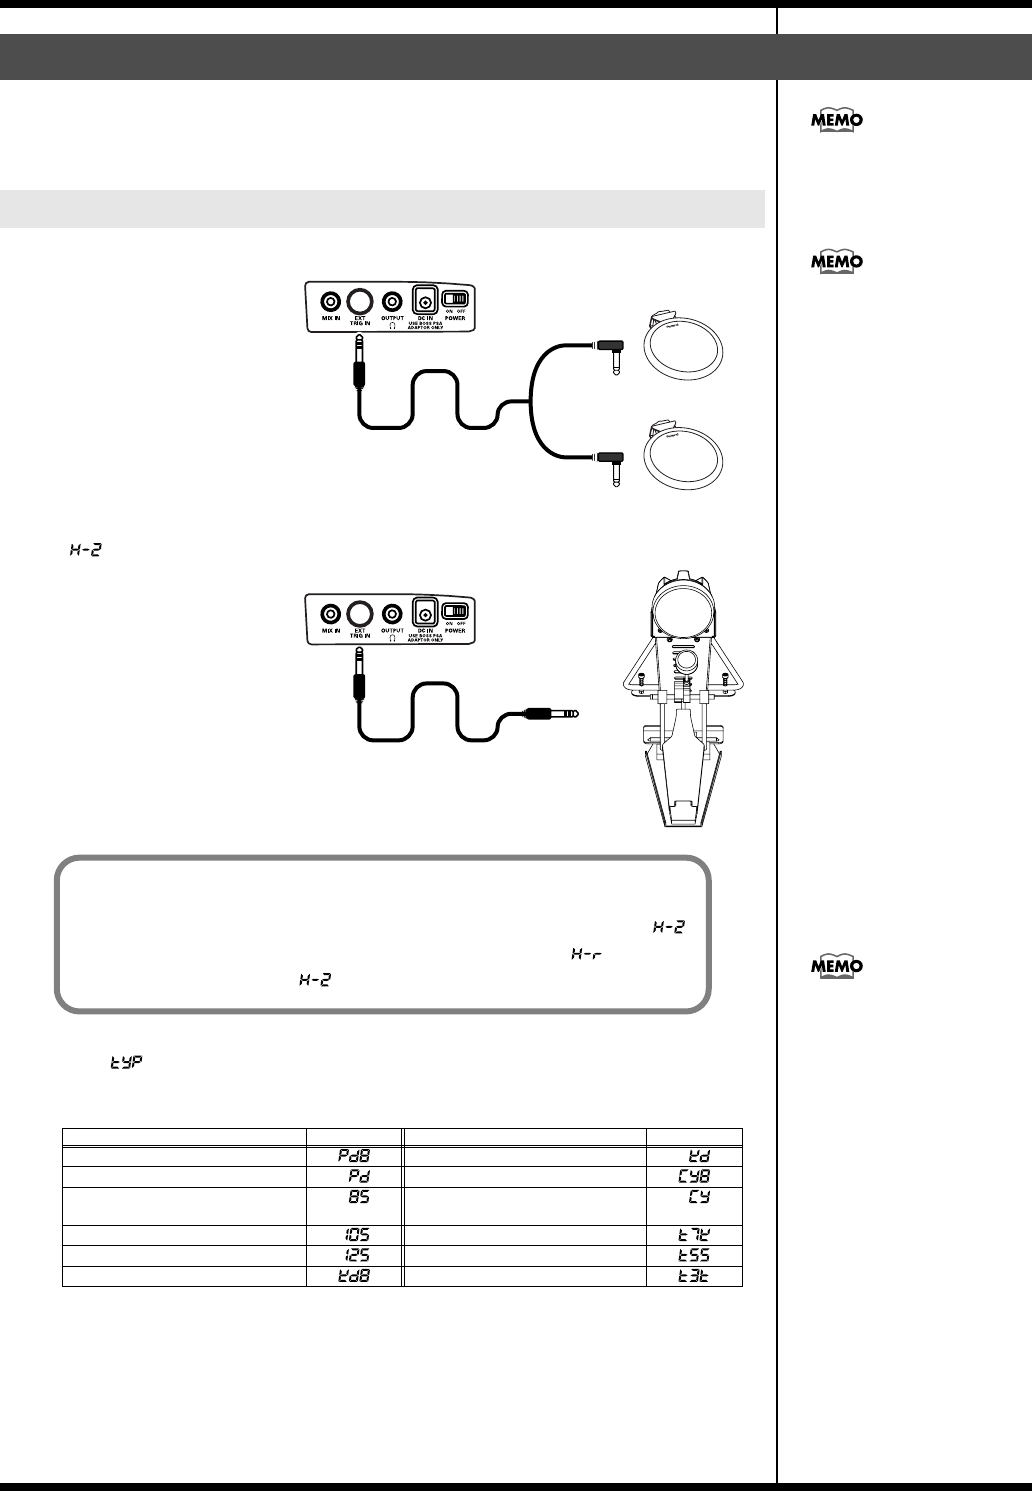
fig.pad2.e
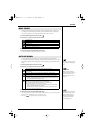
1.
Connect compatible pads to
the External Trigger In jack.
2.
While simultaneously
holding down the
[METRONOME] and
[COACH] buttons, turn on
the power.
The RMP-5 is now in the
parameter setting mode.
3.
Press the [+] or [-] button to
switch the Input Mode to
.
4.
Press the [COACH] button.
Once appears in the display, you can select the Trigger Type.
Press the [+] or [-] button to select one of the following to match the pad you have connected.
When you strike the pad, “EXT1” or “EXT2” flashes, indicating the pad being set.
Confirm the selected pad and then set the trigger parameters.
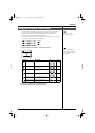
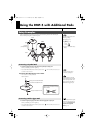
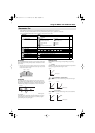
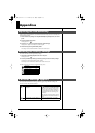
Connecting Other Pads
Connecting the Pads
Pad Type Pad Type
PD-8 KD-120, KD-85, KD-80, KD-7
PD-9, PD-7, PD-6 CY-8
PD-85, PD-80R, PD-80 CY-15R, CY-14C, CY-12R/C,
CY-12H, CY-6
PD-105, PD-100 RT-7K
PD-125, PD-120 RT-5S
KD-8 RT-3T
When connecting a cymbal
pad and kick pad, refer to P.19.
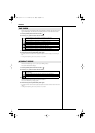
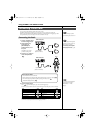
PD-8
PD-8
KD-8
Optional cable
(stereo or monaural)
Optional cable
(PCS-31L, PCS-31)
RMP-5 Side panel
RMP-5 Side panel
If connecting rim shot capable
pads like a PD-85, PD-125 etc.,
refer to the next section,
“Connecting Pads Capable
of Playing Rim Shots” (p. 22).
What is the Input Mode?
Select whether or not to use rim-shot.
When connecting two pads using the optional cable (PCS-31L or PCS-31), select ;
when connecting one pad that is capable of playing rim shots, select .
The default setting for this is .
You cannot change the RMP-5
pad’s trigger type. This is
indicated as “---” in the
display.
RMP-5_e.book 20 ページ 2005年8月11日 木曜日 午後2時47分