


6
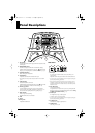
Panel Descriptions
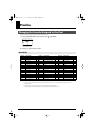
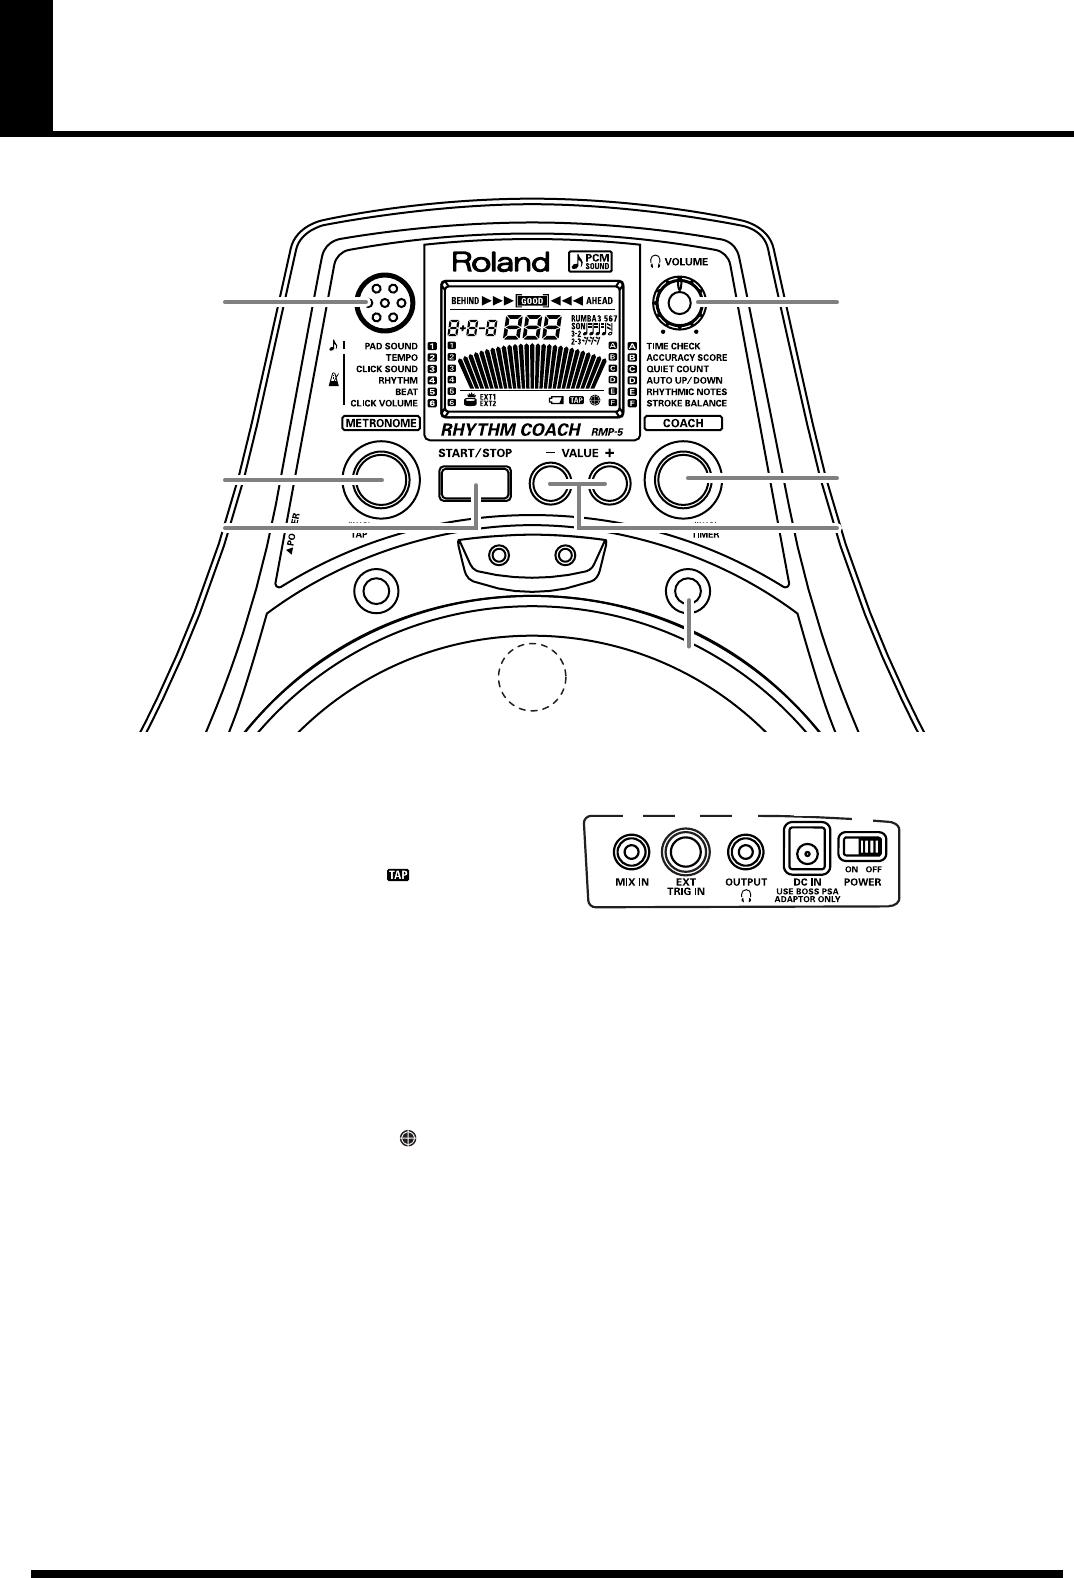
fig.Panel
1.
Mini speaker
Only the metronome sound is played from here (not the sounds
from the pad).
2.
[METRONOME] button
Use this to select pad sounds and for metronome settings.
When the button is held down, the tap icon ( ) blinks in the
display, you can tap the pad to set the metronome tempo (p. 12).
3.
[START/STOP] button
Starts and stops the metronome.
4.
VOLUME knob
Adjusts the sound level from the OUTPUT jack.
* The volume of the mini speaker is adjusted with CLICK VOLUME
(p. 11).
5.
[COACH] button
Selects the Rhythm Coach mode.
When this button is held down, the timer icon ( ) lights in the
display, and the RMP-5 switches to Timer mode (p. 18).
6.
VALUE [+]/[-] button
Use these buttons to change the values of each parameter.
To increase the value rapidly, hold down [+] and press [-]. To
decrease the value rapidly, hold down [-] and press [+].
7.
BEAT indicator
Flashes in quarter note timing.
Red indicator flashes on accent beats.
8.
Head
9.
Sensor
10.
Tuning bolts
Adjusts the head tension.
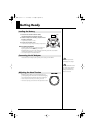
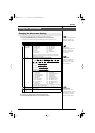
Side Panel
fig.Side
1.
MIX IN jack
For connecting an external audio source (CD, MD, etc.) for
playing along.
Adjust the volume using the controls on the connected device.
* Do not use a plug converter/adapter. Due to its weight, the plug may
fall out of the jack during performance.
926a
* When connection cables with resistors are used, the volume level of
equipment connected to this inputs may be low. If this happens, use
connection cables that do not contain resistors, such as those from the
Roland PCS series.
2.
EXT TRIG IN jack
Connect other pads here.
An optional PCS-31L cable allows you to use cymbal pads and
kick trigger pads. For more detailed information, refer to
“Using
the RMP-5 with Additional Pads”
(p. 19).
3.
OUTPUT jack
For headphones, amp, or audio system.
* The RMP-5 outputs sounds in monaural.
* Do not use a plug converter/adapter. Due to its weight, the plug may
fall out of the jack during performance.
4.
AC Adaptor jack
Connect the AC adaptor (optional) here.
5.
POWER switch
Turns the power on/off.
1
2
4
5
3
7
9
10
8
6
5
4
2
1
3
RMP-5_e.book 6ページ 2005年8月11日 木曜日 午後2時47分