


Quick Start
25
Record and Play Back a Guitar Performance
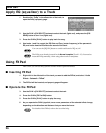
■ Setting the Sampling Rate and the File Bit Depth in the SONAR
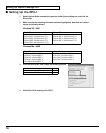
1. Choose “Options - Audio” to open the “Audio Options” dialog box.
2. Click the “General” tab.
3. Under “Default Settings for New Projects,” select a Sampling Rate. For CD-quality sound,
use 44100 Hz.
4. The “File Bit Depth” field and select either 16 or 24.
5. Click OK.
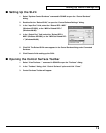
■ Prepare a New Project in the SONAR
6. Select “File - New” from the menu.
7. Select the Normal template and click OK.
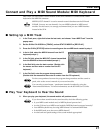
■ Connect your guitar to the SI-24’s GUITAR (Hi-Z) jack.
8. If you have connected an external effects processor between your guitar and the SI-24,
connect it to the conventional INPUT jack rather than the GUITAR (Hi-Z) jack.
■ Record Your Guitar Performance on Track 1 of the SONAR
9. Track 1’s “In” field, choose the “Roland RPC-1 - Right Roland RPC-1 Multichannel 7/8”
(Windows XP / 2000) or the “Roland RPC-1 - Right PCM In 7/8 Roland RPC-1” (Windows Me
/ 98SE).
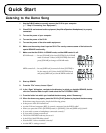
10. Set the SI-24’s CH ASSIGN to [TRACK], and set STATUS MODE to [REC/PLAY].
11. Press the SI-24’s [STATUS 1]. It will change to solid red.
12. Turn the SI-24’s GAIN knob 8 toward the left until the SI-24’s peak indicator does not light
when you play your guitar most loudly.
You can check the input levels in the SONAR.
13. Press the SI-24’s [REC] button to begin recording.
14. Press the SI-24’s [STOP] button to stop recording.
15. Press the SI-24’s [PLAY] button to playback your guitar performance.