


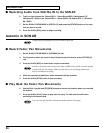


32
Advanced Uses
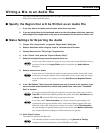
Applying an External Effect
Here’s how you can use an external effect with SONAR. You will use a SONAR Virtual Main bus
as the external effect send, and send audio signals from the tracks for processing by the external
effect.
■ Connect the External Effects Processor to the SI-24
1. Connect the SI-24’s AUX 1 (OUTPUT 3 / 4) to the input of your external effects processor.
2. Connect the output(s) of your external effects processor to the input(s) of the SI-24, and
use the gain knob(s) to adjust the input gain.
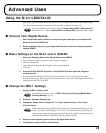
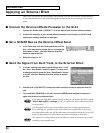
■ Set a SONAR Bus as the External Effect Send
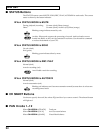
3. In the Track view, click the Out dropdown menu of the
Aux 1. You may need to enlarge the Aux 1 to show the
Out control: In Aux 1, click the “Restore Strip Size”
button to expand the bus.
4. Select the output to “B.”
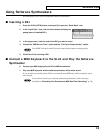
■ Send the Signal from Each Track to the External Effect
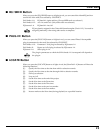
5. In a track view that you want to patch through Aux 1, click
the “Aux 1 Send Enable” button (lit green). You may need
to enlarge a track to show the “Aux 1 Send Enable” button:
In a track, click the “Restore Strip Size” button to expand
the bus.
6. Use the SI-24’s [CH SELECT] to select the track to which you want to apply the effect (lit
red).
7. Turn the SI-24’s [SEND/EQ] on (lit red), and use the SEND knob to adjust the amount of
signal that is sent to the external effect.
If you have not made RPC-1 mixer settings so that you can monitor the SI-24’s inputs
“Step 4: Making RPC-1 Settings” (p. 14), you will not be able to monitor the effect-
on at this point.
Use the output level of your external effects processor to adjust the effect return
level. Although it is possible to adjust the return level using the RPC-1 mixer, the
level adjustment in this case will not affect what is recorded on the tracks, so you will
need to re-adjust the level of the effect sound after recording it on the tracks.
The output of an external effect can be recorded on a track in the same way as when
recording a conventional track.