


Creating a Drum Kit
22
Naming a Drum Kit
You can assign a name of up to 12 characters to each
drum kit.
You can also assign a sub title of up to 14 characters
below the kit to indicate the musical style or the date on
which you created the kit.
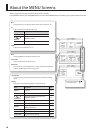
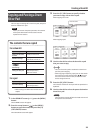
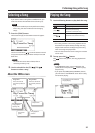
1. In the DRUM KIT screen (p. 11), press the [MENU]
button.
The KIT MENU screen will appear.
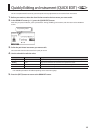
2. Press the [F3] (NAME) button.
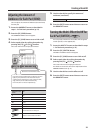
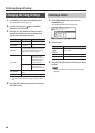
The KIT NAME screen will appear.
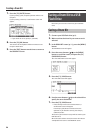
Sub title
Drum kit name
3. Press the [F1] ( ) or [F2] ( ) button to move the
cursor to the character that you want to change.
4. Use the value dial to change the character.
You can delete or insert a character by holding down
the [F3] (DEL/INS) button and pressing the [F1] or [F2]
button.
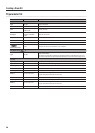
Button Description
[F3]+[F1] (DEL)
Deletes the character at the cursor
position; subsequent characters will
move one place to the left.
[F3]+[F2] (INS)
Inserts a space at the cursor position;
subsequent characters will move one
place to the right.
5. Press the [EXIT] button several times to return to
the DRUM KIT screen.
Changing the MIDI Note
Number of Each Pad
Here’s how to change the MIDI note number that is
transmitted and received by each pad.
MEMO
The settings in this screen will be ignored if the
SYSTEM menu setting “Std MIDI Setup Lock” is “ON”
(p. 37).
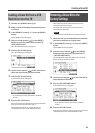
1. In the DRUM KIT screen (p. 11), press the [MENU]
button.
The KIT MENU screen will appear.
2. Press the cursor buttons ( / ) or the [MENU]
button to scroll the screen, and press the [F1]
(MIDI) button.
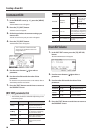
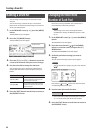
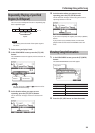
The MIDI NOTE NUMBER screen will appear.
3. Strike the pad whose settings you want to
change.
The edit screen of the pad you struck will appear.
MEMO
You can also select a pad by using the cursor buttons
(
/ ).
Press the [F2] ( ) or [F3] ( ) buttons to select the head/
rim (bow/edge/bell) of each pad.
4. Use the value dial to edit the value.
Value 0–127, OFF
* If the same note number as another pad is selected,
an “*” is shown at the right of the note number.
5. Press the [EXIT] button several times to return to
the DRUM KIT screen.