


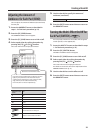

Creating a Drum Kit
25
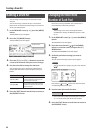
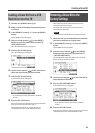
Loading a Drum Kit from a USB
Flash Drive into the TD
1. Connect your USB ash drive (p. 9).
2. Make sure that the loading-destination drum kit
is selected.
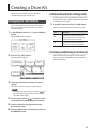
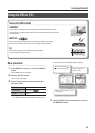
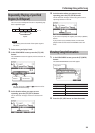
3. In the DRUM KIT screen (p. 11), press the [MENU]
button.
The KIT MENU screen will appear.
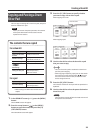
4. Press the cursor buttons ( / ) or the [MENU]
button to scroll the screen, and press the [F3]
(SAVE/LOAD) button.
The 1 KIT SAVE/LOAD screen will appear.
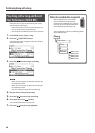
5. Press the [F3] (LOAD) button.
The 1 KIT LOAD screen will appear.
6. Use the cursor buttons ( / ) or the value dial to
select the drum kit that you want to load.
7. Press the [F3] (LOAD) button.
A conrmation screen will appear.
* If you decide to cancel, press the [F1] (CANCEL)
button.
8. Press the [F3] (OK) button.
The drum kit from the USB ash drive will be overwritten
onto the drum kit you selected in step 2.
When loading is nished, the screen will indicate
“Completed” and return to the DRUM KIT screen.
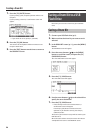
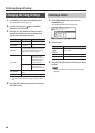
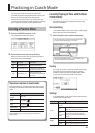
Restoring a Drum Kit to the
Factory Settings
Here’s how the currently selected drum kit can be
restored to its factory-set state.
An accidentally-overwritten drum kit can also be
restored by this operation.
NOTE
The currently selected drum kit will be overwritten.
1. Make sure that you’ve selected the drum kit that
you want to restore to its original state.
2. In the DRUM KIT screen (p. 11), press the [MENU]
button.
The KIT MENU screen will appear.
3. Press the cursor buttons ( / ) or the [MENU]
button to scroll the screen, and press the [F1]
(1 KIT RESTORE) button.
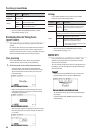
The 1 KIT RESTORE screen will appear, and a list of the
factory-set drum kits will be shown.
4. Use the cursor buttons ( / ) or the value dial to
select the desired drum kit.
5. Press the [F3] (RESTORE) button.
A conrmation screen will appear.
* If you decide to cancel, press the [F1] (CANCEL)
button.
6. Press the [F3] (OK) button.
When the data has been restored, the screen will indicate
“Completed” and return to the DRUM KIT screen.