


13
ENGLISH
17
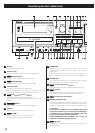
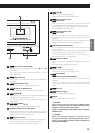
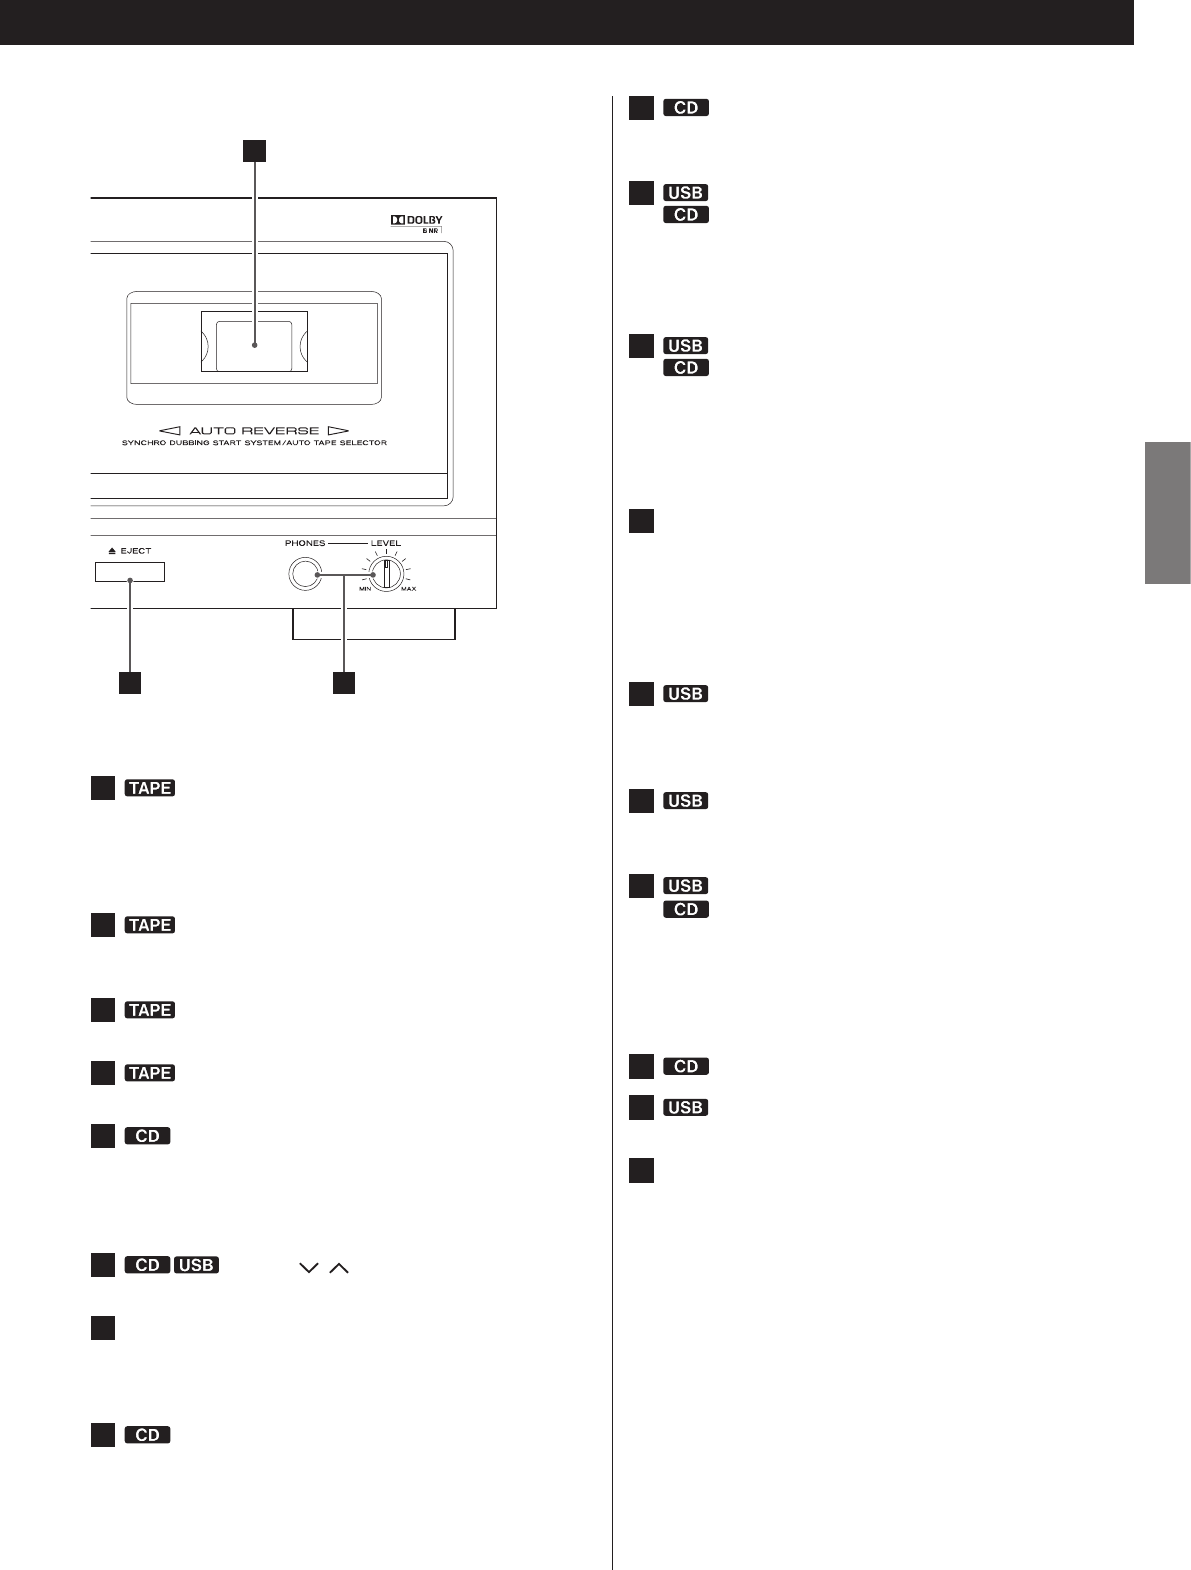
Reverse/Forward play (
g
/
t
)
Press these buttons to start playback of the back (
g
)/front (
t
)
side of a tape.
Press during tape playback/recording standby to restart
playback/recording.
18
DOLBY NR switch
Use this switch to turn Dolby noise reduction on and off (pages10,
29 and 43).
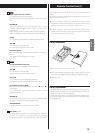
19
PITCH CONTROL knob
Turn this knob to vary the playback speed (page30).
20
REV (Reverse) MODE switch
Use this switch to select the reverse mode (pages28 and 43).
21
RECORD (
K
)
Use to record to a CD. Press once to enter recording standby, and
press again to start recording (pages 31-33).
Press this button during recording to add a track number in the
song (page
34).
22
FOLDER ( / )
Use these buttons to select folders (pages21 and 23).
23
POWER ON START OFF-PLAY-REC (TAPE)
Use this switch to select the timer setting (play, record or off). To
use this when set to play or record, connect a commercially avail-
able audio timer to this unit (pages45-46).
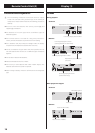
24
Play/Pause (
t
/
J
)
Press this button during playback or recording of a CD to pause.
Press this button again to resume playback or recording.
Use also to start finalizing, unfinalizing and erasure.
25
Stop (
H
)
Press this button to stop CD playback.
Press this button also to stop recording to CD.
26
Skip (
/
)/Search (
,
)
Auto (AUTO)
When in USB mode, press this button to skip to the next track.
Press and hold this button during playback to search forward.
When recording to a CD, press this button to change how num-
bers are added to tracks (pages 31-32).
27
Skip (
.
)/Search (
m
)
Sync (SYNC)
When in USB mode, press this button to skip to the previous
track. Press and hold this button during playback to search
backward.
When recording to a CD, press this button to change the sync
recording mode (one track or all tracks) (pages 34-35).
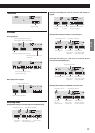
28
POWER ON START CD-TAPE-USB
Use this switch to set the sound source that is active when the
power is turned on.
Use this switch to set the media used for timer playback/record-
ing. (The timer recording can only record to cassette tape.)
To use timer playback/recording, connect a commercially avail-
able audio timer to this unit (pages45-46).
29
Play/Pause (
t
/
J
)
Press this button during USB flash drive playback or recording to
pause.
Press again to resume playback or recording.
30
Stop (
H
)
Press this button to stop USB playback.
Press this button also to stop recording to USB.
31
Erase (ERASE)
Finalize/Erase (FINALIZE/ERASE)
When in USB mode, use to erase files from the USB flash drive
(page 42).
When in CD mode, use to finalize a recorded CD-R/CD-RW,
and to erase recorded songs on or unfinalize a CD-RW (pages
36-38).
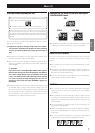
32
Disc tray
33
USB port (A-type)
Connect an external USB flash drive here.
34
POWER
Press this button to turn the unit on or off.
Q CAUTION
Never turn the unit off or disconnect a USB flash drive
when it is being accessed, for example, during writing,
playback, recording or the erasure of files.
Doing so could damage the AD-RW900 and the connected
USB flash drive.
Q CAUTION
Never turn the unit off when it is writing to a CD
(recording, finalizing, unfinalizing, deleting a track).
Doing so could result in the disc being unplayable or
damage the AD-RW900.
14
1516