14
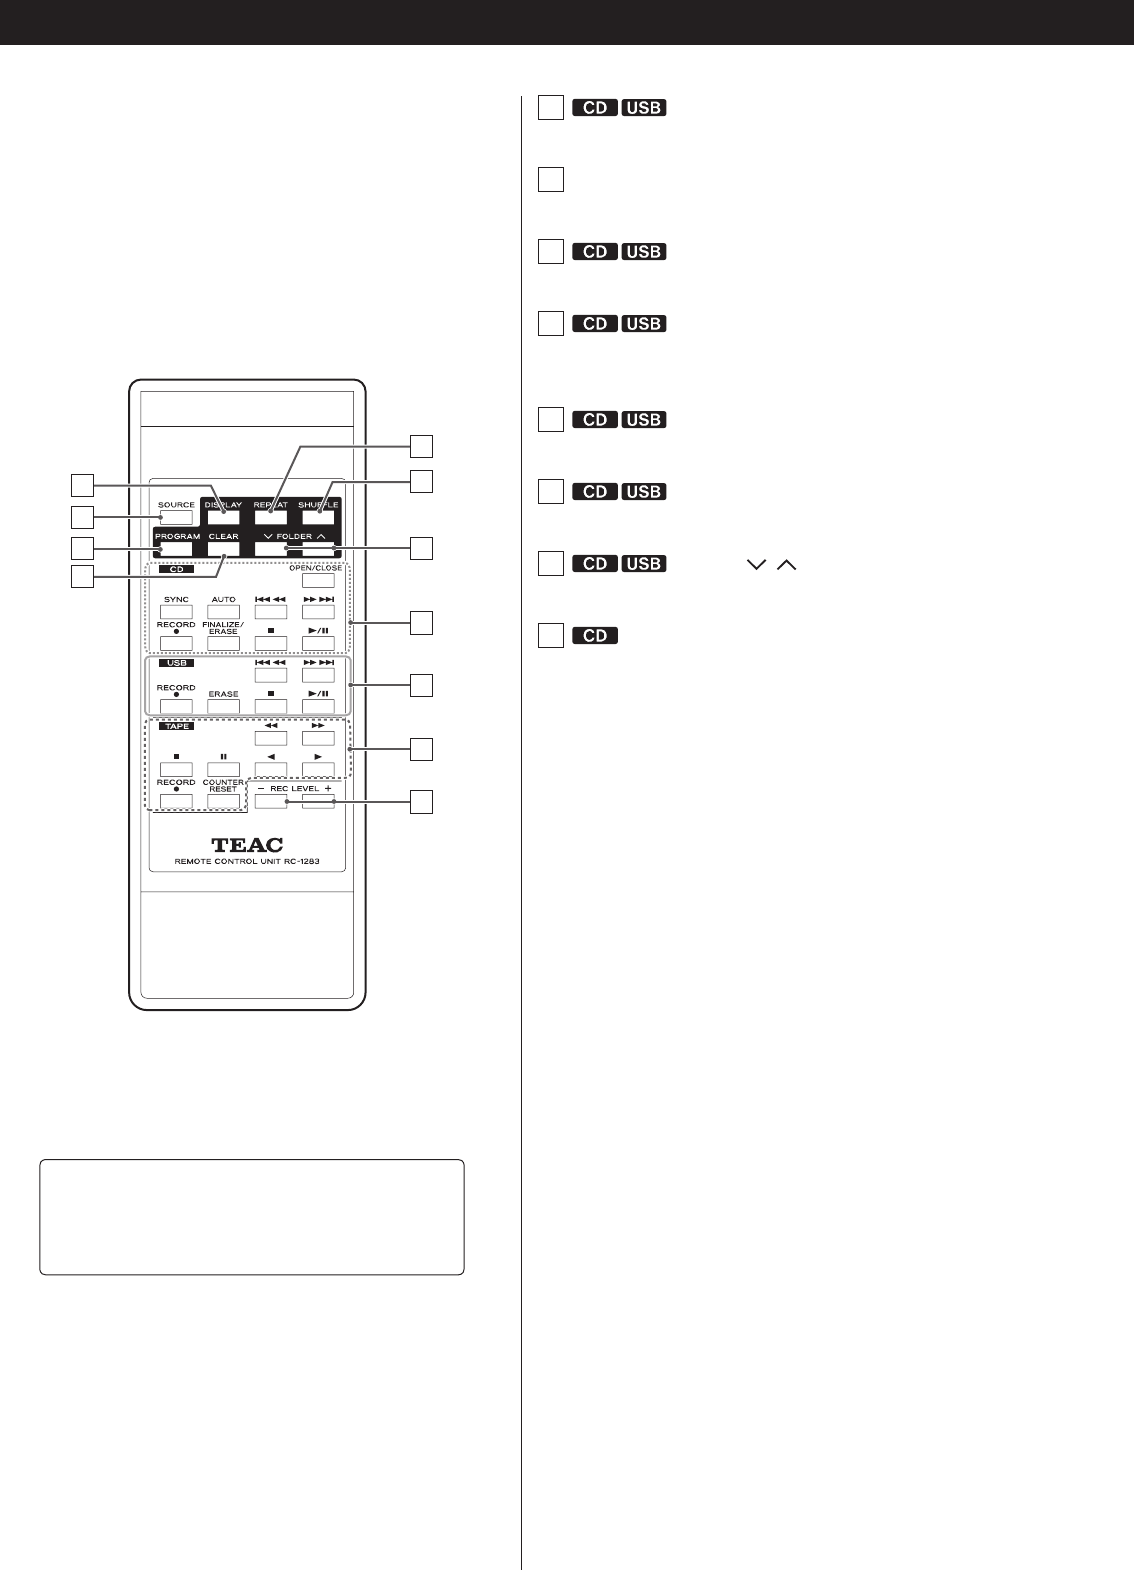
A
DISPLAY
Press this button to change the display information (pages16-18).
B
SOURCE
Use this button to select a source (page
19
).
C
PROGRAM
Use this button to program tracks/files (pages25-27).
D
CLEAR
Use this button to clear programmed tracks/files (page27).
E
REPEAT
Use this button to set the repeat function (page24).
F
SHUFFLE
Use this button to start shuffle playback (page24).
G
FOLDER ( / )
Use these buttons to select MP3 folders (pages21 and 23).
H
OPEN/CLOSE (L)
Press this button to open and close the disc tray.
SYNC
When recording to a CD, press to change the sync recording
mode (one track or all tracks) (pages 34-35).
AUTO
When recording to a CD, press to change how numbers are
added to tracks (pages 31-32).
Skip (.//)/Search (m/,)
Press these buttons to skip through tracks/files.
Hold down these buttons during playback to search for part of a
track/file.
RECORD (K)
Use to record to a CD. Press once to enter recording standby, and
press again to start recording (pages 31-33).
Press this button during recording to add a track number in the
song (page 34).
FINALIZE/ERASE
When in CD mode, use to finalize a recorded CD-R/CD-RW, and to
erase recorded songs on or unfinalize a CD-RW (pages 36-38).
Stop (
H
)
Press this button to stop CD playback.
Press this button also to stop recording to CD.
Play/Pause (
t
/
J
)
Press this button during playback or recording of a CD to pause.
Press this button again to resume playback or recording.
Use also to start finalizing, unfinalizing and erasure.
Identifying the Parts (Remote Control Unit)
B
A
F
G
K
E
H
I
J
C
D
To simplify explanations, instructions in this manual
might refer only to the main unit or the remote control.
In such cases, the same controls on the remote control
and main unit will operate similarly.


