


148
CVP-109/107/105/700
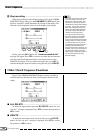
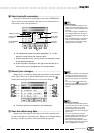
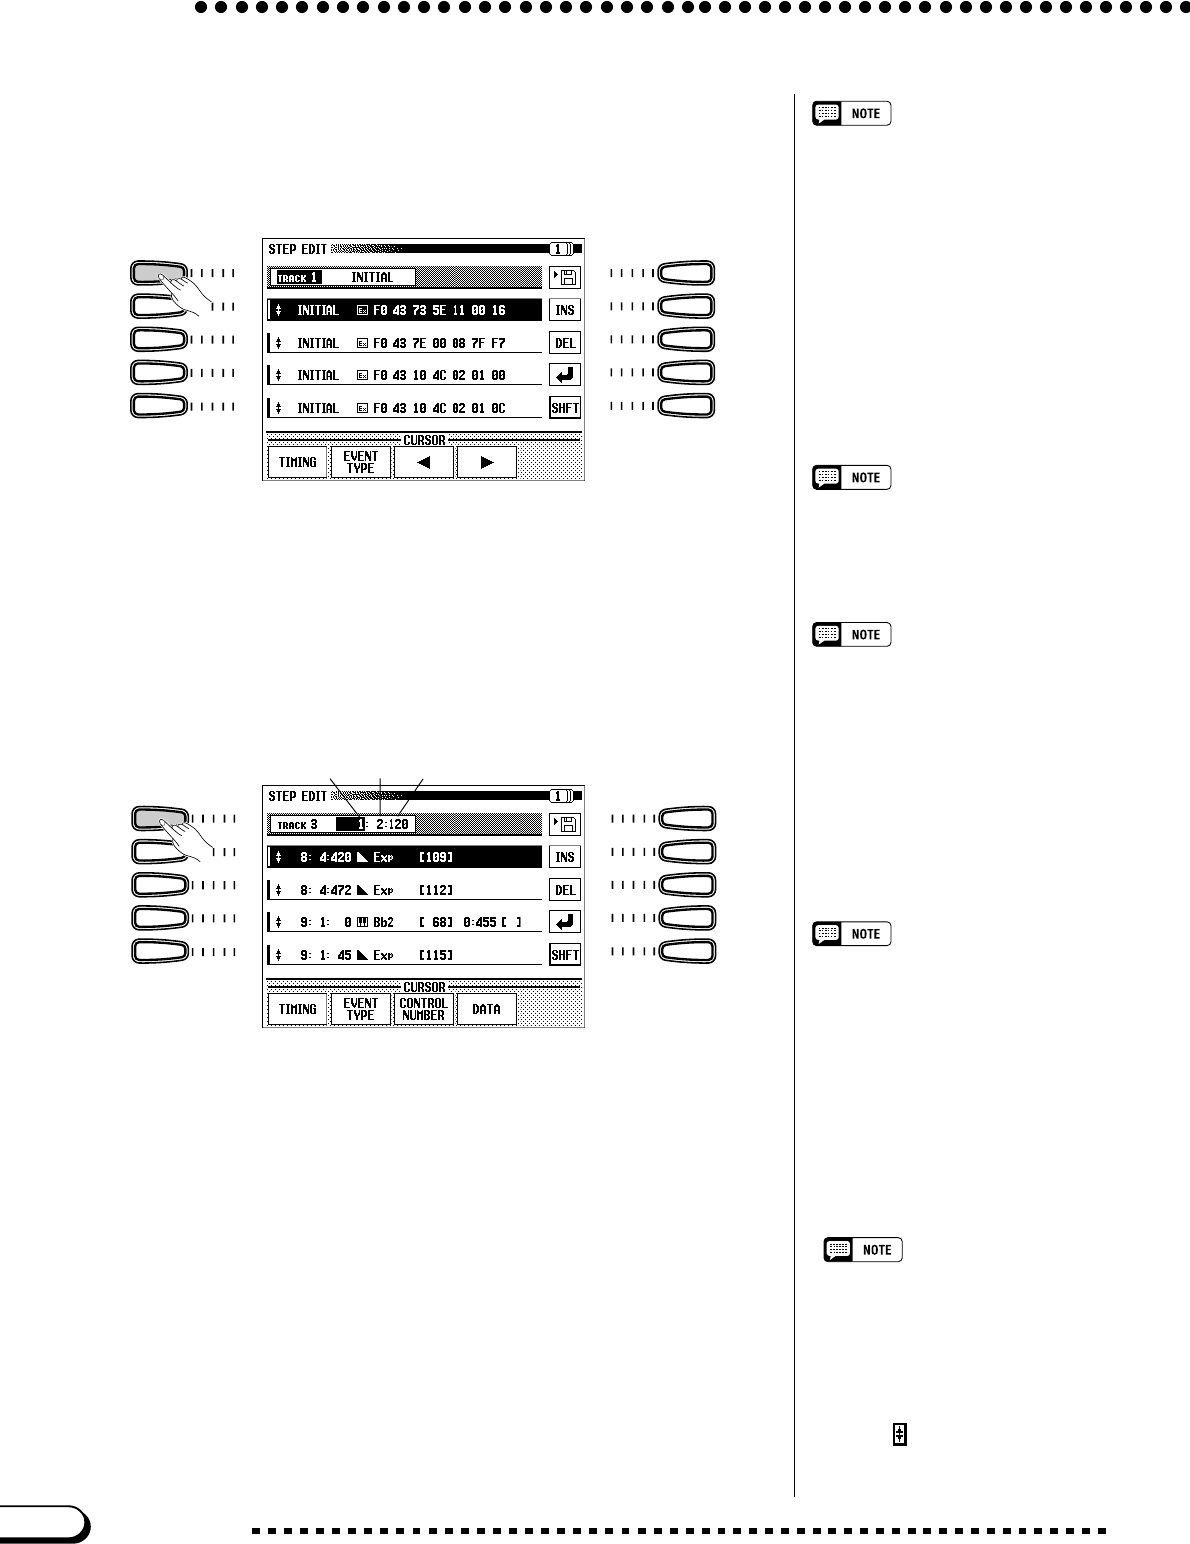
➔ The track selector is highlighted, and the event data for the se-
lected track is displayed.
N Select an event to edit. ...............................................................................
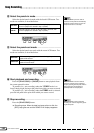
V Select a track to edit. .................................................................................
Track selector
Settings: SYSTEM, TRACK 1 — 16
Press the uppermost left LCD button once to highlight the track
selector, then use the data dial or the [–] and [+] buttons to select the
track you want to edit.
• System Exclusive events (see page
146) are loaded into Track 1.
• Meta events (see page 146) are
loaded into the SYSTEM track.
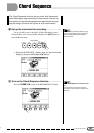
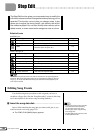
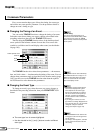
B Select a location................................................................................................
Measure selector
• The measure selector can be set to
INITIAL (in which case the beat and
clock values are not displayed), or to
any value between 1 and 9999.
• The INITIAL setting is used to set
events (such as the voice selection or
volume events) that occur before the
song begins. (Actual song playback
begins with the first beat of measure 1.)
Press uppermost left LCD button again to highlight the right side of
the location indicator, then use the data dial or the [–] and [+] buttons to
select the measure you want to edit.
➔ The selected measure is highlighted, and the beat and clock val-
ues are displayed.
Beat and clock
• The beat value can be set to any value
between 1 and n, where n is the
number of beats in the selected meas-
ure.
• Each quarter note is divided into 480
smaller units (numbered 0 to 479), which
can be used to set the timing of events
that don’t occur precisely on the beat. If
each beat is a quarter note, for example,
the location clock values of two eighth
notes might be set to 0 and 240,
whereas those of four sixteenth notes
would be set to 0, 120, 240, and 360.
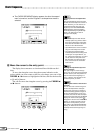
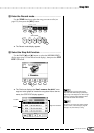
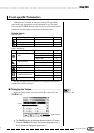
➾ Repeat this step to set the beat and clock values. The track selec-
tor, measure selector, beat, and clock values are highlighted in
turn with each press of the uppermost left LCD button.
➔ The first four events that occur at or after the specified location are
displayed. The first of these events is highlighted.
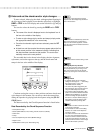
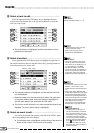
Scrolling the Event List
• To display other events before or
after the selected timing, hold down
one of those four buttons, then use
the data dial or the [–] and [+] buttons
to scroll the event list up or down.
• You can also press the TIMING LCD
button to select the double-pointed
arrow ( ) symbol in the leftmost
column of event data, then use the
data dial or the [–] and [+] buttons to
scroll the event list.
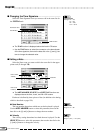
Use one of the bottom four buttons to the left of the LCD to select
the corresponding event in the display.
➔ The selected event is highlighted, and the timing of that event is
shown as the location in the first line of the display.
Measure Beat Clock
Step Edit
146