


28
Music Disk Recorde
r
6
6 Music Disk Recorder (M.D.R.)
The Music Disk Recorder (M.D.R.) lets you store the registration data and load back to the Electone as well as
record your performance and play back the data. Moreover, the M.D.R. allows you to execute song copy
operation and play back commercially available XG song data.
1 Precautions on M.D.R.
Follow the important precautions below.
Compatible Disk Type
3.5" 2DD and 2HD type floppy disks can be used.
A blank 2HD floppy disk has been included with
your Electone for you to record your performances.
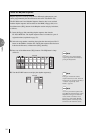
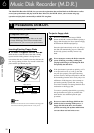
Inserting/Ejecting Floppy Disks
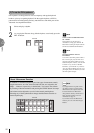
■ To insert a floppy disk into the disk drive:
Hold the disk so that the label of the disk is facing
upward and the sliding shutter is facing forward,
towards the disk slot. Carefully insert the disk into the
slot, slowly pushing it all the way in until it clicks into
place and the eject button pops out.
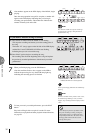
Floppy disk slot
LED (Lamp in-use) Eject button
NOTE:
When the EL-200 is turned on, the LED below the floppy disk
slot will be lit indicating that the M.D.R. is ready to use.
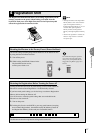
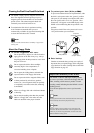
To eject a floppy disk:
Be sure to confirm that the lamp of STOP
button on M.D.R. is turned off before ejecting a
floppy disk from the slot. Never eject the floppy
disk before the STOP lamp lights up.
Press the eject button slowly as far as it will go;
the disk will automatically pop out. When the
disk is fully ejected, carefully remove it by
hand.
Never attempt to remove the disk or turn the
power off during recording, reading and
playing back. Doing so can damage the disk
and possibly the disk drive.
If the eject button is pressed too quickly, or if it
is not pressed in as far as it will go, the disk
may not eject properly. The eject button may
become stuck in a half-pressed position with the
disk extending from the drive slot by only a few
millimeters. If this happens, do not attempt to
pull out the partially ejected disk, since using
force in this situation can damage the disk drive
mechanism or the floppy disk.
To remove a partially ejected disk, try pressing
the eject button once again, or push the disk
back into the slot and then repeat the eject
procedure.
Be sure to remove the floppy disk from the
disk drive before turning off the power. A
floppy disk left in the drive for extended
periods can easily pick up dust and dirt that
can cause data read and write errors.