


44
Music Disk Recorde
r
6
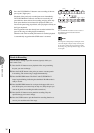
MUSIC DISK RECORDER
PAUSE STOP PLAY SONG SELECT RECORD CUSTOM PLAY
FORMATTEMPO
CONTROLPEDALLOWERUPPERCONTROLPEDALLOWERUPPER
RECORD PLAY
SHIFT
SONG DEL.TOFROMSONG
REPEAT
SONG COPY
MUSIC DISK RECORDER
PAUSE STOP PLAY SONG SELECT RECORD CUSTOM PLAY
FORMATTEMPO
CONTROLPEDALLOWERUPPERCONTROLPEDALLOWERUPPER
RECORD PLAY
SHIFT
SONG DEL.TOFROMSONG
REPEAT
SONG COPY
MUSIC DISK RECORDER
PAUSE STOP PLAY SONG SELECT RECORD CUSTOM PLAY
FORMATTEMPO
CONTROLPEDALLOWERUPPERCONTROLPEDALLOWERUPPER
RECORD PLAY
SHIFT
SONG DEL.TOFROMSONG
REPEAT
SONG COPY
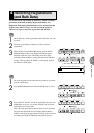
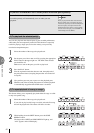
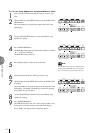
To use the Song Copy function between two different disks:
1
Insert the source disk that contains the song you want to copy
from.
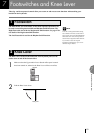
2
While holding down the SHIFT button, press the SONG COPY
FROM button.
The song number to be copied from appears at the left of the
LED display.
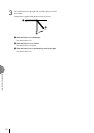
3
Use the SONG SELECT buttons to select a destination song
number for copying.
4
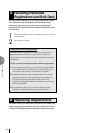
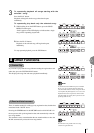
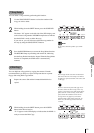
Press the RECORD button.
The RECORD lamp lights up and the LED continues to indicate
“00.--” as shown at the right.
The RECORD lamp remains lit.
NOTE:
The RECORD lamp remains lit. Although ejecting
the disk while the RECORD lamp is lit is prohib-
ited, you are allowed to eject the disk in this case.
5
Press the Eject button to take out the source disk.
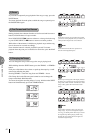
6
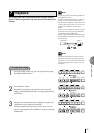
Insert the destination disk to which you want to copy.
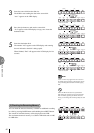
7
While holding down the SHIFT button, press the SONG COPY
TO button.
The song number to be copied to appears at the right side of the
LED display. The M.D.R. automatically searches for an empty
song number to copy the data to.
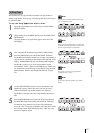
8
Use the SONG SELECT buttons to select a destination song
number for copying.
9
Press the RECORD button.
The LED display shows the “size” of the song in numbers, and
counts down as the data is being copied. When the display
shows “0000,” the song has been completely copied.