


46
Music Disk Recorde
r
6
PAUSE
RECORD PLAY
SHIFT
(
LEAD
)
REM.MEM.
(
K.PERC.
) (
LEAD
) (
K.PERC.
)
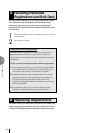
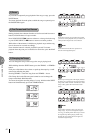
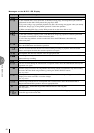
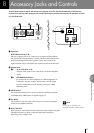
9) Checking the Remaining Memory
You can check the amount of memory available for additional recording
in a disk by pressing PAUSE button while holding down SHIFT button.
The amount of available memory will be displayed on the LED.
The maximum amount of memory is ca.700 for 2DD disks and ca.1400
for 2HD disks.
MUSIC DISK RECORDER
PAUSE STOP PLAY SONG SELECT RECORD CUSTOM PLAY
FORMATTEMPO
CONTROLPEDALLOWERUPPERCONTROLPEDALLOWERUPPER
RECORD PLAY
SHIFT
SONG DEL.TOFROMSONG
REPEAT
SONG COPY
MUSIC DISK RECORDER
PAUSE STOP PLAY SONG SELECT RECORD CUSTOM PLAY
FORMATTEMPO
CONTROLPEDALLOWERUPPERCONTROLPEDALLOWERUPPER
RECORD PLAY
SHIFT
SONG DEL.TOFROMSONG
REPEAT
SONG COPY
MUSIC DISK RECORDER
PAUSE STOP PLAY SONG SELECT RECORD CUSTOM PLAY
FORMATTEMPO
CONTROLPEDALLOWERUPPERCONTROLPEDALLOWERUPPER
RECORD PLAY
SHIFT
SONG DEL.TOFROMSONG
REPEAT
SONG COPY
MUSIC DISK RECORDER
PAUSE STOP PLAY SONG SELECT RECORD CUSTOM PLAY
FORMATTEMPO
CONTROLPEDALLOWERUPPERCONTROLPEDALLOWERUPPER
RECORD PLAY
SHIFT
SONG DEL.TOFROMSONG
REPEAT
SONG COPY
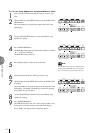
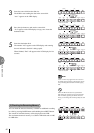
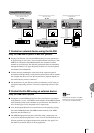
3
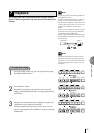
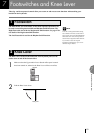
Insert the source disk into the disk slot.
The M.D.R. starts reading the data in the source disk.
“out 1” appears on the LED display.
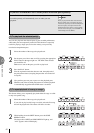
4
Press the eject button to take out the source disk.
“In 2” appears on the LED display to urge you to insert the
destination disk.
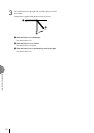
5
Insert the destination disk.
The number “160” appears on the LED display and counting
down is initiated as the disk is being copied.
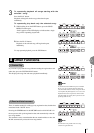
When finished, “End” will appear on the LCD display for few
seconds.
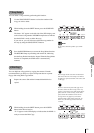
NOTE:
“Fort” or “bAd” may appear if an error occurs in
the middle of the operation. If this happens, please
retry formatting the destination disk and copying
disk.
Follow the M.D.R. direction to eject/insert the
disks during the operation. Do not eject/insert the
disks frivolously ignoring the M.D.R. direction.
Doing so can damage the disk and possibly the disk
drive.