


Basic operation of the QL series
Owner’s Manual
22
Basic operation of
the QL series
This section explains the basic operations of the QL
series.
QL series operations are divided into two main
categories. In general, you will operate the QL series for
mixing using a combination of these operations.
• Controlling selected channels
(Selected Channel section)
• Using the faders on the top panel
(Channel Strip section)
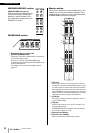
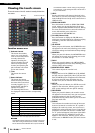
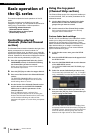
Controlling selected
channels (Selected Channel
section)
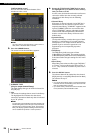
The Selected Channel section located at the right of the
display corresponds to a channel module of a
conventional analog mixer, and allows you to manually
adjust all the major parameters of the currently selected
channel. Operations in this section will affect the channel
that was most recently selected by its [SEL] key.
1. Press the appropriate Bank Select key (in the
FADER BANK section) of the bank containing
the channel that you want to control.
Select one of the preset or custom fader banks in
the Channel Strip section.
2. Press the [SEL] key to select the target channel.
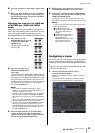
3. Press one of the knobs in the Selected Channel
section.
The SELECTED CHANNEL VIEW screen for the
selected channel will appear. You can view the
actual setting values on screen.
4. Use the knobs of the Selected Channel section
and the buttons in the SELECTED CHANNEL
VIEW screen to edit the parameters of the
selected channel.
Even if a different screen is selected, the
currently-selected channel can be set using the
knobs of the Selected Channel section. In this case,
a mini window indicating the value of that
parameter will appear on screen when you operate
a knob.
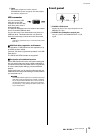
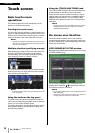
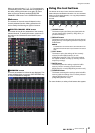
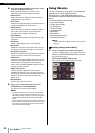
Using the top panel
(Channel Strip section)
The Channel Strip section of the top panel enables you
to control the level, CUE, and other parameters for the
selected channels.
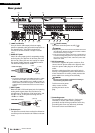
1. Use the Bank Select keys located in the Fader
Bank section to select the channels or DCA
groups that you want to control.
2. Use the controls of the Channel Strip section.
Each channel’s display indicates the currently
assigned channel information.
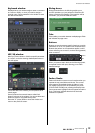
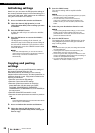
Custom fader bank settings
The B1, B2, B3, and B4 keys in the Fader Bank section
enable you to assign and recall a bank with your own
assortment of the channels or DCA groups. These
banks are called
“custom fader banks.” Since the custom
fader banks enable you to assign a combination of
different types of channels, you can control different
types of channels as a group.
1. In the function access area, press the SETUP
button.
2. Press the USER SETUP button in the upper left of
the SETUP screen.
3. Press the CUSTOM FADER tab near the bottom
of the USER SETUP screen.
The CUSTOM FADER BANK/MASTER FADER page
will appear.
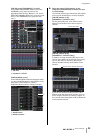
4. Select the custom fader bank you want to set.
The channel strip is divided into 1
–16, 17–24 (QL5
only), and Master, from the left side of the console.
5. Press the Fader select button you want to set,
then press the [SEL] key for the channel that you
want to assign to that fader.
You can also select a channel in the display. Press
the button below the desired number to display the
CH SELECT screen. Use the list in the left column to
select the desired channel group, then use the
buttons in the right column to select channels.