


Continued from front
MacOS X
Cubase LE installation
Windows
Connections and preparation Use Cubase LE to record
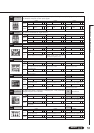
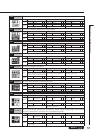
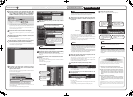
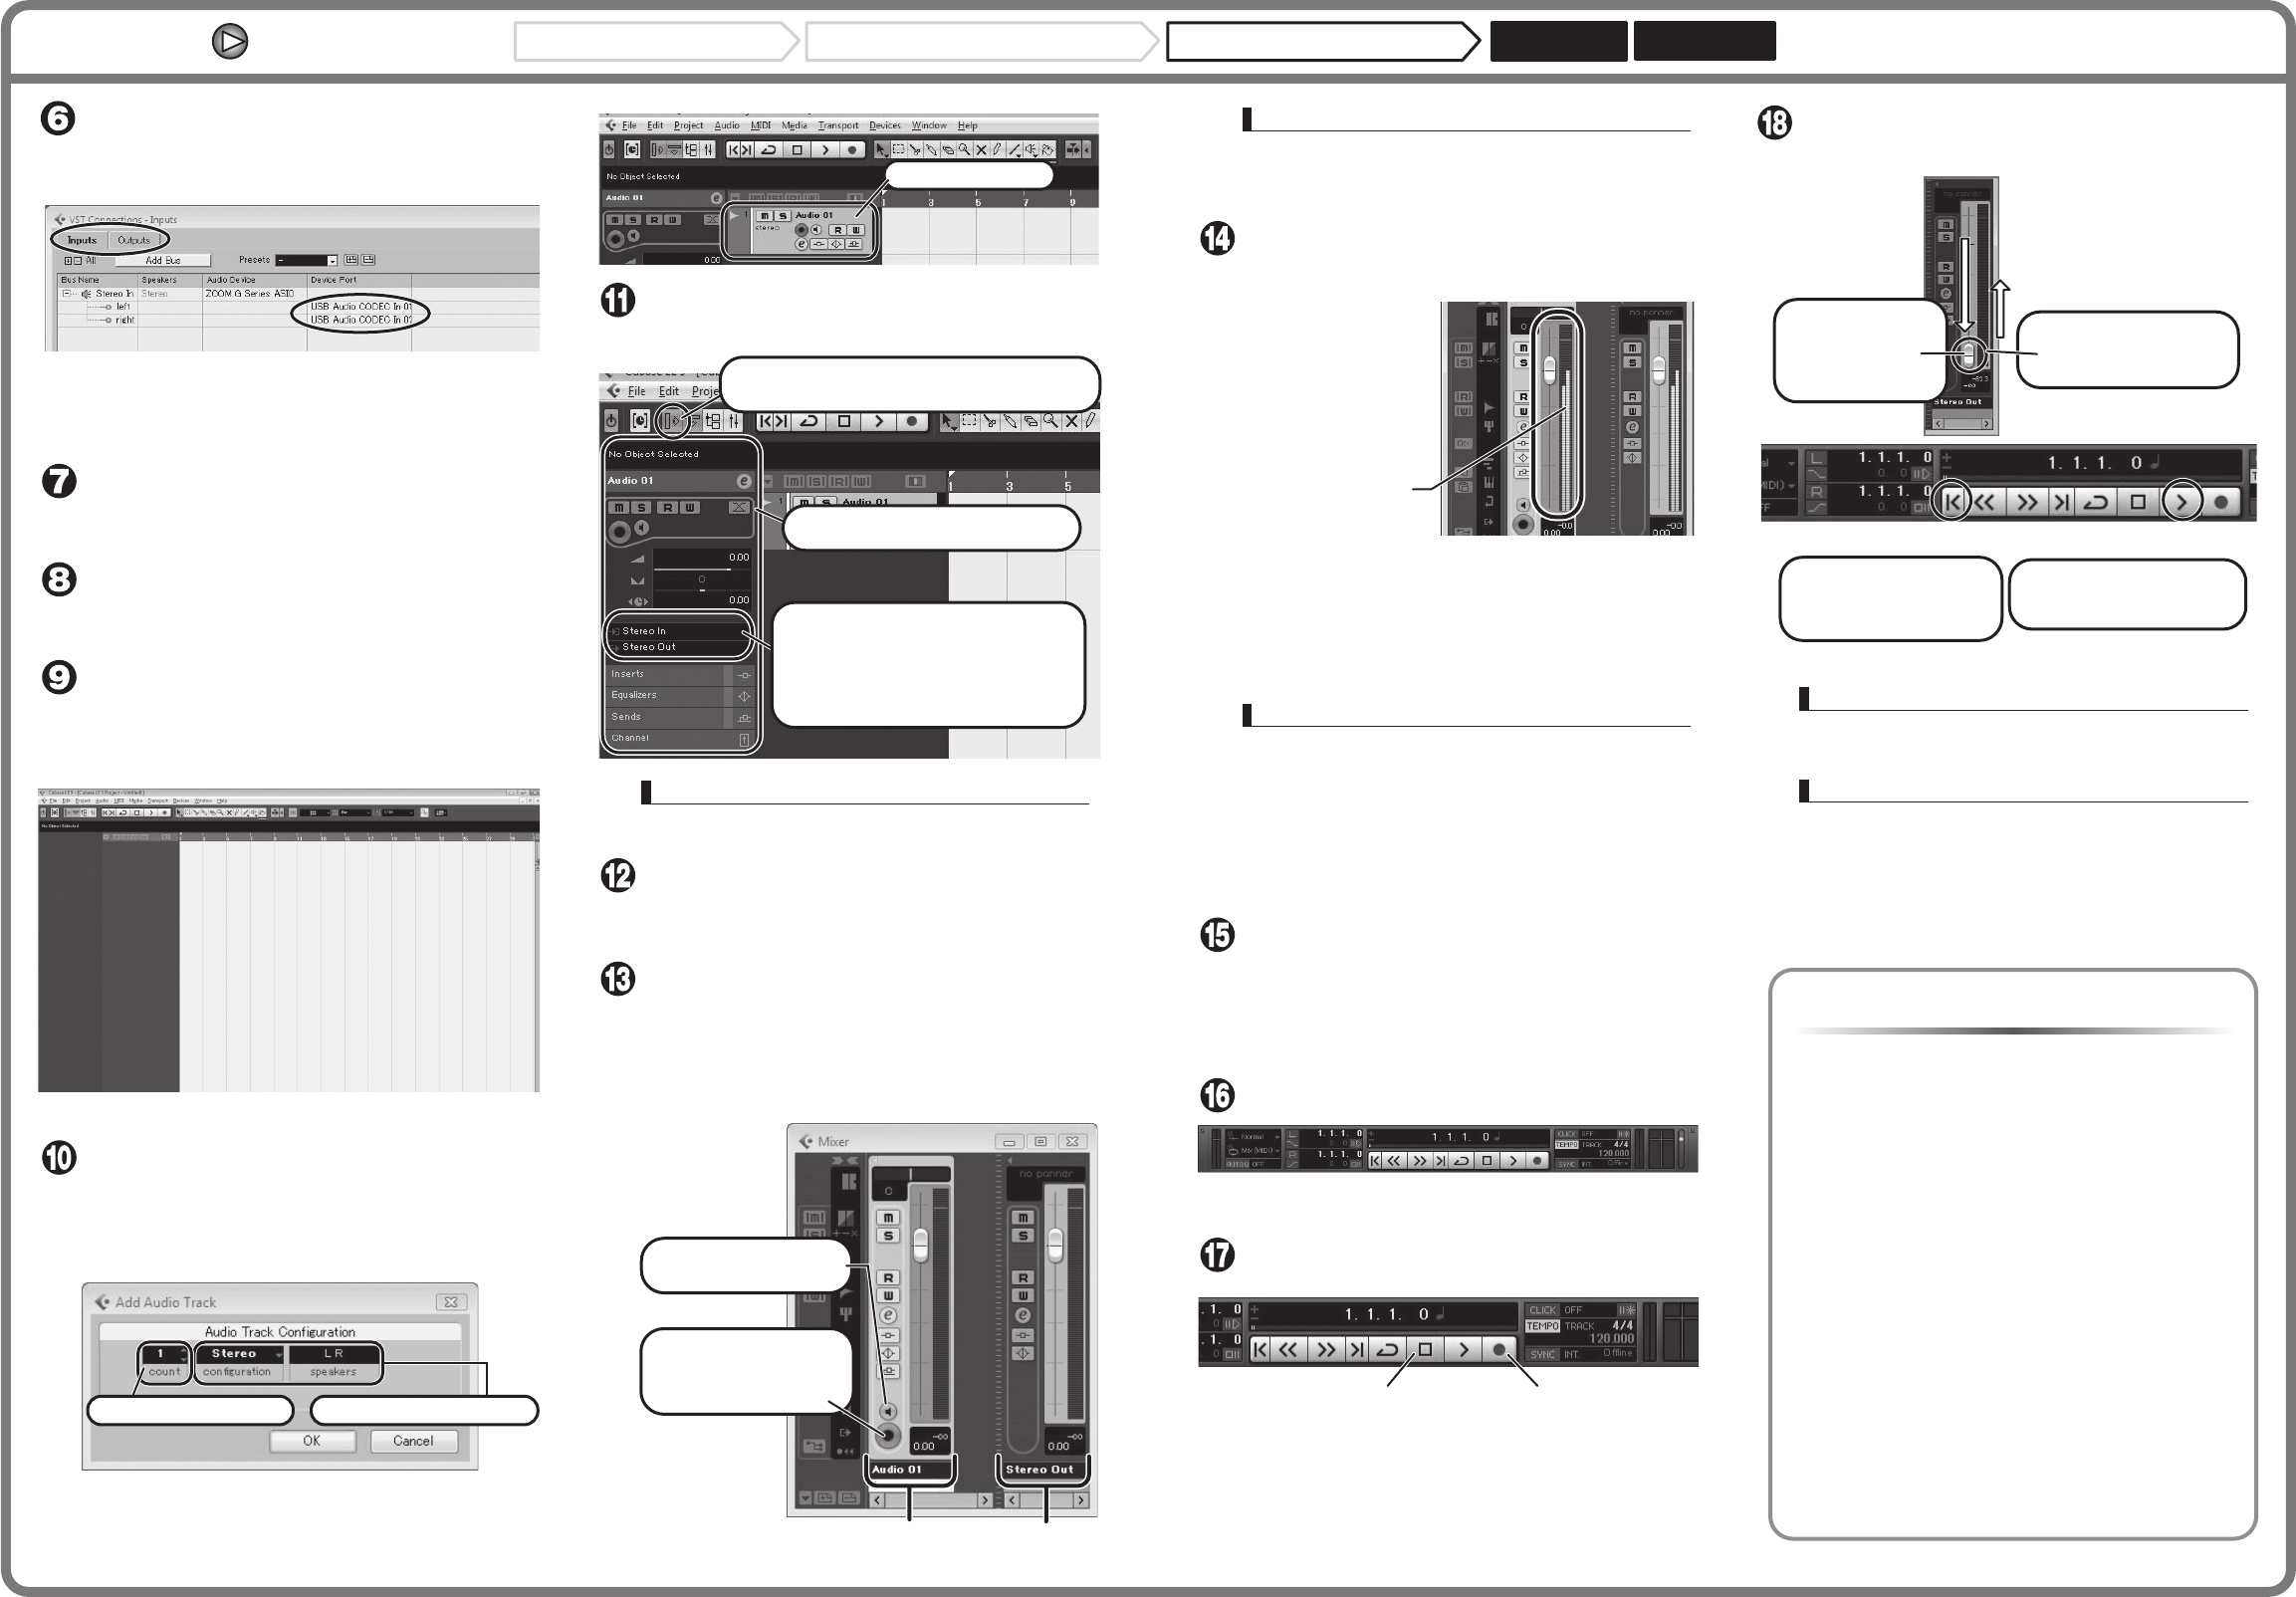
Project window
If the Inspector is not shown, click here to
toggle the Inspector show/hide setting.
Select the input/output path for the
track. (The path name assigned to the
this unit in step 6 is shown here.) To
select a different path, click this
section and select a new path from the
menu that appears.
Inspector (area for making detailed
track settings)
Channel assigned to audio track
Master channel
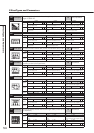
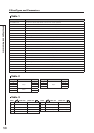
Mixer window
Click monitoring button so
that it lights up in orange.
Click recording standby
button so that it lights up in
red, to activate recording
standby condition.
Level meter
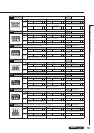
Stop button
Record button
Go to beginning of project
Play button
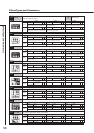
Move the fader of
the master channel
(as displayed in
step 13) fully
down.
1.
Use the button in the
transport panel to move
to the beginning of the
project.
2.
Raise the fader of the
master channel to obtain
a suitable volume.
4.
Click the Play button in the
transport panel to start
playback.
3.
New audio track
Select number of tracks Select stereo/mono setting
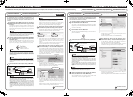
From the "Devices" menu of Cubase LE, select "VST
Connections" and select the device containing the
string "USB Audio CODEC In (Out)" ( "USB Audio
CODEC" for MacOS X) as input port and output port.
Use the tabs at top (top center for Mac OS X) left to switch between
input and output, and verify that "USB Audio CODEC In (Out)" is
selected as device port. If another device is selected, click the device
port field and change the selection.
Access the "File" menu and select "New Project".
The new project window appears. Here you can select a project
template.
Make sure that the "Empty" template is selected, and
click the OK button.
A window for selecting the project file save location appears.
After specifying a suitable project file save location,
click the OK button (Choose button in MacOS X).
A new project is created, and the project window for controlling most
of the Cubase LE operations appears.
To create a new audio track, access the "Project"
menu and select "Add track". In the submenu that
appears, select "Audio".
he Add Track window for specifying the number of audio tracks and
the stereo/mono setting appears.
In this example, set the number of tracks to "1" and select stereo, the
nclick the OK button.
A new stereo audio track is added to the project window.
Make the following settings for the newly created
audio track.
Connect the guitar or other instrument to the [INPUT]
jack of this unit and select the desired patch.
The sound selected here will be recorded on the computer via the
[USB] port.
Access the "Devices" menu of Cubase LE and select
"Mixer".
The mixer window appears.
This window shows the channel assigned to the created track, and the
master channel.
Perform the following steps here.
HINT
The Inspector shows information about the currently selected track. If
nothing is shown, click on the track to select it.
While playing your instrument, adjust the output level
of this unit to achieve a suitable recording level for
Cubase LE.
The recording level for Cubase LE can be checked with the level meter
for the channel that is assigned to the recording standby track.
Set the level as high as possible without causing the meter to reach
theend of the scale.
To adjust the level, do not use the fader of Cubase LE. Instead change
the recording level and gain settings at this unit.
When the recording level has been adjusted, click the
monitoring button to disable it.
The input level is no longer shown on the meter, and the signal
returned to this unit via the computer is muted.
In this condition, only the signal before sending to the computer can be
monitored via the [OUTPUT] jack of this unit.
Verify that the transport panel is being shown.
If the transport panel is not shown, access the "Transport" menu and
select "Transport Panel".
To start recording, click the Record button in the
transport panel.
Recording starts.
As you play your instrument, the waveform appears in real time in the
project window.
To stop recording, click the Stop button in the transport panel.
HINT
When the monitoring button is enabled, the level meter next to the fader
shows the input level to the audio track. When the monitoring button is
disabled, the meter fader shows the audio track output level.
NOTE
• While the monitoring button is enabled, the direct signal input to this
unit and the signal routed to the computer and then returned to this unit
will be output simultaneously from this unit, causing a flanger-like effect
in the sound. To accurately monitor the sound also while adjusting the
recording level, temporarily set the output device port for the VST
connection (step 6) to "Not Connected".
• The level meter as in the above illustration shows the signal level after
processing in the Cubase LE. When you pluck a guitar string the meter
may register with a slight delay, but this is not a defect.
Check the recorded content.
To play the recording, perform the following steps.
HINT
If no sound is heard when you click the Play button after recording,
check the VST connection settings (step 6) once more.
NOTE
To continue using Cubase LE, a process called activation (license
authentication and product registration) is necessary. When you start
Cubase LE, a screen offering to register the product will appear. Select
"Register Now". A web site for registration will open in your Internet
browser. Follow the instructions on that page to register and activate
the product.
For optimum enjoyment
While using Cubase LE, other applications may slow down drastically
or a message such as "Cannot synchronize with USB audio interface"
may appear. If this happens frequently, consider taking the following
steps to optimize the operation conditions for Cubase LE.
(1) Shut down other applications besides Cubase LE.
In particular, check for resident software and other utilities.
(2) Reduce plug-ins (effects, instruments) used by Cubase LE.
When there is a high number of plug-ins, the computer's
processing power may not be able to keep up. Reducing the
number of tracks for simultaneous playback can also be
helpful.
(3) Power the unit from an AC adapter.
When a device designed to use USB power is powered via
the USB port, the current supply may sometimes fluctuate,
leading to problems. See if using an AC adapter improves
operation.
If applications still run very slowly or the computer itself does not
function properly, disconnect this unit from the computer and shut
down Cubase LE. Then reconnect the USB cable and start Cubase LE
again.