© Copyright 2013 TRENDnet. All Rights Reserved.
TRENDnet User’s Guide
TEW-811DRU
38
Set your router date and time
Administrator > Time
1. Log into your router management page (see “Access your router management page
”
on page 31).
2. Click on Administrator, and click on Time.
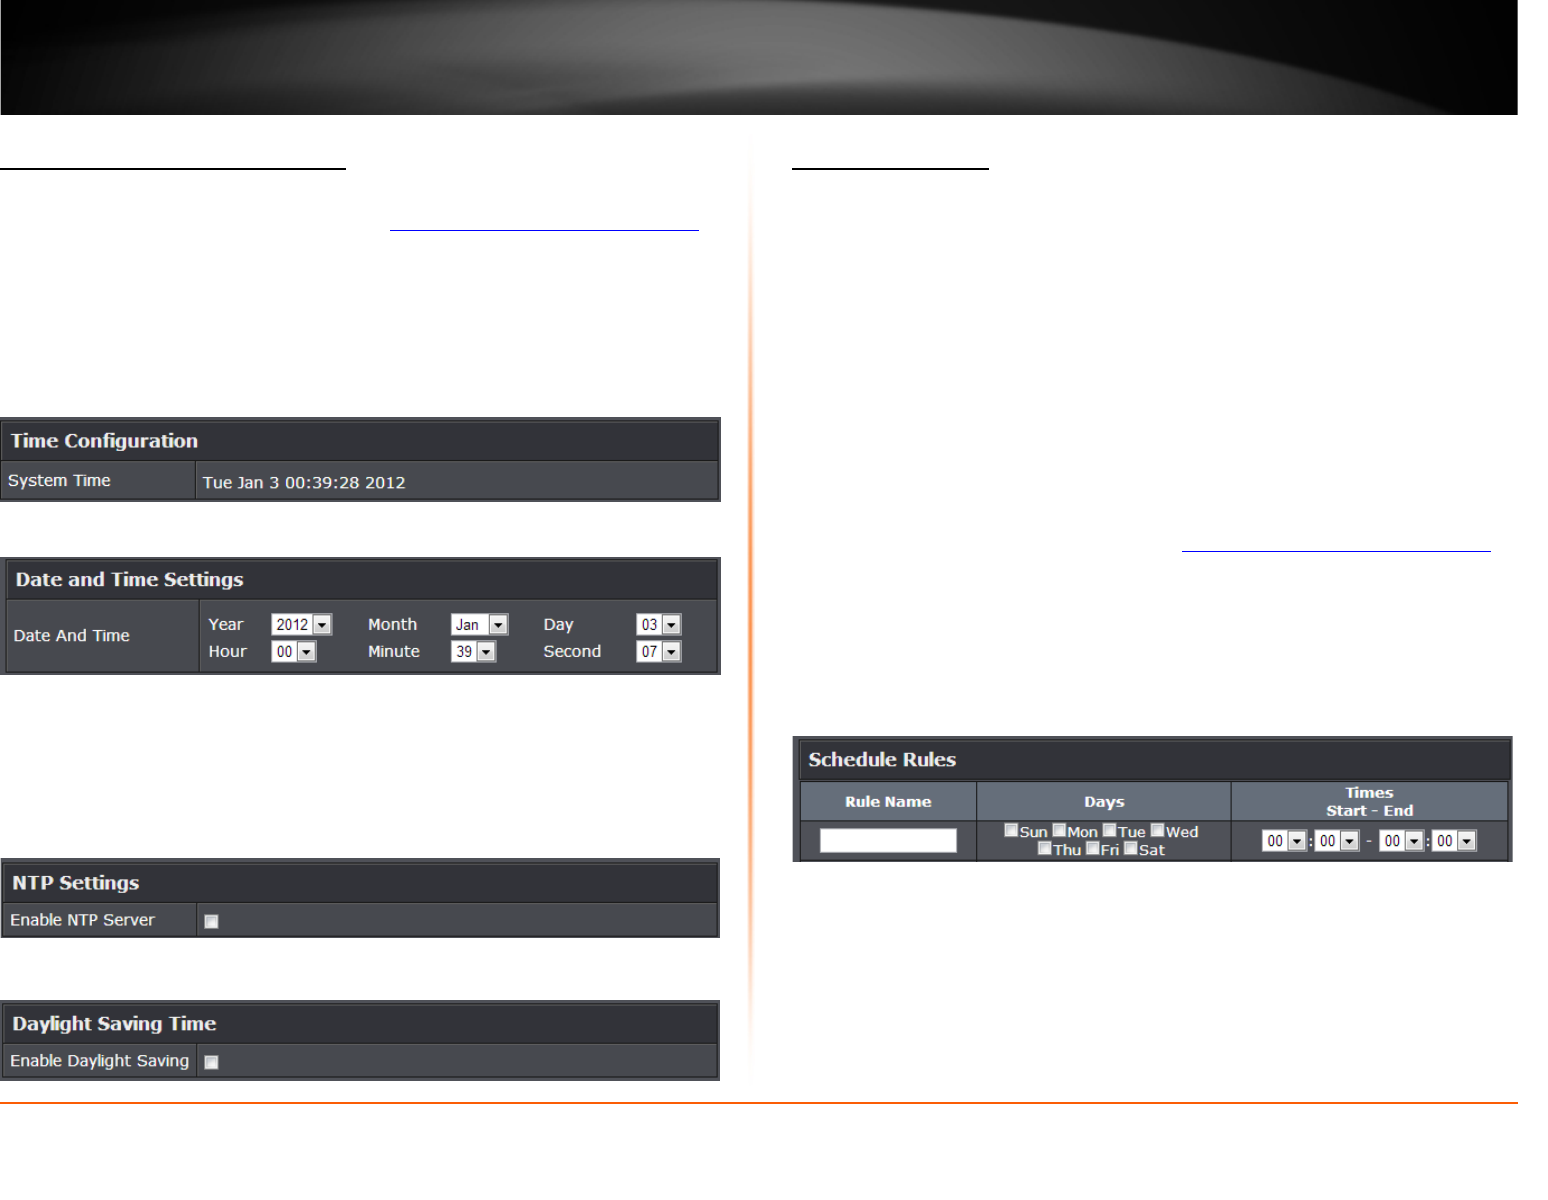
3. Review the Time settings. Click Apply to save settings.
• Time Configuration: Displays the current device time and date information.
• Manually set time – Set your router date and time manually in the Date and Time
Settings section. Note: Time is specified in 24-hour format.
• Automatically synchronize time using NTP – Check the Enable NTP Server option
to set your router date and time to synchronize with an NTP (Network Time
Protocol) server address (e.g. pool.ntp.org). Enter the NTP server address next to
Default NTP server, (e.g. pool.ntp.org). Click the Time Zone drop-down list to
select the appropriate zone and you can optionally change your NTP Sync period.
Note: NTP servers are used for computers and other network devices to
synchronize time across an entire network.
• Enable Daylight Saving: Check the option to configure the DST settings. Set the
annual range when daylight saving is activated. To save changes, click Apply.
Create schedules
Advanced > Schedule
For additional security control, your router allows you to create schedules to specify a
time period when a feature on your router should be activated and deactivated. Before
you use the scheduling feature on your router, ensure that your router system time is
configured correctly.
Note: You can apply a predefined schedule to the following features:
• Virtual Server
• Access Control (Domain/URL Filters & IP/Protocol LAN Client Filters)
• Special Applications
• Gaming
1. Log into your router management page (see “Access your router management page
”
on page 31).
2. Click on Advanced and click on Schedule.
3. Review the Schedule settings. Click Apply to save settings.
• Rule Name: Enter a name for the schedule you would like to apply.
• Days: Check the days you would like the rule to be applied or select All Week to
enable the rule all week.
• Start/End Time: Select the start and end time you would like the schedule to
follow.
Note: The schedule defined will define the time/day the feature will be activated.
