


15
Technical Services Group ~ 1-800-283-5936 (USA) ~ 1-801-974-3760
Installation ~ LCD Programming
LCD Programming
For most installations, the default settings in the AP400 do not need to be changed;
the system can be used as soon as power is applied. However, if you need to
customize any settings, such as telephone connection options or unique routing
requirements, you can do so through the front panel user interface or with AP-Ware
software.
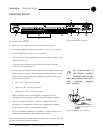
The front panel includes a 2x16 character LCD, menu buttons, level LED bar
meter and gate LED indicators.
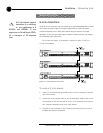
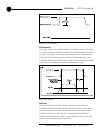
When power is applied to the AP400, all LEDs light and the LCD panel reads
INITIALIZING. If initialization is completed without any errors, a title screen
appears, showing the product name (top line) and the version number (bottom
line). The title screen remains on display until you initiate some action that writes
information to the LCD panel or the AP400 detects and displays an error. (If an
error is displayed, contact our Technical Services Group.)
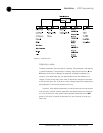
Menu trees
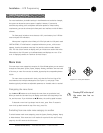
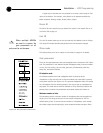
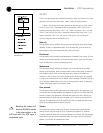
Five menu trees (menu categories) comprise all of the AP400 options you can control
through the front panel: System, Inputs, Outputs, Routing, and Meter. You enter each
of the trees, or move from one tree to another, by pressing the corresponding button
(right).
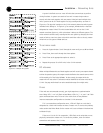
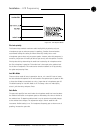
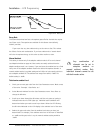
The menu trees are structured in levels, such that the first level (top of the
tree) branches into multiple subcategories (see Figure 2.7, next page). These
branches typically end when an adjustable parameter or viewable value is reached.
Navigating the menu items
Use the ▲ and ▼ buttons to scroll through the menu items at a particular level.
When you reach the last menu item, the display scrolls back to the beginning of the
list, and vice-versa. If you hold down an ▲/▼ button, the scrolling speed increases.
To descend a menu level (go deeper into the tree), press Enter. To ascend a
menu level (go back toward the top of the tree), press Esc.
Switching from one main menu category to another
To switch between main menu categories, press the System, Routing, Outputs, Inputs,
or Meter buttons. If the menu tree is left inactive for a period of time (see Timeout,
page 22), the LCD reverts to the title screen.
Figure 2.6. Front panel buttons
Pressing ESC at the top of
the menu tree has no
effect.
✍