4.Pattern mode
4.Pattern mode
33
Selecting the step (Target Step)
Step Rec 1.01...4.16
When the Pattern mode STEP EDIT key is on (key lit) and the
parameter select LEDs indicate Step Rec, the value shown in
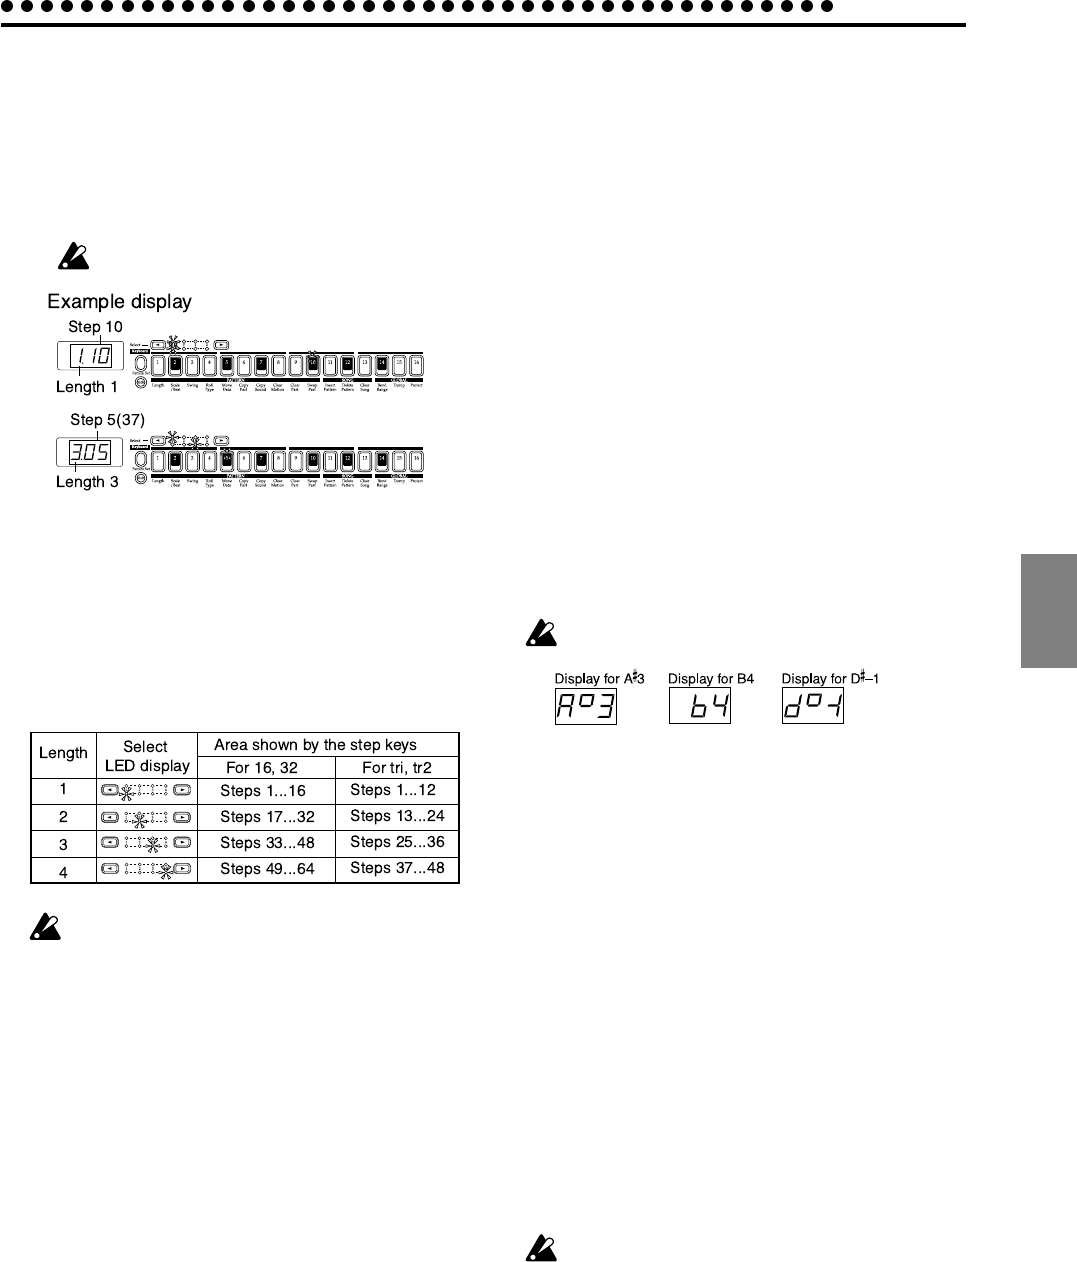
the display is called the “target step.” The value in the display
indicates the location of the step within the phrase pattern. If
the keyboard function is off, the step key for the target step
will blink.
When the Keyboard key is on, the step keys will not
indicate the target step.
To change the target step, you can use the dial or press one of
the sixteen step keys. Alternatively, you can hold down the
Shift key and use the Select keys to move forward or back-
ward in single steps.
In the case of a pattern with a length of 2 measures or greater,
you can use the Select keys to move the select LED in the lower
line (red) in order to change the length that is shown by the
step keys, and verify or modify the trigger locations.
The maximum number of steps will depend on the length
and scale/beat settings.
Changing the trigger settings
Make sure that the PATTERN mode key is lit.
1. Turn off the Keyboard key (the key will be dark).
2. Use the Synth part key to select the part that you wish to
edit.
3. For a pattern with a pattern length of 2 measures or more,
you can use the Select keys to move the red select LEDs to
left or right to change the length location that you will edit.
4. The step keys will light to indicate the trigger locations of
the pattern for that part. You can press each key to switch
the trigger on/off for that step. Each time you press a step
key, the trigger will alternate on (lit) and off (dark).
Changing the note number (pitch)
Note.No C1...G9
1. Press the STEP EDIT key.
2. Use the cursor keys to select Note No. (the corresponding
LED will light).
3. Press the key of the synth part that you wish to edit (the key
will light).
4. Turn off the keyboard function (the keyboard key will go
dark).
5. The step keys will light to indicate the trigger locations of
the pattern for that part. Press the step key for the step whose
note number you wish to edit (the key will blink). By press-
ing a step key where a trigger exists, you can audition its
pitch.
6. Rotate the dial to modify the note number of that step.
When the display is showing the Note. No, pressing a step
key will not switch its trigger on/off. Changing the note num-
ber of a step whose trigger is off will have no effect.
If you turn that trigger on, the specified pitch will be used. To
transpose an individual part, refer to Shift Note in p.36 “Mov-
ing data within a part (Move Data).” To transpose the entire
pattern, refer to p.35 “Transposing a pattern (Transpose).”
The pitch will be shown in the display as follows.
Changing the gate time
Gate Time 0.25...64.0
1. Press the STEP EDIT key.
2. Use the cursor keys to select Gate Time (the corresponding
LED will light).
3. Press the key of the synth part that you wish to edit (the key
will light).
4. Turn off the keyboard function (the keyboard key will go
dark).
5. The step keys will light to indicate the trigger locations of
the pattern for that part. Press the step key for the step whose
gate time you wish to edit (the key will blink). By pressing a
step key where a trigger exists, you can audition its pitch.
6. Rotate the dial to modify the gate time of that step.
The value shown in the display is the gate time length in units
of a step. For example if the gate time is set to 1.0, the gate
time will be exactly as long as one step.
If the gate time length extends into the timing of the next
note, the filter EG of the next note will not be retriggered.
When the display is showing the Gate Time, pressing a step
key will not switch its trigger on/off.
Changing the gate time of a step whose trigger is off will have
no effect. If you turn that trigger on, the specified gate time
will be used.
