4.Pattern mode
4.Pattern mode
35
Recording a motion sequence
Knob and key movements (motion sequences) for each part,
effect, and delay can be recorded.
To record a motion sequence for a part, select the part, and
then turn on the Motion Sequence key of the Part Common
section.
When you newly record a motion sequence for a part,
the motion sequence for the previous knob or key will
be erased.
To record an effect motion sequence, turn on the Motion Se-
quence key of the Effect/Delay section (turn the Delay Edit
key off).
To enable the effect motion sequence, turn the effect on
(lit) for each part to which you want the effect to apply.
To record a delay motion sequence, turn on both the Delay
Edit key and the Motion Sequence key of the Effect/Delay sec-
tion.
The delay motion sequence will apply to the entire pat-
tern. It cannot be set for individual parts.
For the recording procedure, refer to p.22 "Using a motion se-
quence" in section 3. Basic operation (Quick Start).
Checking motion sequence data
If motion sequence data has been recorded, you can hold down
the Shift key and press the Motion Sequence key to view the
status in the step keys.
• If motion sequence data for the knobs of the Part Common
section is included
Step keys 1 and 2 will light
• If motion sequence data for the knobs of the Synth Filter
section is included
Step key 3 will light
• If motion sequence data for the knobs of the Part Common
section is included
Step key 4 will light
• If effect motion sequence (Edit 1 data) is included
Step keys 5 and 6 will light
• If effect motion sequence (Edit 2 data) is included
Step keys 7 and 8 will light
• If delay motion sequence (delay time data) is included
Step keys 9 and 10 will light
• If delay motion sequence (delay depth data) is included
Step keys 11 and 12 will light
It is not possible to check motion sequence data during
playback, or recording, nor during Pattern Set Play.
Convenient functions for
editing patterns
If you wish to save the pattern you edit using these func-
tions, you must perform the Write operation before se-
lecting a different pattern or turning off the power.
Transposing a phrase (Transpose)
Transpose –24...24
This transposes the phrase of synth parts 1 and 2.
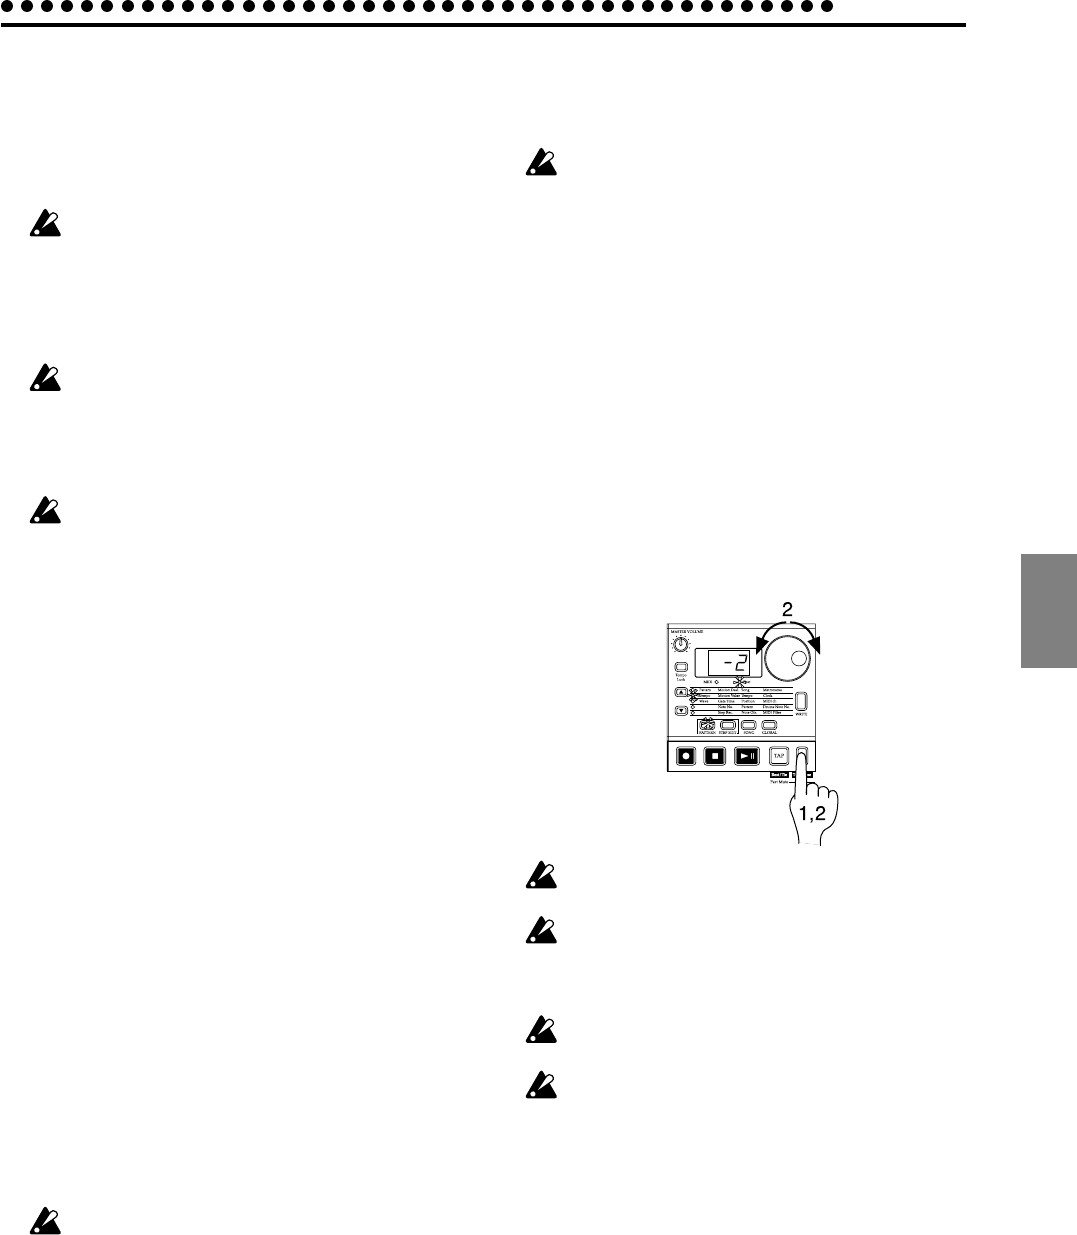
1. While you continue pressing the Transpose key, the display
will indicate the current transposition status.
2. While holding down the Transpose key, rotate the dial to
transpose the phrase in semitone steps. +/–1 transposes the
pitch by a semitone, +/–2 by a whole tone, +/–7 by a fifth,
and +/–12 by one octave.
While holding down the Transpose key you can also use the
step keys or Select keys to transpose.
When you hold down the Transpose key and use the step keys
to specify the transposition, step key 4 will correspond to the
C pitch.
To transpose an individual part, use the Shift note op-
eration described below.
If solo has been specified, the key will remain lit when
you specify a transposition, and will not change to blink-
ing. When you defeat the solo setting, the key will begin
blinking.
The Transpose value is not saved. The next time that
the power is turned on, the value will be 0.
If a chord split (see p.27) is selected as the wave for the
synth part, the chord or octave may change when you
specify a transposition.


