


12
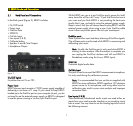
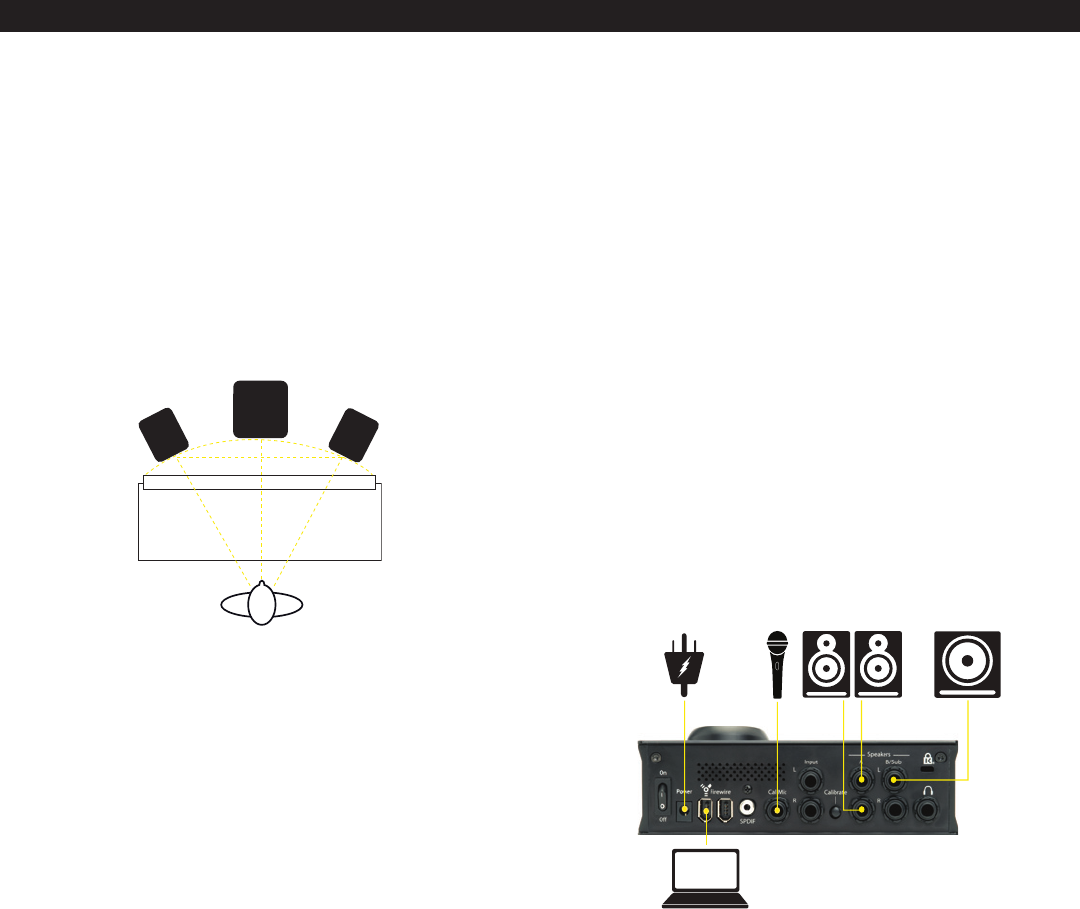
AAddddiinngg aa SSuubbwwooooffeerr
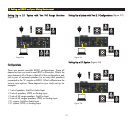
Begin by
determining the best location for your subwoofer. If
possible, the optimum set up would reflect that shown in Figure
3.2; however, this set up may not be practical, or possible, in
your room. Once you have set up your monitors, listen to
program material that you know contains low frequency
information. If your subwoofer has a phase switch, adjust the
subwoofer to provide the highest frequency setting possible. Flip
the switch back and forth to find the loudest setting. Then adjust
the sub’s low pass filter so that it works in conjunction with the
satellite’s high pass frequencies. When you have finished,
readjust the level of the sub. (Figure 3.2)
33..33 CCoonnnneeccttiinngg YYoouurr SSyysstteemm——WWhhaatt GGooeess WWhheerree??
Now you
get to plug things into ERGO. Plugging in audio
cables is always a rewarding experience, as the gratuitous
“thunk” of a cable seating into a jack provides a sense of
accomplishment, both aurally and tactically. So here are the
steps for hooking things up:
Make sure power is Off at your monitors/amplifier, computer,
and ERGO’s power switch is Off. This is an important step.
Please follow it to ensure things go smoothly.
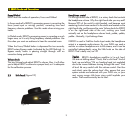
1) Plug ERGO into your computer by connecting it to the
FireWire port. ERGO ships with a 6-pin FireWire cable that
supplies both power and data. If you are using a laptop that has
a 4-pin FireWire cable, you’ll need to dig up an adapter cable
to use ERGO.
2) Plug in ERGO’s Microphone adapter cable. This is the little
XLR to 1/4” TRS cable that shipped with ERGO.
3) Go into that box in the corner of your room and dig up your
best XLR mic cable. Make sure it is about the length of the longest
dimension of your room. Also make sure it is your BEST cable
and it is in working order. Plug this into the ERGO’s XLR-1/4”
adapter.
4) Plug in ERGO’s microphone into your best cable that you
installed in the previous step. Place the microphone in your best
microphone stand, you know, the one in the other corner of your
studio. Put this aside for the time being.
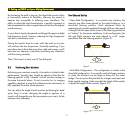
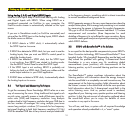
SSeettttiinngg UUpp aa SSyysstteemm wwiitthh TTwwoo MMoonniittoorrss aanndd OOnnee SSuubb
(Fi
gure
3.3)
Subwoofer
Left
Right
Focus / Listening Position
33.. SSeettttiinngg uupp EERRGGOO aanndd yyoouurr MMiixxiinngg EEnnvviirroonnmmeenntt
Figure 3.2
Figure 3.3