


65
Chapter 3. Creating Your Own Sounds
Chapter 3
■ Editing a Performance
Start with an existing Performance and edit it to create a new
Performance. But before you do, try to envision what the
entire Performance will sound like and decide which Patch to
assign to each of 16 Parts.
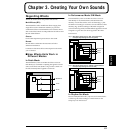
1. Press [PERFORM] to access the PERFORM PLAY
display, and select the Performance whose settings you
wish to modify (p. 51).
2. Press [EDIT] to make the indicator light.
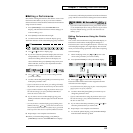
3. Use the function buttons to select the display group.
The button indicator of the selected display group will blink.
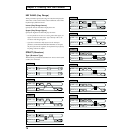
fig.3-11
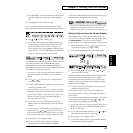
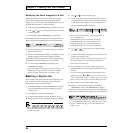
4. Use [ ] or [ ] to select a display page.
5. If you have selected a parameter display that can be set
independently for each Part, the number of the Part
selected for editing will be shown in the display. To
select a different Part, press [EDIT] to temporarily turn
off the indicator, and use [1-8/9-16] and the function
buttons to select a Part.
fig.3-12
6. Use [ ] or [ ] to move the cursor to the parameter
you wish to modify.
7. Use the VALUE dial, [INC]/[DEC] or numeric keys and
modify the parameter value.
* If you’ve selected two or more Tones, your editing will modify
the parameter values for all selected Tones by the same amount.
* If you’ve made a mistake in setting the parameter value or you
don’t like the changes, just press [UNDO/COMPARE] to
restore the value to what it was.
8. If you wish to move to another display group, press
[EDIT] to make the indicator light, and use the function
buttons.
* You can also move to another display group by holding down
[SHIFT] and using [ ] or [ ]. Since this can be done even
when [EDIT] indicator is dark, it is a faster way to get around
because you don’t have to turn on [EDIT] indicator each time.
9. Repeat steps 3–8 to complete a Performance.
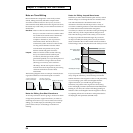
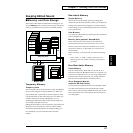
10. When you finish making settings, press [EXIT] or
[PERFORM] to return to the PERFORM PLAY display.
An asterisk (*) will be displayed at the left of the Performance
group. This shows Performance settings have been modified.
fig.3-13
* If you select another Performance in the group with an asterisk
(*), the modified Performance settings will be lost. If you wish to
keep these modified settings, you must write them into user
memory (p. 68).
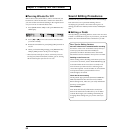
Editing Performance Using the Palette
Display
You can also edit a Performance using the Palette display in
Performance mode. When modifying Part settings for a
Performance, the values for eight Parts (Part 1–8 or Part 9–16)
will be displayed together on a single display. This is useful
when you wish to change parameter values while comparing
each Part settings.
1. When modifying a Part, use [ ] or [ ] to move the
cursor to the parameter you wish to modify.
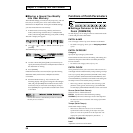
2. Press [PALETTE EDIT] to call up the Palette display.
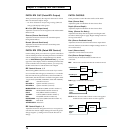
fig.3-14
3. Press [ ] or [ ] to choose the Part to modify.
The Part number and the Patch name assigned to the Part
will be shown in the display.
* To switch between the palette page for parts 1–8 and the palette
page for parts 9–16, press [1-8/9-16].
4. Use the VALUE dial, [INC]/[DEC] or numeric keys to
change the parameter value.
* If you’ve made a mistake in setting the parameter value or you
don’t like the changes, press [UNDO/COMPARE] to restore
the value to what it was.
5. If you wish to edit other parameters, press [ ] or [ ] to
select the parameter that you wish to edit.
6. Repeat steps 3–5 to complete a Performance.
7. To cancel the palette display, press [PALETTE EDIT] to
make the button indicator go dark.