


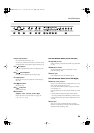


23
Panel Descriptions
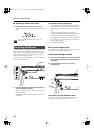
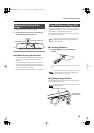
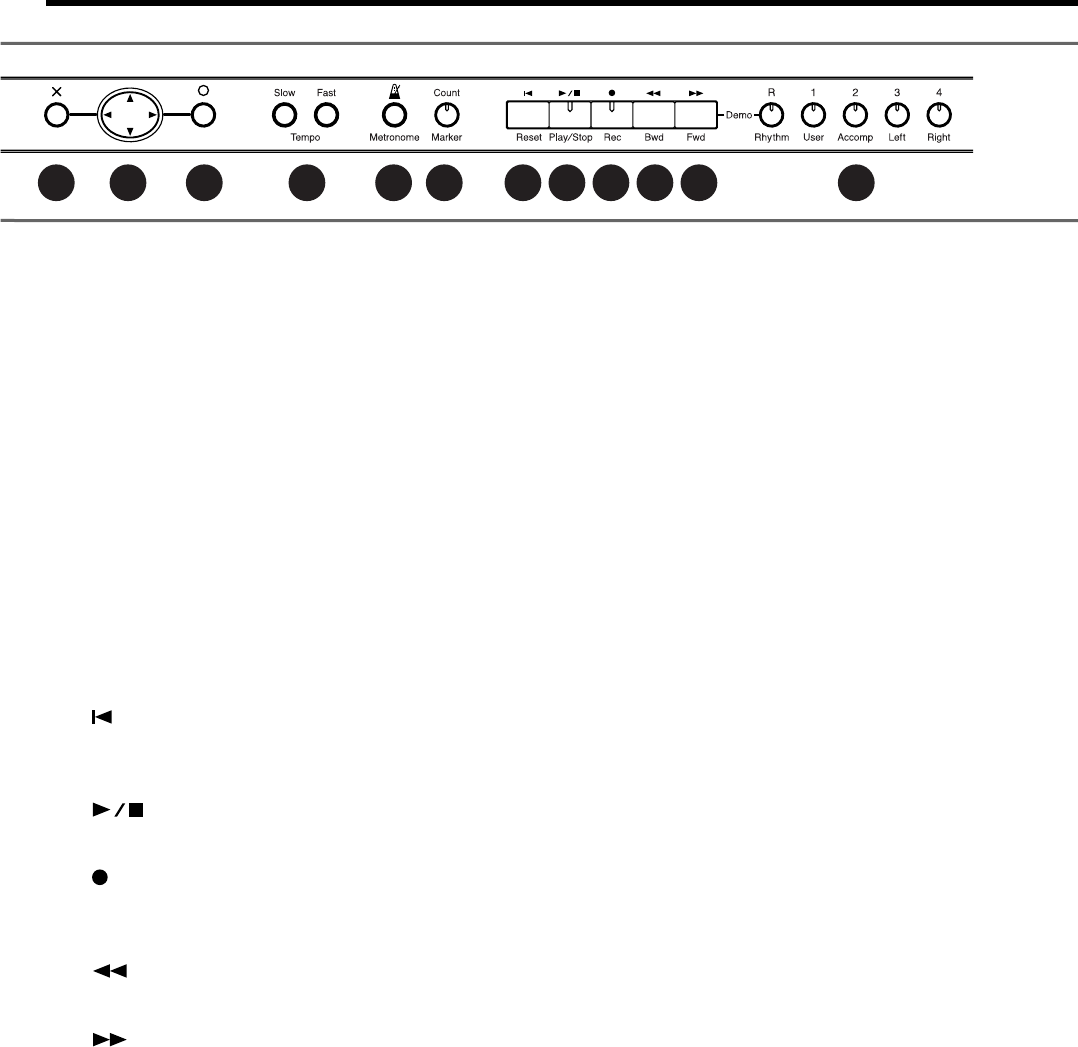
14.
[Count/Marker] button
This is used for setting the count (p. 65).
This allow you to add and move markers in the notation as well
as repeat playback of song segments simply and easily (p. 67).
15.
[ (Reset)] button
Resets the song playback-start location to the beginning of the
song.
16.
[ (Play/Stop)] button
This starts and stops playback and recording of songs.
17.
[ (Rec)] button
This lets you record your own performance into the HPi-6S (p.
70–p. 78).
18.
[ (Bwd)] button
Rewinds the song.
19.
[ (Fwd)] button
Fast-forwards the song.
20.
Track buttons
(R/Rhythm, 1/User, 2/Accomp, 3/Left, 4/Right)
Used to play back or record each track of a song (p. 60,
p. 74, p. 76, p. 77, p. 78).
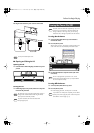
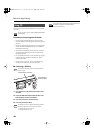
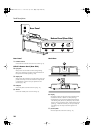
HPi-6S’s Bottom Panel (Front Side Left)
21.
USB (MIDI) connector
Used for connecting a computer to the HPi-6S using a USB cable
(p. 109).
22.
MIDI Out/In connector
An external MIDI device can be connected here to receive
performance data (p. 107).
23.
Phones jacks
A set of headphones can be connected here (p. 18).
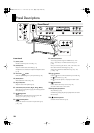
HPi-6S’s Bottom Panel (Front Side Right)
24.
External memory connector
Here you can connect USB memory, a floppy disk drive, or a CD
drive, and play back stored songs (p. 41).
You can also use USB memory to save a song you’ve recorded
on the HPi-6S (p. 81).
By rotating the base you can neatly store the USB memory or USB
cable.
* Use USB memory available from Roland. Proper operation
cannot be guaranteed if other USB Memory products are used.
* CD drives that draw their power from the USB connector cannot
be used.
25.
Input jacks
Here you can connect a portable audio player or another
electronic musical instrument, and listen to the connected device
through the HPi-6S’s speakers (p. 106).
10 11 10 12 13 14 15 16 17 18 19 20
HPi-6S-e.book 23 ページ 2007年11月19日 月曜日 午前10時36分