


26
Sampling with a Specied
Tempo
If you specify the BPM (tempo) while you’re still in
sampling standby mode, the end point (the timing at
which the sound stops playing) will be automatically set
after sampling to a beat of the BPM value you specied.
1. Prepare for sampling as described in steps 1–6 of
“STEP 2: Sampling” (p. 18).
2. Adjust the tempo as described in “Adjusting the
Tempo” (p. 15).
3. Press the [REC] button to start sampling.
4. Press the [REC] button once again to stop
sampling.
MEMO
• When sampling ends, the end point will automatically
be set according to the BPM, and the [MARK] button
will light. Refer to “Adjusting the Playback Region of a
Sample” (p. 27).
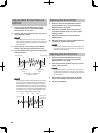
• If the sampled time is multiple measures or less than
one measure, the BPM indication may be double or half.
In this case, press the [TIME/BPM] button so the button
is lit, then turn the [CTRL 2] (BPM) knob to set the
desired value. Refer to “Changing a Sample’s BPM” (p. 30).
• The displayed BPM value is an approximation derived
from the sampled time, and may not be accurate.
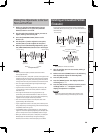
• Depending on the BPM value, the time corresponding
to the BPM may not precisely match the time from the
start point to the end point. For this reason if you use
Loop playback (p. 12) to continuously play a sample for
an extended time, the timing will gradually drift.
Using a Count-in
You can add a count-in (1, 2, 3, 4) when you start sampling.
This is convenient when you are sampling with a specic
tempo or time signature in mind.
1. Specify the tempo as described in steps 1–2 of
“Sampling with a Specied Tempo” (p. 26)
2. Press the [START/END/LEVEL] button so the
button is lit.
3. Press the [REC] button.
The metronome will sound, and the display will succes-
sively indicate.
“-1-” -> “-2-” -> “-3-” -> “-4-” -> “rEC.”
Sampling will begin when the “rEC” indication appears.
Resampling
You can play back a sample with an eect applied, and
then newly sample the result. This is called “resampling.”
1. Make sure that the [PATTERN SELECT] button is
extinguished.
If it is lit, press the [PATTERN SELECT] button to turn it o.
2. Apply an eect to the original sample, and adjust
the eect parameters.
3. Press the [RESAMPLE] button so the button is lit.
The display will indicate “LEU.”
4. Play back the original sample.
5. Adjust the [CTRL 3] (LEVEL) knob so that the
display illumination does not light red.
MEMO
While the [RESAMPLE] button is lit, you can’t use the
[CTRL 3] knob to adjust the eect depth. If you want to
use the [CTRL 3] knob to adjust the eect depth, press
the [CANCEL] button to make the [RESAMPLE] button
go out.
6. Press the [REC] button so the button is blinking.
The bank buttons and pads to which resampling is
possible will start blinking.
7. Press the pad to which you want to resample, so
the pad is lit.
You can also resample to a dierent bank.
NOTE
You can’t resample to a pad to which a sample is
already assigned.
8. Use the [STEREO] button to specify the stereo/
mono setting.
For details, refer to step 5 of p. 18.
9. Press the [REC] button so the button is lit.
Resampling will not yet begin at this point.
10. Press the pad to which you want to resample.
The sample will begin playing, and resampling will start.
NOTE
Never turn o the power during resampling. Turning o
the power at this time may destroy not only the sample
being resampled, but also other samples as well.
11. When resampling is nished, press the [REC]
button.
MEMO
During resampling, you can simultaneously play up to
four monaural samples or two stereo samples.