


40
Restoring the Factory Settings
(Factory Reset)
This operation will restore the SD card’s sample and
pattern data, as well as the SP-404SX’s internal settings
and data to their factory-set condition. In order to perform
this operation, you’ll need a computer and a commercially
available card reader.
NOTE
When you perform this operation, the sample and pat-
tern data of all banks, as well as the SP-404SX’s internal
settings will all be lost. If you wish to keep any of this
data, you must back it up before proceeding (p. 37).
1. Prepare an SD card that has been formatted on
the SP-404SX (p. 35).
If you’re using the SD card that was included with the
SP-404SX, or an SD card that is currently being used with
the SP-404SX, there’s no need to format the card.
2. While holding down the [CANCEL] button, turn on
the power to cancel all protection.
The display will indicate “P.oF” indicating that protection
has been turned o for all samples and patterns.
3. Switch o the SP-404SX’s power.
4. Using your computer, copy the “FCTRY” folder
of the “SP-404SX UTILITY CD-ROM” to the root
directory (the top level) of the SD card.
MEMO
• The SD card included with the SP-404SX already has the
“FCTRY” folder, so step 4 will not be necessary.
• The “FCTRY” folder of the “SP-404SX UTILITY CD-ROM”
contains the factory-set preset data.
5. Insert the SD card into the SP-404SX, and while
holding down the [CANCEL], [REMAIN], and [DEL]
button buttons, turn on the power.
The display will indicate “ini,” and the [REC] button will
blink.
MEMO
If you decide not to proceed with this Factory Reset
operation, you can simply turn o the power at this
point.
6. If you’re sure that you want to restore the
SP-404SX to its factory-set state, press the [REC]
button.
The [REC] button will light, and the dot in the display
will blink. When the operation has been completed, the
blinking will stop.
NOTE
Never turn o the power while the dot is blinking.
Doing so may destroy the SD card.
MEMO
If you’re using the SD card included with the SP-404SX
or an SD card that is being used with the SP-404SX, and
are executing this procedure from step 2, the backup
data on the card will not be erased by this procedure.
Erasing the sample/pattern data of all banks
By executing this procedure starting with step 5 with
an SD card that has no “FCTRY” folder, you can make
the sample and pattern data of all banks be empty. The
internal settings of the SP-404SX itself will be the factory
settings.
Restoring only the SP-404SX’s internal settings to the factory-set state
By executing step 5 and following without inserting an
SD card, you can restore only the internal settings to their
factory-set state.
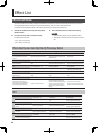
Display Illumination and Sleep
Settings
Here’s how to specify the color of the illumination around
the display, and make Sleep settings.
1. While holding down the [FUNC] button, press the
pad [7] (ILLUMINATION).
2. Turn the [CTRL 3] knob to change the setting.
The [REC] button will blink when you turn the knob.
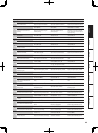
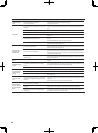
Setting Description
oFF
The illumination will not blink.
It will not blink even during pattern playback.
r b
The illumination will blink in two colors, red and
blue (default setting).
b
The illumination will blink only in blue.
r
The illumination will blink only in red.
SLP
After approximately ve minutes have elapsed
without any operation being performed, all of the
SP-404SX’s buttons will go out and it will enter
Sleep mode. This will extend the battery life if
you’re running on batteries.
• When in Sleep mode, the three dots in the
display will blink sequentially.
• To exit Sleep mode, press any button.
• The display illumination setting will be the
same as “oFF.”
• No sound will be produced while in Sleep
mode.
3. Press the [REC] button to conrm the setting.
MEMO
• If you decide to cancel, press the [CANCEL] button.
• This setting is retained even while the power is turned
o.
Checking the Version Number
1. While holding down the [MARK] button, turn on
the power.
The display will indicate the version number.
MEMO
Press the [CANCEL] button to return to the normal state.