


39
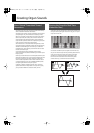
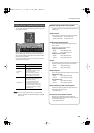
Creating Organ Sounds
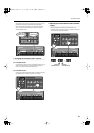
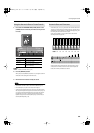
1.
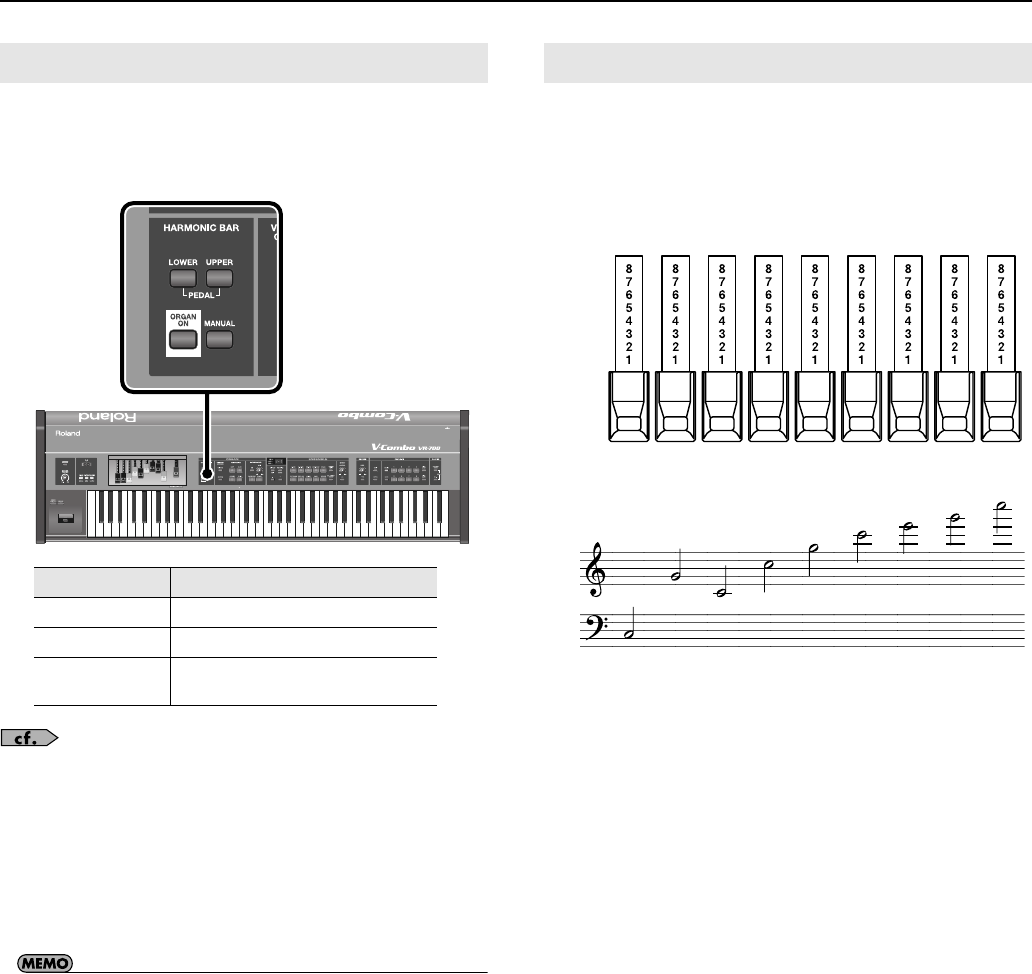
Press either the HARMONIC BAR [UPPER] button or the
[LOWER] button to select the part whose sound you want
to create.
fig.pnl-assgn.eps
“About the VR-700’s Parts” (p. 27)
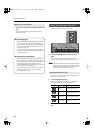
2.
Press the [MANUAL] button.
When you press the [MANUAL] button so it’s lit, the organ sound will
reflect the current settings of the harmonic bars.
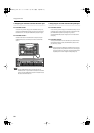
3.
Move the harmonic bars to modify the sound.
• The sound you create can be saved as a Favorite (p. 47).
• If percussion is turned on, the 1’ sound will not be heard (p. 41).
• For the Pedal part, only the 16’ and 8’ sounds will speak.
• To hear the sound of the lower part, turn Split on, and then use the
left range of the keyboard to play the sound of the lower part (p. 34)
or connect an external MIDI keyboard (p. 66). To hear the sound of
the pedal part, turn Split on, and then use the left range of the
keyboard to play the sound of the pedal part (p. 34) or connect an
external pedal keyboard (p. 20).
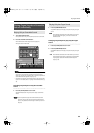
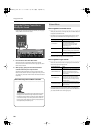
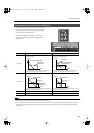
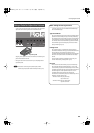
The numbers (16’, 5-1/3’, etc.) printed on each harmonic bar are the
“footage” (a number of feet). The footage plays an important role in
determining the tonal character. 8’ is the basic footage (pitch); you’ll
be creating the sound around this basic pitch.
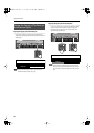
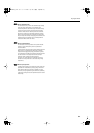
If you play the middle ‘C’ note (C4), the harmonic bars will be
sounding the following pitches.
fig.H-bar-Harmonic.eps
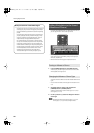
There are three colors of harmonic bars. Those that are in octave
multiples of 8’ are white, those that are not octave multiples are
black, and the lower-pitched bars are brown.
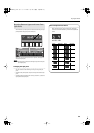
Using the Harmonic Bars to Create Sounds
Part
Operation
Upper part
Press the [Upper] button
Lower part Press the [Lower] button
Pedal part
Press the [Upper] button and [Lower]
button simultaneously
Harmonic Bars and Overtones
16’ 8’ 4’ 2’ 1’5
1
/3’ 2
2
/3’ 1
3
/5’ 1
1
/3’
one octave
below
5th root 8th 12th 15th 17th 19th 22th
VR-700_e.book 39 ページ 2009年11月18日 水曜日 午前9時24分