


21
EN
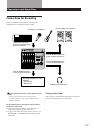
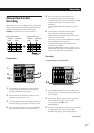
Recording
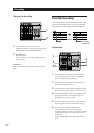
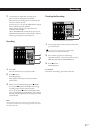
Checking the Recording
1
Turn the jog dial to set the counter to the point
you want to hear.
If you set it as a locate point, it can be located
immediately with the LOCATE keys.
2 Press CUE to prepare for monitoring.
Adjust the monitor volume using the respective
TRACK knobs and the MONITOR knob.
3 Press ( PLAY.
Playback begins.
To rerecord
Follow the “Recording” procedure to the left.
1
2
3
1
2
3
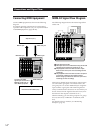
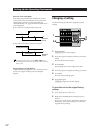
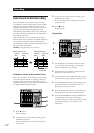
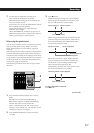
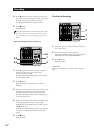
7 Use the fader to adjust the recording level.
Play a relatively loud phrase and make
adjustments by watching the level meter for the
track you want to record.
If necessary, you can use the TRIM knob to adjust
the recording level and equalizer.
Adjust the recording level so that the CLIP
indicator does not light.
Adjust the TRIM knob so that the proper level is
obtained when the fader is set between 7 and 8 to
achieve good frequency characteristics.
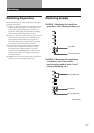
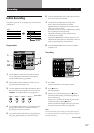
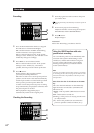
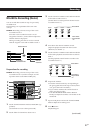
Recording
1 Press REC.
The unit switches to record pause mode.
2 Press ( PLAY.
Recording begins.
Play together with the previously recorded
performance.
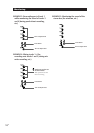
3 When you’ve finished playing, press p STOP.
If you press p STOP in the middle of the song,
recording stops at that counter position.
If you do not press p STOP in the middle of the
song, recording stops automatically at the end of
the song and the beginning of the song is recalled
automatically.
Note
Do not turn off the power during recording. Not only may
you loose the data for the current song, you may loose all of
the data on the disc.