


22
TASCAM DR-680MKII
3 – Preparations
Ejecting an SD card
CAUTION
•
Do not remove the SD card from the unit during
recording, playback or at other times when it is being
accessed.
•
Do not remove the SD card from the unit when it is
connected to a computer by USB.
•
SD cards that meet SD, SDHC or SDXC standards can
be used with this unit.
•
A list of SD cards that have been confirmed to work
with this unit can be found on the TEAC Global Site
(http://teac-global.com/).
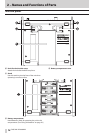
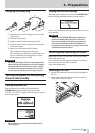
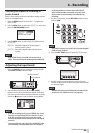
1. Open the SD card slot cover.
2. Push the SD card gently, and it will come out of the unit
slightly and can be pulled out.
Preparing an SD card for use
An SD card must be formatted by this unit to be used with
the unit.
CAUTION
•
Formatting erases all data on the card.
•
When formatting, use the included AC adaptor
(GPE248-120200-Z) or confirm that the remaining
battery charge is sufficient.
1. Confirm that the SD card is inserted and turn the
power ON.
2. If a new card or a card that has been formatted by
a device other than this unit has been inserted, the
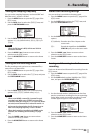
following pop-up message appears.
3. Press the ENTER/MARK button to start formatting.
4. When formatting is complete, the Home Screen opens.
You can reformat a card at any time with this unit. (See
“Reformatting SD cards” on page 51.)
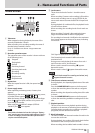
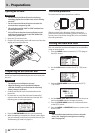
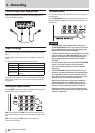
Card write-protection
SD cards have lock (write-protection) switches.
Writing possible Writing not possible
Slide the switch in the direction of the Lock arrow to
prevent the recording and editing of files on the card. To
record, erase or otherwise change files on a card, disable
the write-protection.
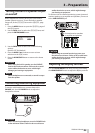
Setting the date and time
This unit adds date and time information to recorded files
using its internal clock.
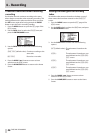
1. Press the MENU button to open the
SYSTEM
page of
the
MENU
screen.
2. Use the DATA wheel to select the
DATE/TIME
menu
item.
3. Press the ENTER/MARK button to open the
DATE/
TIME
screen.
4. Use the MARK (Â/¯) buttons to move the cursor
and use the DATA wheel to change the values.
5. Press the ENTER/MARK button to confirm and return
to the
MENU
screen.
6. Press the MENU or HOME/DISP button to return to the
Home Screen.
NOTE
You can add the date and time set here to the take
name. (See “Setting the name given to recording
takes” on page 26.)