


Elation Professional® www.elationlighting.com - DMX Programmer Page 18Elation Professional® www.elationlighting.com - DMX Programmer Page 17
There are 7 data folders in the CF Card Menu. All “ALL”, Scenes “SCEN,
Program 1 “Pro1”, Program 2 “Pro2”, Program 3 “Pro3, Program 4 “Pro4”,
and Set “SEt”.
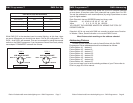
1. Press and hold the RECORD BUTTON for three (3) seconds to
activate record mode. A red LED above the button will be lit
and the
LCD Window will display “1: REC”.
2. Press the UP BUTTON, until the LED WINDOW shows “3: CF”. Press
the RECORD BUTTON, the LED WINDOW will show “1: St”.
3. Press the RECORD BUTTON, the LED WINDOW will now show “ALL”.
Press the UP BUTTON will let you scroll through all the data folders.
Select the data folder you want to write to and press the RECORD
BUTTON. Select a desired location between 01 - 99.
4. Press the RECORD BUTTON, the LED WINDOW will show “Stor”, while
the writing the CF Card. “Good” will appear in the LCD WINDOW,
when the writing proces is complete and successfull, and then will
exit Record mode automatically. If the process is not successful the
LED WINDOW will show “Err”, and then will exit Record mode auto-
matically. Note: If the DMX Programmer continues to show “Err”,
make sure that your CF Card is formatted.
There are 7 data folders in the CF Card Menu. All “ALL”, Scenes “SCEN,
Program 1 “Pro1”, Program 2 “Pro2”, Program 3 “Pro3, Program 4 “Pro4”,
and Set “SEt”.
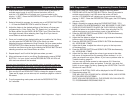
1. Press and hold the RECORD BUTTON for three (3) seconds to
activate record mode. A red LED above the button will be lit
and the
LCD Window will display “1: REC”.
2. Press the UP BUTTON, until the LED WINDOW shows “3: CF”. Press
the RECORD BUTTON, the LED WINDOW will show “2: rd”.
3. Press the RECORD BUTTON, the LED WINDOW will now show “ALL”.
Press the UP BUTTON will let you scroll through all the data folders.
Select the data folder you want to read and press the RECORD
BUTTON. Select the desired folder between 01 - 99.
4. Press the RECORD BUTTON, the LED WINDOW will show “rEAD”,
while reading the CF Card. “Good” will appear in the LCD WINDOW,
when the reading proces is complete and successfull, and then will
exit Record mode automatically. If the process is not successful the
LED WINDOW will show “Err”, and then will exit Record mode auto-
matically.
NOTE: The successful operation will lose all the previous data. To pro
-
tect this data, write it to a CF Card or computer database.
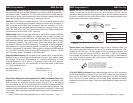
DMX Programmer™ Write A CF Card
DMX Programmer™ Read A CF Card
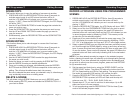
SETTTING BLACKOUT DELAY TIME
1. Press and hold the RECORD BUTTON for three (3) seconds to
activate record mode. A red LED above the button will be lit
and the
LCD Window will display “1: REC”.
2. Press the UP BUTTON, the LED WINDOW will show “2:SEt”. Press the
RECORD BUTTON, the LED WINDOW will show “1:ASS”.
3. Press the UP BUTTON, the LED WINDOW will now show “2:blt”.
4. Press the RECORD BUTTON, the LED WINDOW will now show “bt:00”.
5. Now using the UP and DOWN BUTTONS you can adjust the Blackout
Delay time from 1 - 10 seconds.
6. To exit Blackout Delay setting, press and hold the RECORD BUTTON
for three (3) seconds.
NOTE: Pressing the BLACKOUT BUTTON for one second can bypass
Blackout delay.
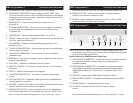
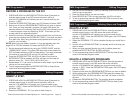
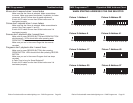
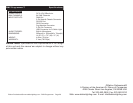
PERCENT OR VALUE DISPLAY
You can choose whether the display shows the fader level as a Percentage
or Value. 100 means the display is showing percentage level. 255 means
the display is showing the value level.
1. Press and hold the RECORD BUTTON for three (3) seconds to
activate record mode. A red LED above the button will be lit
and the
LCD Window will display “1: REC”.
2. Press the UP BUTTON, the LED WINDOW will show “2:SEt”. Press the
RECORD BUTTON, the LED WINDOW will show “1:ASS”.
3. Press the DOWN BUTTON, the LED WINDOW will now show “3:dis”.
4. Press the RECORD BUTTON, the LED WINDOW will now show “255”.
5. Now using the UP or DOWN BUTTON you can choose between
Percent or Value display.
6. To exit Display setting, press and hold the RECORD BUTTON
for three (3) seconds.
DMX Programmer™ Settings