


10
2a. Prvw ................................................................
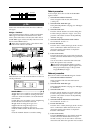
You can preview the first two seconds of the
selected WAV file.
If you select a WAV file of an unsupported format,
one of the following error messages will appear.
SAMPLE RATE NOT 44.1k: This will
appear if the sampling frequency of the WAV file is
other than 44.1 kHz.
SAMPLE BIT NOT FIT: This will
appear if the quantization of the WAV file is other
than 8 bit, 16 bit, or 24 bit.
ILLEGAL WAV DATA: This will appear
if the WAV file is unsupported for a reason other
than the above (perhaps a form of data compres-
sion etc.).
Sub-directories are also supported when
importing from CD-ROM, CD-R, or CD-RW.
Sub-directories are indicated as [...] in the Wav-
FileList screen.
To enter this directory, select [...] and press the
“OK” button. To return, select “←” and press
the “OK” button.
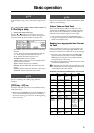
3. DestTrack........................ [1...16, 1-2...15-16, Clip#]
Selects the import destination track.
Clip# will be 1 if the selected WAV file is monaural, or 2
if the file is stereo.
4. FileType .........................................................[M, St]
This indicates whether the selected WAV file is monau-
ral or stereo.
Mono: The selected WAV file is monaural.
Stereo: The selected WAV file is stereo.
5. Exec. (Execute) ........................................................
Executes the WAV file import command.
Importing a WAV file to the beginning of a
track
Here’s how a monaural WAV file named
“Sound001.wav” can be imported into the beginning of
track 1 from a DOS format external drive “A: DOS”
connected to the SCSI connector.
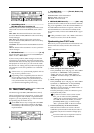
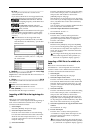
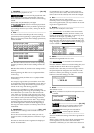
1 Select Import.
Select the [TRACK] “Import” tab page.
2 Select the import source drive.
Press the “DriveList” button to access the dialog
box. Select the DOS format drive that contains the
WAV file. For this example select drive “A,” and
press the “OK” button to return to the [TRACK]
“Import” tab page.
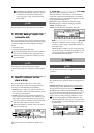
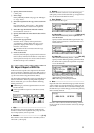
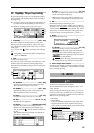
3 Select the WAV file.
Press the “WavFileList” button to access the dialog
box. For this example, select “A:Sound001.wav,”
and press the “OK” button to return to the
[TRACK] “Import” tab page.
Sub-directories are supported if you are importing
from a CD. If you are importing from another SCSI
drive, only WAV files saved in the root directory
are supported.
You can use the “Prvw” button to audition the first
two seconds of the selected WAV file.
4 Select the import destination track number.
Set “DestTrack” to track “1.”
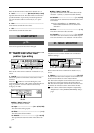
5 Execute the import.
Press the “Exec.” button, and respond to the
“AreYouSure?” display. When the import is com-
pleted, the display will indicate “Completed.”
Press the “OK” button.
6 Listen to the result.
Hold down the [STOP] key and press the [REW]
key to return to the beginning of the song, and lis-
ten to the data to verify that it was imported cor-
rectly. You can use Undo to return the data to the
previous condition.
The longer the file being imported, the more
time will be required for this operation (i.e.,
before the “Completed” display appears).
Importing a WAV file to the middle of a
track
Here’s how a monaural WAV file named
“Sound001.wav” can be imported once into the TO
location of track 1 from a DOS format external drive
“A: DOS” connected to the SCSI connector.
1 Select Import.
Select the [TRACK] “Import” tab page.
2 Select the import source drive.
Press the “DriveList” button to access the dialog
box. Select the DOS format drive that contains the
WAV file. For this example select drive “A,” and
press the “OK” button to return to the [TRACK]
“Import” tab page.
3 Select the WAV file.
Press the “WavFileList” button to access the dialog
box. For this example, select “A:Sound001.wav,”
and press the “OK” button to return to the
[TRACK] “Import” tab page. Sub-directories are
supported if you are importing from a CD. If you
are importing from another SCSI drive, only WAV
files saved in the root directory are supported.
4 Select the clipboard as the copy destination track
number.
Set “DestTrack” to “Clip.”
5 Execute the import.
Press the “Exec.” button, and respond to the
“AreYouSure?” display. When the import is com-
pleted, the display will indicate “Completed.”
Press the “OK” button.
The longer the file being imported, the longer
the time that will be required for this operation
(i.e., before the “Completed” display appears).