4.Pattern mode
4.Pattern mode
31
Data Copy within a pattern
Phrase pattern data (including motion sequence data) that you
create for a pattern of length 1 can be copied to the steps of
lengths 2...4. This function is a convenient way to create a pat-
tern that uses similar phrases repeatedly.
1. Create a pattern with a length of 1, and Write it into memory.
(Refer to p.32 "Saving a pattern.")
2. At this point, the same data as in length 1 will automatically
be copied to the steps of lengths 2...4.
3. Change the pattern length to the desired length. (Refer to p.26,
"Length, Scale/Beat settings.")
4. The steps of lengths 2...4 will contain the same data as length
1. Now you can edit the data of lengths 2...4 to complete the
pattern.
The data will be copied in a similar way when the pattern length
is 2 or 3 (refer to the table below). If you shorten a pattern you
create, the data will be copied according to the shortened length.
The data that is copied automatically when you Write a
pattern does not force the pattern length (1--4) to change.
If the length is 4, data will not be copied within the pattern.
Erasing motion sequence data
from a part (CLEAR MOTION)
This operation erases all the motion sequence data of a part.
1. If the pattern is playing, press the Stop/Cancel key to stop
playback.
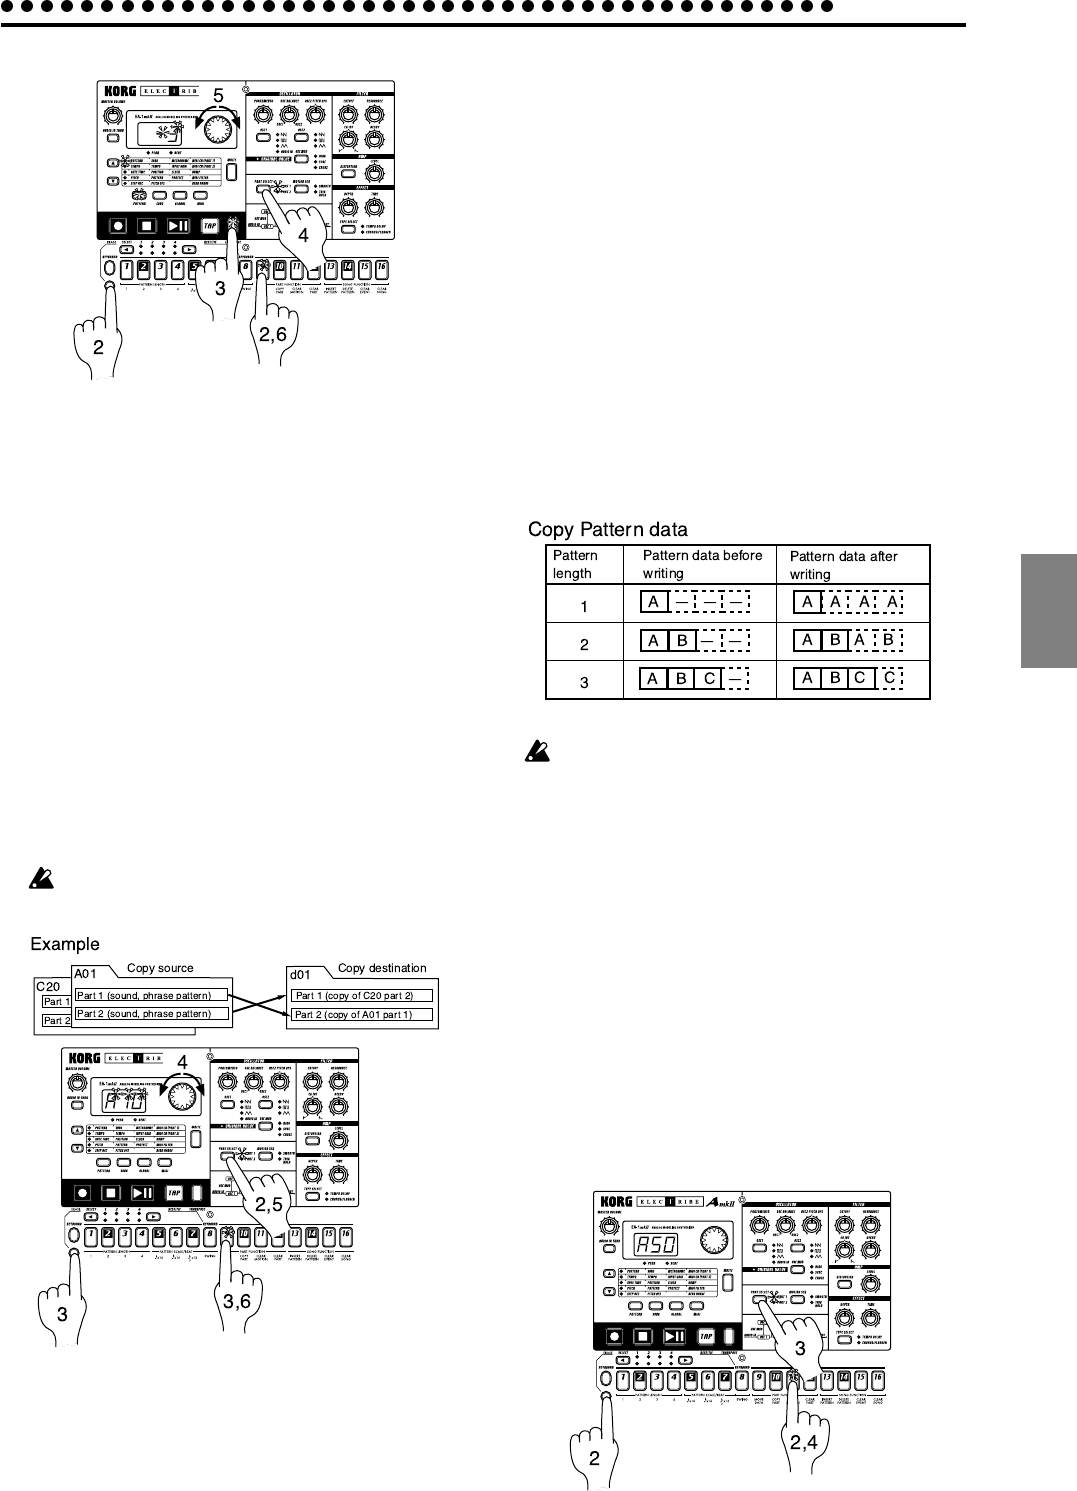
2. Hold down the SHIFT key and press step key 11 (CLEAR
MOTION). (Key 11 will blink.)
3. Use the PART SELECT key to select the part whose motion
sequence you wish to erase.
4. Press step key 11 once again to clear the motion sequence
data.
To cancel, press the Stop/Cancel key.
To cancel without executing, press the Stop/Cancel key.
Copying a part (COPY PART)
You can copy the sound settings and phrase pattern data (in-
cluding motion sequence) from a selected part to another part.
1. If the pattern is playing, press the Stop/Cancel key to stop
playback.
2. Press the PART SELECT key to select the copy destination
part (the LED will light).
3. Hold down the SHIFT key and press step key 10 (COPY
PART). (Key 10 will blink.) The display will begin blinking.
4. Rotate the dial to select the copy source pattern number.
5. Use the PART SELECT key to select the copy source part.
(The copy source LED will blink, and the copy destination
LED will be dark.)
6. Press step key 10 once again to execute the Copy Part opera-
tion.
To cancel, press the Stop/Cancel key.
For details on data copy within the same part, refer to the
following section "Data Copy within a part."


