8
2.Front and rear panel
1
2
7
98
10
3
4
5
6
2. Front and rear panel
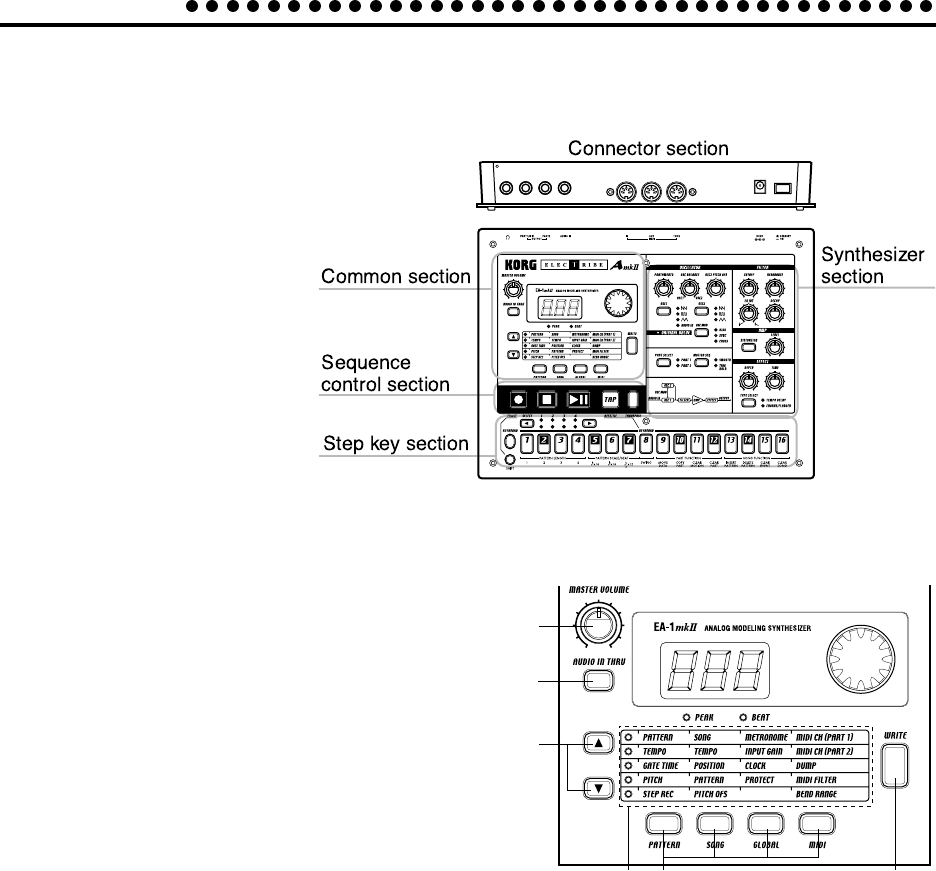
The contr ols and other par ts of the EA-1mk
II
can be br oadly grouped as sho wn in the dia-
gram.
Common section
1. MASTER VOLUME
This knob adjusts the v olume that is output fr om
the Part output jacks and the headphone jack.
2. AUDIO IN THRU
This key allows the external audio input to be out-
put directl y from the P art output jac ks and the head-
phone jack.
When this key is on, the AUDIO IN of OSC1 will
have no eff ect.
3. Display
This sho ws the v alue of the currentl y selected pa-
rameter , and various messa ges.
4. Dial
Use this to modify the v alue sho wn in the displa y.
5. Peak LED
This indicates the peak le vel for the input signal fr om the audio in jac ks. Adjust the
output level of your external device so that the LED lights only at the maximum level.
6. Beat LED
This will b link at quar ter-note inter vals to indicate the tempo.
7. [▲][▼] (cursor keys)
In eac h mode , use these ke ys to select parameter s from the matrix sho wn in the displa y.
8. Matrix
The parameter s that will appear in the displa y are listed here f or eac h mode . Use the
cursor ke ys to make the desired parameter select LED light.
9. Mode keys
Use these ke ys to mo ve to the desired mode: Pattern, Song, Global, or MIDI. During
playback you can move to Global mode, but not to MIDI mode.
10. WRITE key
Use this key when you wish to save settings that you modified in Pattern , Song , Global ,
or MIDI mode, or to save Pattern Set data.


