


53
V. AUX 1/2 Source mod
This modification should only be performed if
the console is being used strictly for recording.
A. When the Aux 1/2 Pre Switch is engaged,
Aux Send 1 and 2 will tap the Pre-Fader
information from the tape returns.
B. When the Aux 1/2 Pre Switch is not engaged,
Aux Send 1 and 2 function normally, as post
fader channel sends..
All that said, here’s the mod.
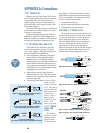
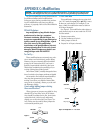
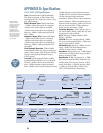
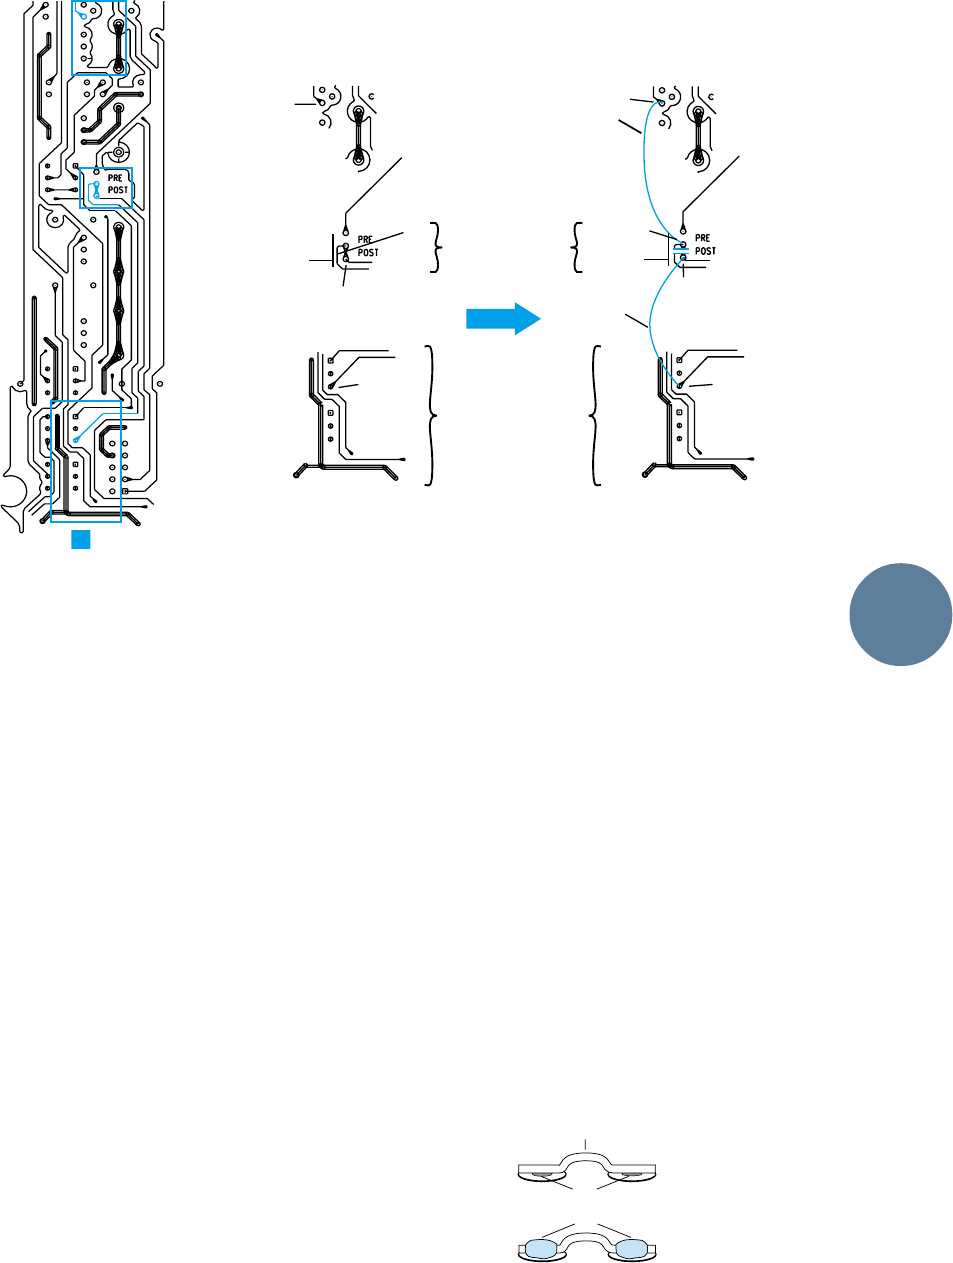
See Figure 13 (appropriately numbered)
above. This modification takes place on each
channel strip in the area under the AUX 3/4
Mix-V Source switch and also under and near
the AUX 1/2 PRE switch.
1. Remove power cord.
2. Cut two (2) traces at point (A).
Note: The wire used in the next three steps
should be 24-28 gauge insulated jumper wire.
Do not strip off any more insulation than is
absolutely necessary.
3. Add a 1-1/2” jumper (B), connected at
points K and L.
4. Add a 2-1/4” jumper (D), connected at
points P and Q.
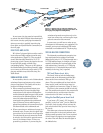
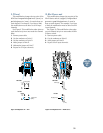
A note about adding jumpers during
these modifications
When a jumper or jumpers are called for, they
should NOT go into holes in the PCB. Rather,
they should be soldered to the flat, tinned area
around the hole (called a pad) and bowed
slightly over to the other pad (see right). Make
sure the ends of these jumpers do not extend be-
yond the pad.
Holes
Jumper
Solder
BEFORE
AFTER
BEFORE
AFTER
(AUX SEND 1&2)
PRE SWITCH
(AUX SEND 3&4/5/6)
PRE SWITCH
(L)
(K)
(K)
(L)
add jumper (B)
add jumper (D)
cut here (A)
(P) (P)
(Q)(Q)
Figure 13:
The infamous and dreaded but-if-we-hadn’t-included-it-we’d-just-have-to-fax-it-to-the-foolhardy-anyway Modification V.
ADD-ONS
SPECS
ETC.