


Playing with accompaniment (Arranger)
16
r
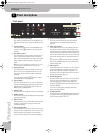
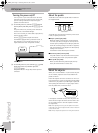
KR103 Digital Intelligent Piano
5. Playing with accompaniment (Arranger)
Let us begin with the automatic accompaniment function, which is called “Arranger” and often referred to as “Style” or
“Music Style” in the display and on the front panel.
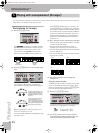
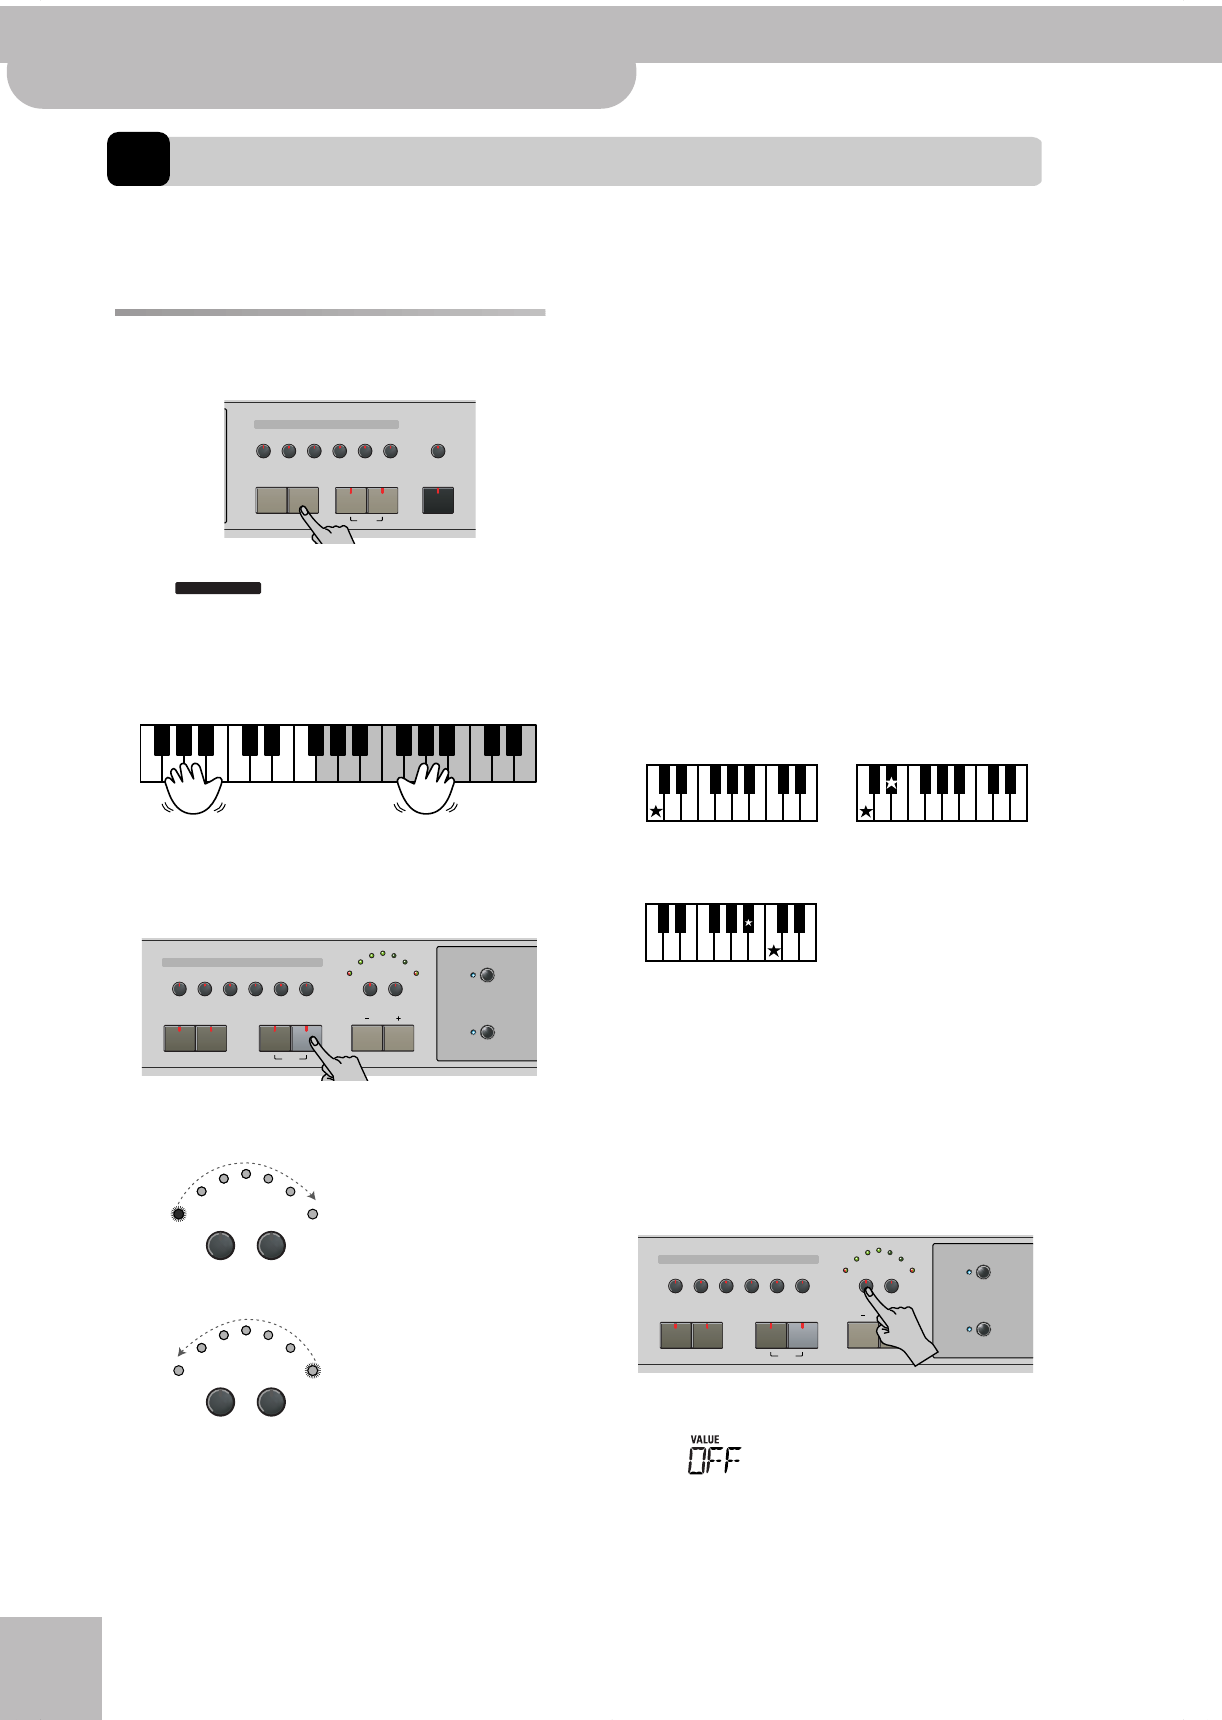
Starting/using the Arranger
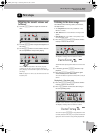
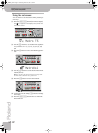
(1) Press the [Arranger] button.
The icon appears in the display and the
keyboard is split into two halves. The keys you press
in the left half are used to specify the key of the
accompaniment. The right half of the keyboard
allows you to play a tune to the accompaniment.
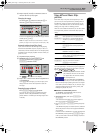
(2) Press the [Start÷Stop] button to start Arranger play-
back.
The metronome indicators flash to indicate the
tempo and beats according to the following system:
Note: The lighting pattern of the beat indicators can be
switched off. See “Beat Ind” on p. 45.
There is also a BEAT indication in the display that tells
you where you are.
If the [Arranger] indicator lights, you will hear a ste-
reo string sound and a monophonic bass sound while
the Arranger is stopped. The string and bass sounds
are muted as soon as you start Arranger playback (or
switch on the SYNC START function). If you want to
double Arranger playback with a sound assigned to
the left half of the keyboard, switch on the Lower
part (see p. 21).
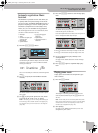
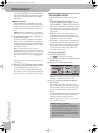
(3) Play a chord (or just one note) with your left hand.
The same pattern is now played in that key. You don’t
even have to play full chords:
• For major chords, playing just the root note is
enough (e.g. “C” for C major, “A” for A major, etc.)
• For minor chords, playing the root note and the third
key to its right will do.
• For seventh chords, playing the root and the second
key to its left is enough.
(4) Play another chord (or note) to change the
Arranger’s key.
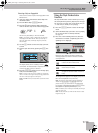
Using the count-in function
The KR103 provides a count-in function you may want
to use for practising new songs. This function counts
down one measure when you press the [Start÷Stop] but-
ton, after which Arranger playback starts.
(1) Press the [Count÷Marker] button.
The following message appears in the display:
(2) Use the [+][–] buttons to select “On” (count-in
active, the button’s indicator lights) or “Off” (no
count-in, the button’s indicator goes dark).
Tone
Guitar
Bass
Melody
Intelligence
Piano
Piano
Lower
One Touch Program
Layer
Split
Arranger
DiskStringsOrgan
Others
Drum/Sfx
Sax
Brass
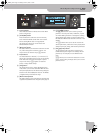
ARRANGER
Arranger
(accompaniment)
Upper part
(melody)
Tempo
Marker
Music Style
User
Trad
Kids
Latin
Gospel
Intro
Ending
Start
Stop
Big Band
Swing
Ballad
Acoustic
Oldies
Country
Pop
Rock
Fill In Sync
To Original
To Variation
Count Metronome
Song
Music
Assistant
Marker
Count Metronome
Marker
Count Metronome
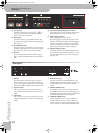
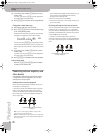
“1”
“2”
The slightly bigger indicators at either
end of the arc indicate the beats. The
remaining indicators are only used to
simulate the movement of a mechanic
metronome.
The “big” indicators light red to indi-
cate the downbeat (see “1”), and
green on the remaining beats of a bar
(see “2”). Consequently, the third beat
of this example is indicated by the left
indicator that then lights in green.
C major C minor
C7
Only the key that corresponds to
the chord's name.
Root note + third key to the
right.
Root note + second key to the left.
Tempo
Marker
Music Style
User
Trad
Kids
Latin
Gospel
Intro
Ending
Start
Stop
Big Band
Swing
Ballad
Acoustic
Oldies
Country
Pop
Rock
Fill In Sync
To Original
To Variation
Count Metronome
Song
Music
Assistant
Count-In
00
KR103_GBEF Page 16 Wednesday, March 23, 2005 5:26 PM