


25
MZ-R909
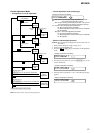
47. Adjust with the [VOL+] key (adjusted value up) or [VOL--]
key (adjusted value down) so that the adjusted value becomes
0A.
48. Press the X key.
(1018 is blinking)
49. Press the [VOL+] key once to change the blinking portion to
1019.
50. Press the x key.
(00 is blinking)
51. Adjust with the [VOL+] key (adjusted value up) or [VOL--]
key (adjusted value down) so that the adjusted value becomes
60.
52. Press the X key.
(1019 is blinking)
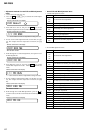
53. Press the [VOL+] key once to change the blinking portion to
101A.
54. Press the
x key.
(00 is blinking)
55. Adjust with the [VOL+] key (adjusted value up) or [VOL--]
key (adjusted value down) so that the adjusted value becomes
C7.
56. Press the X key.
(101A is blinking)
57. Press the [VOL+] key once to change the blinking portion to
101B.
58. Press the x key.
(00 is blinking)
59. Adjust with the [VOL+] key (adjusted value up) or [VOL--]
key (adjusted value down) so that the adjusted value becomes
E5.
60. Press the X key.
(101B is blinking)
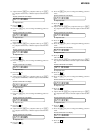
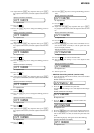
023 10180A
Remote commander LCD display
0A
: Adjusted value
023 101900
Remote commander LCD display
00
: Adjusted value
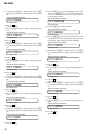
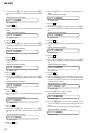
023 101960
Remote commander LCD display
60
: Adjusted value
023 101A00
Remote commander LCD display
00
: Adjusted value
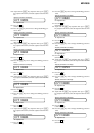
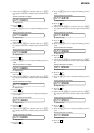
023 101AC7
Remote commander LCD display
C7
: Adjusted value
023 101B00
Remote commander LCD display
00
: Adjusted value
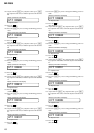
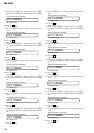
023 101BE5
Remote commander LCD display
E5
: Adjusted value
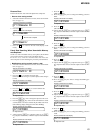
61. Press the [VOL+] key once to change the blinking portion to
101C.
62. Press the x key.
(00 is blinking)
63. Adjust with the [VOL+] key (adjusted value up) or [VOL--]
key (adjusted value down) so that the adjusted value becomes
04.
64. Press the X key.
(101C is blinking)
65. Press the [VOL+] key twice to change the blinking portion to
101E.
66. Press the x key.
(00 is blinking)
67. Adjust with the [VOL+] key (adjusted value up) or [VOL--]
key (adjusted value down) so that the adjusted value becomes
A0.
68. Press the
X key.
(101E is blinking)
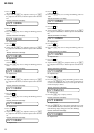
69. Press the [VOL+] key once to change the blinking portion to
101F.
70. Press the x key.
(00 is blinking)
71. Adjust with the [VOL+] key (adjusted value up) or [VOL--]
key (adjusted value down) so that the adjusted value becomes
E1.
72. Press the X key.
(101F is blinking)
73. Press the [VOL+] key once to change the blinking portion to
1020.
74. Press the x key.
(00 is blinking)
023 101C00
Remote commander LCD display
00
: Adjusted value
023 101C04
Remote commander LCD display
04
: Adjusted value
023 101E00
Remote commander LCD display
00
: Adjusted value
023 101EA0
Remote commander LCD display
A0
: Adjusted value
023 101F00
Remote commander LCD display
00
: Adjusted value
023 101FE1
Remote commander LCD display
E1
: Adjusted value
023 102000
Remote commander LCD display
00
: Adjusted value