


MZ-R909
3333
115. The modified data writing is over, if the adjusted value
changes to DD.
116. Turn the power off.
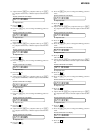
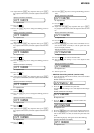
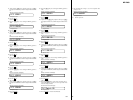
023 ***SDD
Remote commander LCD display
DD
: Adjusted value
101. Press the [VOL+] key once to change the blinking portion to
105F.
102. Press the x key.
(00 is blinking)
103. Adjust with the [VOL+] key (adjusted value up) or [VOL--]
key (adjusted value down) so that the adjusted value becomes
E1.
104. Press the X key.
(105F is blinking)
105. Press the [VOL+] key twice to change the blinking portion to
1061.
106. Press the x key.
(00 is blinking)
107. Adjust with the [VOL+] key (adjusted value up) or [VOL--]
key (adjusted value down) so that the adjusted value becomes
B0.
108. Press the
X key.
(1061 is blinking)
109. Press the [VOL+] key twice to change the blinking portion to
1063.
110. Press the x key.
(00 is blinking)
111. Adjust with the [VOL+] key (adjusted value up) or [VOL--]
key (adjusted value down) so that the adjusted value becomes
03.
112. Press the X key.
(1063 is blinking)
113. Press the [DISPLAY] key on the remote commander for sev-
eral seconds (about 3 seconds) to exit the patch data write
mode and display as below.
114. Press the X key to write the modified data.
87. Adjust with the
[VOL+] key (adjusted value up) or [VOL--]
key (adjusted value down) so that the adjusted value becomes
E1.
88. Press the X key.
(105B is blinking)
89. Press the [VOL+] key once to change the blinking portion to
105C.
90. Press the x key.
(00 is blinking)
91. Adjust with the [VOL+] key (adjusted value up) or [VOL--]
key (adjusted value down) so that the adjusted value becomes
0E.
92. Press the X key.
(105C is blinking)
93. Press the [VOL+] key once to change the blinking portion to
105D.
94. Press the
x key.
(00 is blinking)
95. Adjust with the [VOL+] key (adjusted value up) or [VOL--]
key (adjusted value down) so that the adjusted value becomes
F0.
96. Press the X key.
(105D is blinking)
97. Press the [VOL+] key once to change the blinking portion to
105E.
98. Press the x key.
(00 is blinking)
99. Adjust with the [VOL+] key (adjusted value up) or [VOL--]
key (adjusted value down) so that the adjusted value becomes
B0.
100. Press the X key.
(105E is blinking)
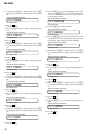
023 105C00
Remote commander LCD display
00
: Adjusted value
023 105C0E
Remote commander LCD display
0E
: Adjusted value
023 105D00
Remote commander LCD display
00
: Adjusted value
023 105DF0
Remote commander LCD display
F0
: Adjusted value
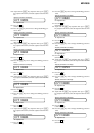
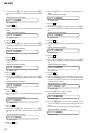
023 105BE1
Remote commander LCD display
E1
: Adjusted value
023 105E00
Remote commander LCD display
00
: Adjusted value
023 105EB0
Remote commander LCD display
B0
: Adjusted value
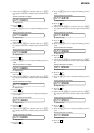
023 105F00
Remote commander LCD display
00
: Adjusted value
023 105FE1
Remote commander LCD display
E1
: Adjusted value
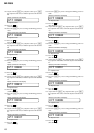
023 106100
Remote commander LCD display
00
: Adjusted value
023 1061B0
Remote commander LCD display
B0
: Adjusted value
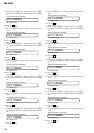
023 106300
Remote commander LCD display
00
: Adjusted value
023 106303
Remote commander LCD display
03
: Adjusted value
023 Patch 09
Remote commander LCD display
09
: Adjusted value