


108
Remote Function List
01X Owner’s Manual
Before Using Basics Section AppendixGetting Started Reference
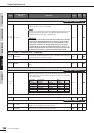
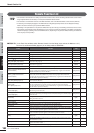
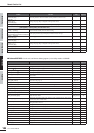
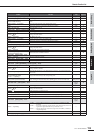
■ Cubase/NUENDO: On the 01X, set Remote Select (page 87) in the Utility mode to “CUBASE.”
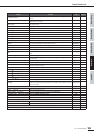
Knobs 1 – 8 (pressing)
(Parameter page)
Reset the parameter value to the default. (Some parameters cannot be reset.)
—
DISPLAY [ / ]
Cursor [ / ]
(Parameter page)
Changes the page. (Page is displayed at the right of the LCD.)
—
[SHIFT]+[PLUG-IN]
Return to the PLUG-IN mode from PLUG-IN parameter pages.
—
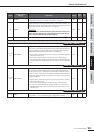
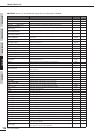
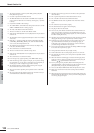
INSTRUMENT mode [SHIFT]+[INST] (Multi Channel View)
[SHIFT]+[INST] ➝ [SHIFT]+[INST] (Track Parameter View)
lights *28
Knobs 1 – 8
(turning ➝ pressing)
Turn the knob to select the desired instrument for insertion (indication flashes), then
press the knob to actually enter the selected setting.
—
Knobs 1 – 8 (pressing)
(Knob to which the Instrument is assigned)
Calls up the parameter page and displays the Editor window on Logic.
—
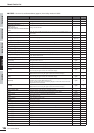
Knobs 1 – 8 (turning)
(Parameter page)
For editing parameters.
—
Knobs 1 – 8 (pressing)
(Parameter page)
Reset the parameter value to the default. (Some parameters cannot be reset.)
—
DISPLAY [ / ]
Cursor [ / ]
(Parameter page)
Changes the page. (Page is displayed at the right of the LCD.)
—
[SHIFT]+[INST]
IReturn to the INSTRUMENT mode.
—
No function
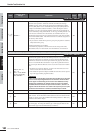
[WRITE]
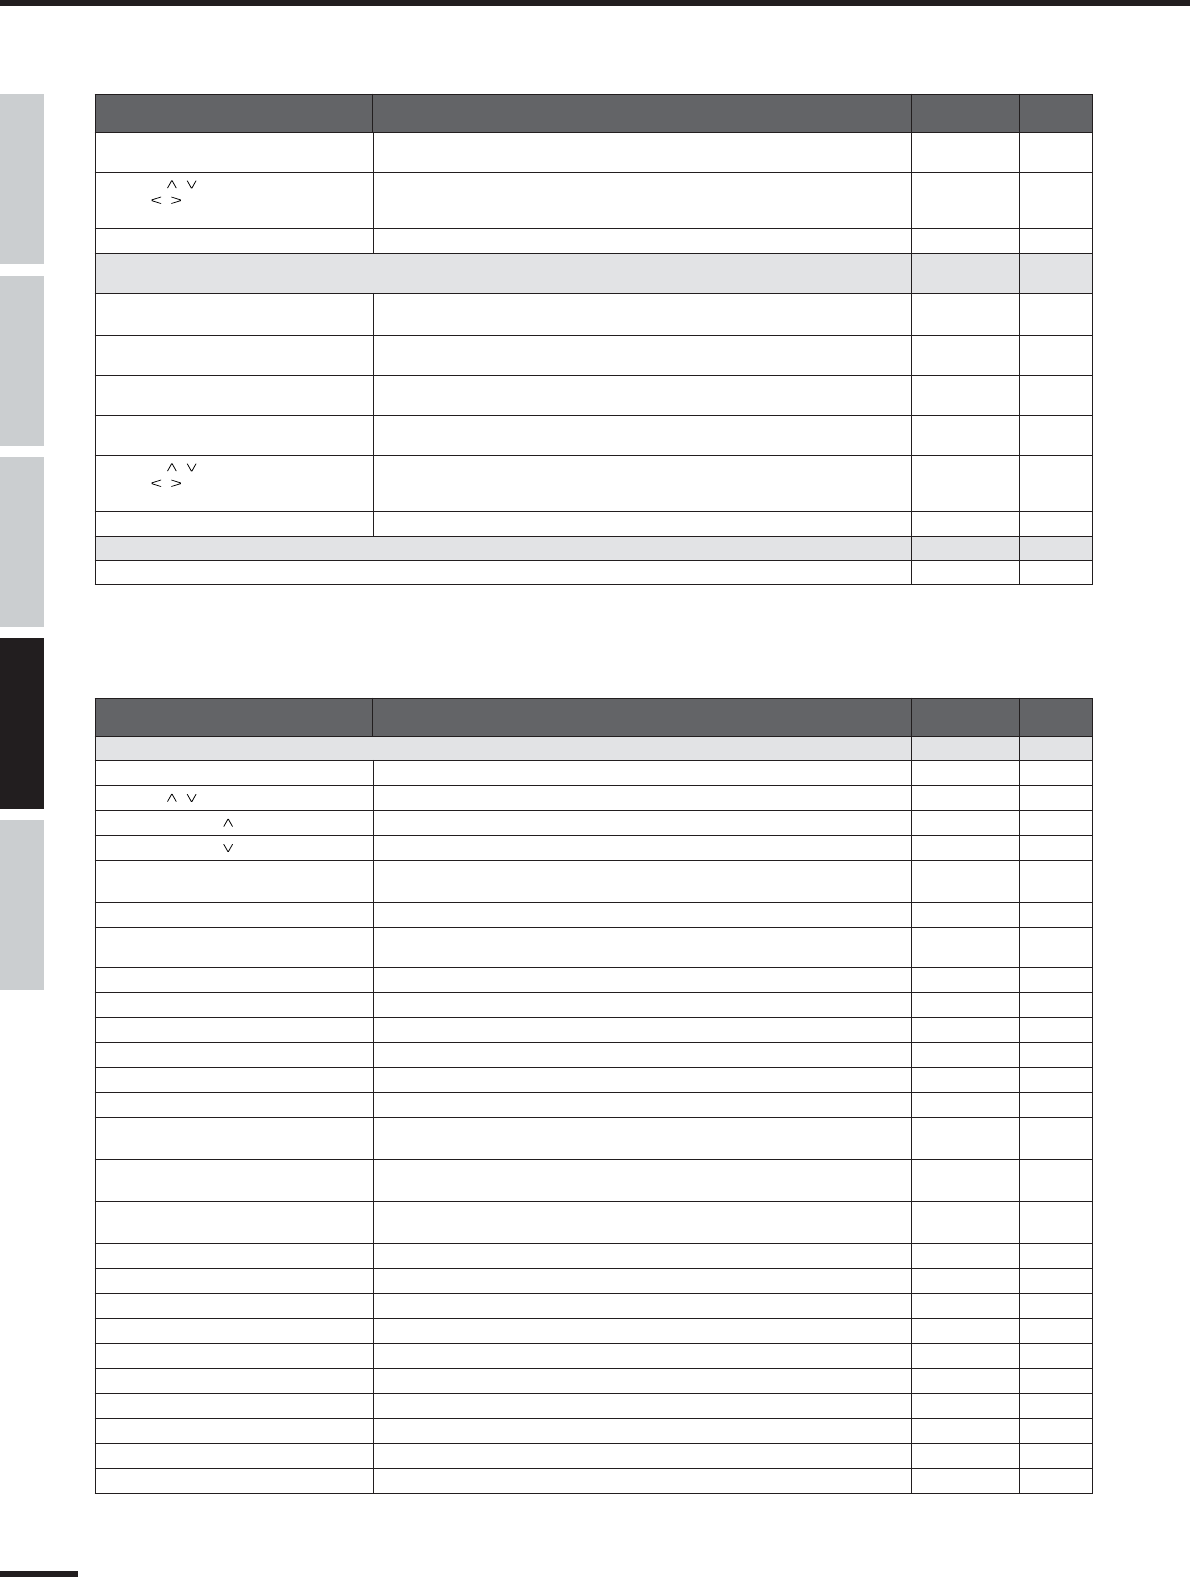
Button Function LED
Notes
(page 114)
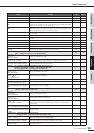
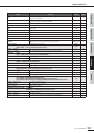
In all modes:
[NAME/VALUE]
Changes the indication of the parameter name and its value.
—
DISPLAY [ / ]
Calls up the next/previous page.
—
[SHIFT]+DISPLAY [ ]
Calls up the first page.
—
[SHIFT]+DISPLAY [ ]
Calls up the last page.
—
[SHIFT]+[REMOTE]
Enters the mode for Multi Part Editor Remote operation. Press [REMOTE] button to can-
cel the mode.
flashes *5
[SEL] (in normal status)
Selects a channel.
lights/goes out *2
[SEL] ([SEL] flashes)
Fader touch-out (page 15)
flashes ➝
goes out
[SEL] ([AUTO EDIT] lights)
Fader touch-in (page 15)
flashes
[ON] (in normal status)
Turns each channel off or on (mutes/unmutes the signal)
lights/goes out *2
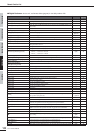
[SHIFT]+[ON] (in normal status)
Turns all the channels on.
lights *2, 12, 13
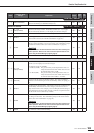
[ON] ([SOLO] lights)
Sets Solo for each channel to on or off.
lights/goes out *2
[SHIFT]+[ON] ([SOLO] lights)
Sets Solo for all channels to off,
lights/goes out *2, 12
[ON] ([REC RDY] lights)
Sets the REC RDY of each channel to on or off.
lights/goes out *2
[ON] ([AUTO R/W] lights)
Switches the automation status of the selected channel (only that channel) in order: Off,
Read and Read + Write.
lights/goes out *14
[SHIFT]+[ON] ([AUTO R/W] lights)
Switches the automation status of all channels in order: Off, Read, Read + Write, Write
(or Off, Write, Write + Read, Read).
lights/goes out *2, 14
[AUTO EDIT]
Changes the function of the [SEL] button to the touch-in function. This button flashes
during automation touch-in.
lights
[SOLO]
Changes the function of the [ON] button to the Solo function.
lights
[REC RDY]
Changes the function of the [ON] button to the REC RDY function.
lights
[AUTO R/W]
Changes the function of the [ON] button to the AUTO R/W function.
lights
BANK [</>]
Scrolls through the track indication every eight channels.
—
[SHIFT]+BANK [</>]
Scrolls through the track indication channel-by-channel.
—
[FLIP]
Exchanges the functions between the Channel Knobs and the Faders.
lights
[EDIT]
Opens the Edit window for the currently selected block (AUDIO/MIDI).
—
[LOOP]
Turns Loop on or off.
lights/goes out
[F1] – [F8]
[F1] – [F8] as defined in Cubase/Nuendo.
—
[SHIFT]+[F1]
Brings the Track View window to the front of the computer screen.
—
Button Function LED
Notes
(page 114)