


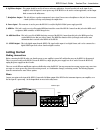
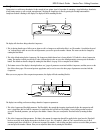
Powering the RP21D
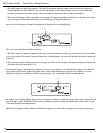
Once the audio connections have been made, connect the 4 pin connector of the power adapter to the power jack on the back of the RP21D
and the other end to an AC outlet. Begin to play your guitar while adjusting the Input Level on the back panel of the RP21D. The Input Level
should be adjusted so the clip LED lights occasionally on the strongest peaks of your signal.
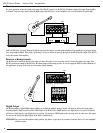
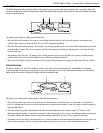
At this point, turn the Output Level of the RP21D all the way down (counterclockwise). Then turn the power to your amplifier(s) on. Set the
amp(s) to a clean setting and set the tone controls to a flat EQ response (on most amps, this would be 0 or 5 on the tone controls). Turn
the Output Level of the RP21D up to achieve the desired volume level.
About the RP21D
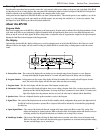
Program Mode
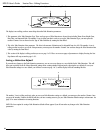
When you first apply power to the RP21D, it will power up in Program mode. Program mode is indicated when the Program button is lit and
is the mode used while you are performing. Using the footswitches while in Program mode allows you to access different Programs, turn
effects on and off, access the tuner, bypass all effects, change banks, or adjust the values of any parameters assigned to the expression pedal.
Rotating the Data Wheel selects Programs in the Program mode.
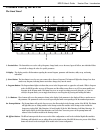
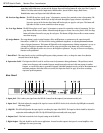
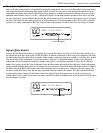
The Display
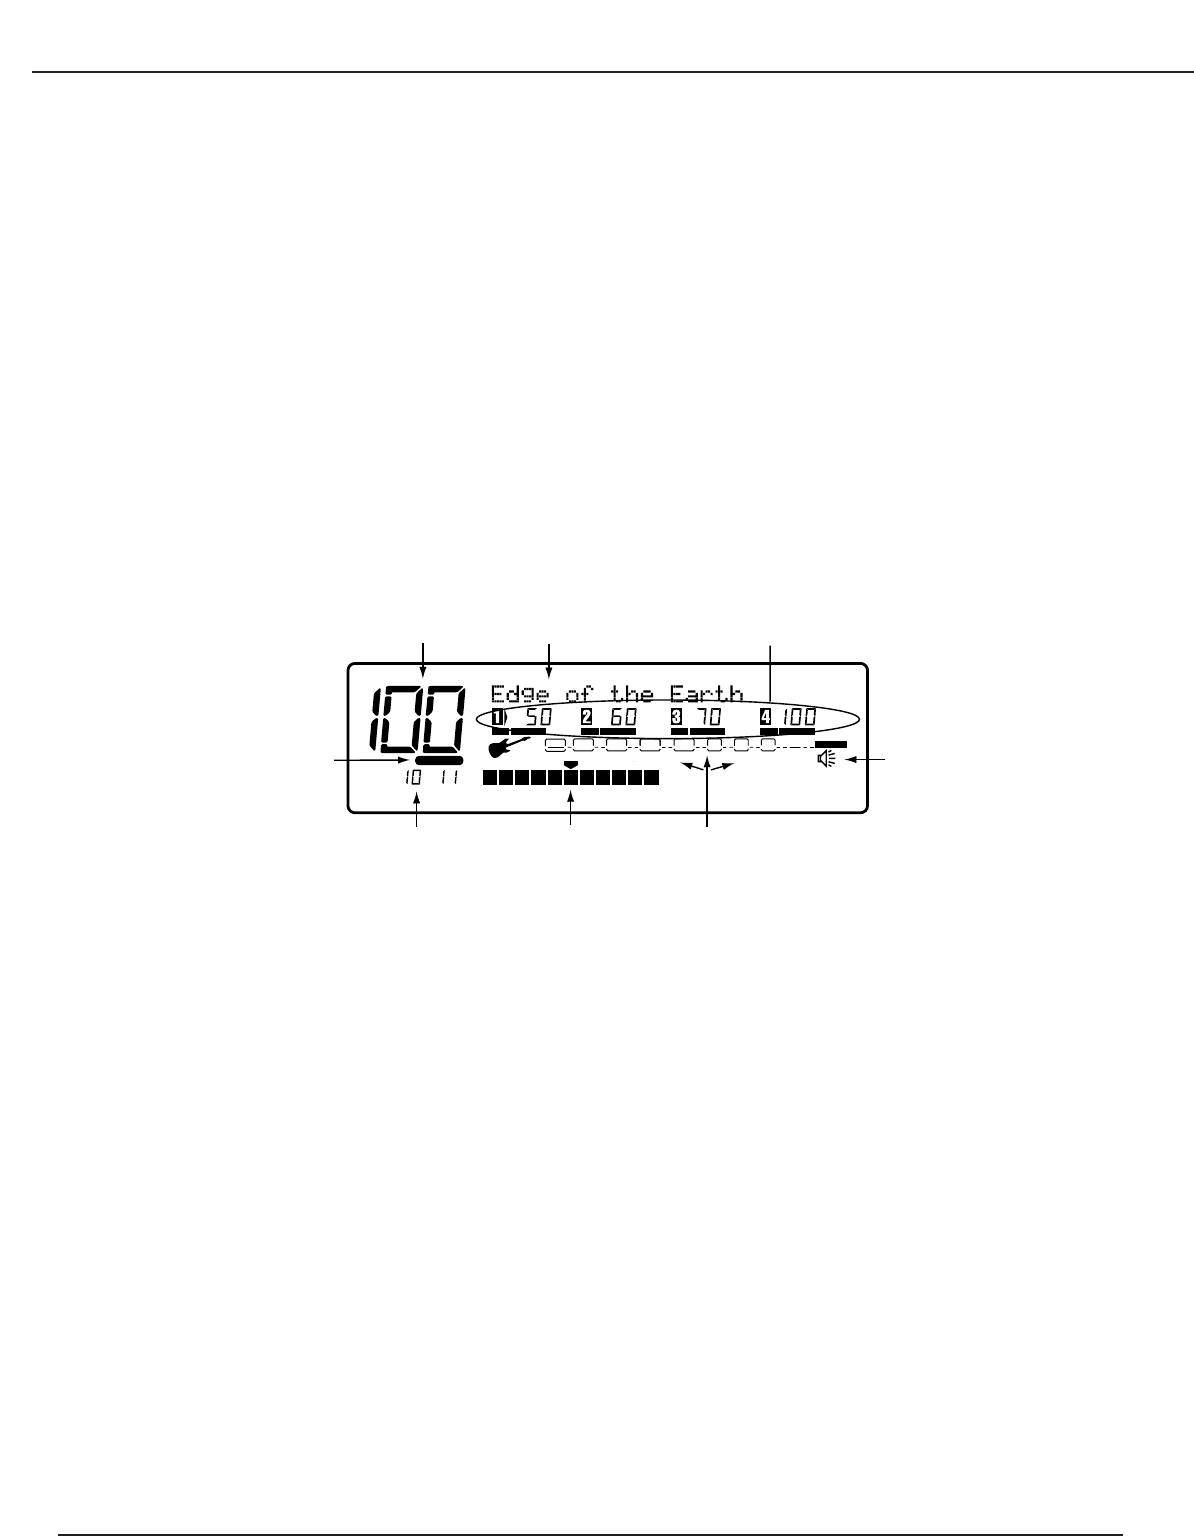
Understanding what the RP21D’s display is telling you is crucial to getting the most out of what the RP21D has to offer. There are several
different sections to the display, and each section is telling you what the RP21D is currently doing, or listing options to alter the current
sound.
A. Factory/User Icon - This section of the display tells you whether you are currently using a factory Program, or a user Program.
Pressing and holding the Program button for 2 seconds will switch between the factory and user Programs.
B. Program Number - In Program mode, this section of the display will show the number of the currently selected Program. In tuner
mode, this section of the display will show the name of the note that you are tuning.
C. Program Name - This line of the display will show the name of the Program currently active.
D. Parameter Values - This section of the display will appear when you are editing a Program. Each of the 4 sections represent an effect
parameter and the value of that parameter. Accessing any of these 4 parameters is done with the 1-4 buttons to the
right of the display. Once the parameter has been accessed, the value may be adjusted with the Data Wheel.
E. Speaker Icon - This icon is displayed when the speaker simulator is active in the Program.
F. Signal Flow - This section of the display shows the order of the effect modules and the configuration being used in the digital section of
the RP21D. Each box represents a separate effect. A bypassed effect will be indicated by a horizontal line going through
the effect box.
G. Input Signal/Tuner - This section of the display will show the strength of the input signal to the Effects section. This section of the
display also functions as a tuning indicator. While in the tuner mode, the Program number will show the note you
are tuning, and this line will provide indications as to whether you are sharp, flat, or in tune.
H. Bank/Page Number - This section of the display will show the Bank number that is currently active when you are in Program mode.
While in edit mode, this section will show how many pages of parameters are associated with a particular editing
function, and which page you are currently on.
USER
%kHz
msdB
CHANGEDLINK
%kHz
msdB
CHANGEDLINK
%kHz
msdB
%kHz
msdB
CHANGEDLINK CHANGEDLINK
PAGE OF
WAH
COMP
TUBE EQ
L/R OUTS
CLIP
#
b
GATE
BANK
A
B
C
D
E
FGH
7
RP21D User’s Guide Section One - Introduction