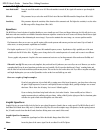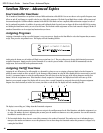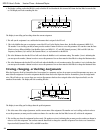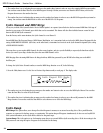
4. The Display is telling you that the RP21D is ready to link the FX Level but that the link is turned off. Rotate the Data Wheel to turn the link
on. The Display now looks something like this:
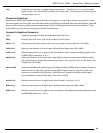
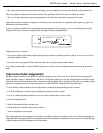
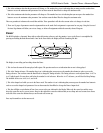
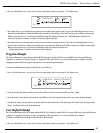
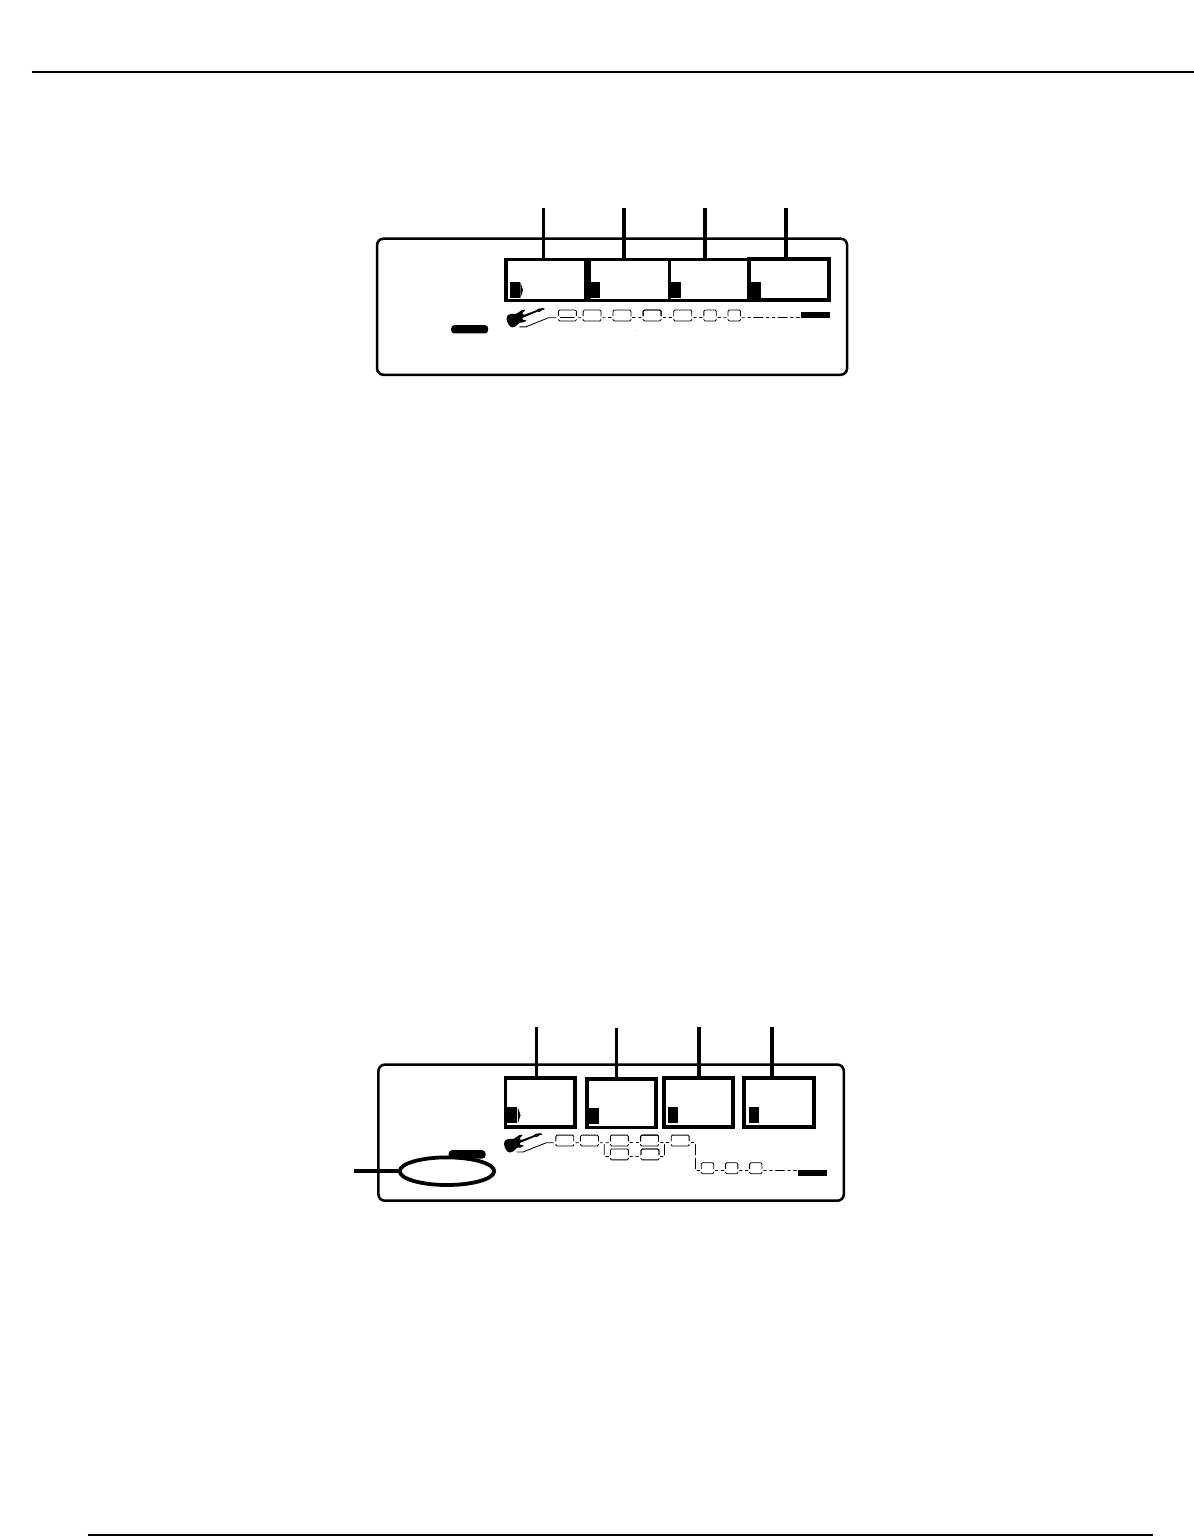
The Display is now telling you four things about the current assignment.
1. This tells you the assignment is on, and that the Parameter that is assigned is the FX Level.
2 . This is the Modifier that you are assigning to control the FX Level. In the Display shown above, the Modifer assignment is MIDI CC #1.
The number 2 icon is telling you that you must press the number 2 button in order to access this parameter. You can then rotate the Data
Wheel to select a different Modifier. Your Modifier choices are MIDI CC 1-127 and ChP (channel pressure), LFO1 and LFO2 (the Low
Frequency Oscillators), Dy1 and Dy2 (the Dynamic Filters), or any footswirtch on the RP21D.
3. This is the Minimum value that the FX Level will reach when the Modifier is at it’s minimum setting. The number 3 icon is indicating that
you must press the number 3 button in order to access this parameter. You can then rotate the Data Wheel to change the Minimum value.
4. This is the Maximum value that the FX Level will reach when the Modifier is at it’s maximum setting. The number 4 icon is indicating that
you must press the number 4 button in order to access this parameter. You can then rotate the Data Wheel to change the Maximum value.
Viewing, Changing, or Deleting Assignments
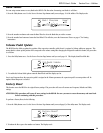
When the Expression Pedal or Footswitches have been assigned to a parameter and you do not want to control that parameter any more, you
must delete the assignment. To view the assignments that have been made to the Expression Pedal or Footswitches, press the Assign button
twice. This will take you to a screen where you can view all parameters that have been assigned either to the Expression Pedal, or to the
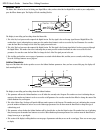
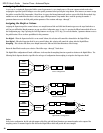
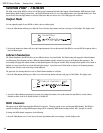
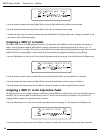
numbered Footswitches. The Display will look something like this:
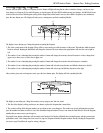
The Display is now telling you five things about the pedal assignments.
1. This is the name of the assigned parameter, and the current status of the assignment. The number one icon is telling you that in order to
access this parameter you must press the number one button. You can then rotate the Data Wheel to turn off, or delete the assignment.
2. This is telling you where the assignment has been made. The number two icon is indicating that you must press the number two button in
order to access this assignment. You can then rotate the Data Wheel to change the controller assignment. Your choices are Footswitches,
Expression Pedal, Dynamic Filters, LFO’s, and MIDI controllers.
TubeD FS # Min Max
4
FACTORY USER
%kHz
msdB
On
1
CHANGEDLINK
%kHz
msdB
2
CHANGEDLINK
%kHz
msdB
bypo
3
LINK
%kHz
msdB
On
4
LINK
PAGE
5
OF
19
COMP WAH TUBE EQ
L/R OUTS
DIGITAL
CLIP
#
b
GATE
SEAMLESS
BANK
EQDIST
12
2
F 6
3
5
4
FX:Lvl CC # Min[ ]Max
2
FACTORY USER
%kHz
msdB
On
1
CHANGEDLINK
%kHz
msdB
0
2
CHANGEDLINK
%kHz
msdB
OFF
3
CHANGEDLINK
%kHz
msdB
100
4
CHANGEDLINK
PAGE
5
OF
19
COMP WAH TUBE EQ
L/R OUTS
L/R OUTS
#
b
GATE
BANK
1234
52
RP21D User’s Guide Section Three - Advanced Topics


