90
MR-8HD Owner’s Manual (Data export to a personal computer)
By converting track data recorded on tracks 7/8 (which consists of an L/R pair of mono WAV
files) to a stereo WAV file, you can export the data to a personal computer.
The following describes how to convert data on tracks 7/8 (which may be bounced from other
tracks or simply recorded in stereo) to a stereo WAV file. See page 92 for details about how to
export a converted WAV file to a personal computer.
You can enable or disable the WAV file con-
version function by pressing the [7/8 > STE-
REO WAV FILE] key.
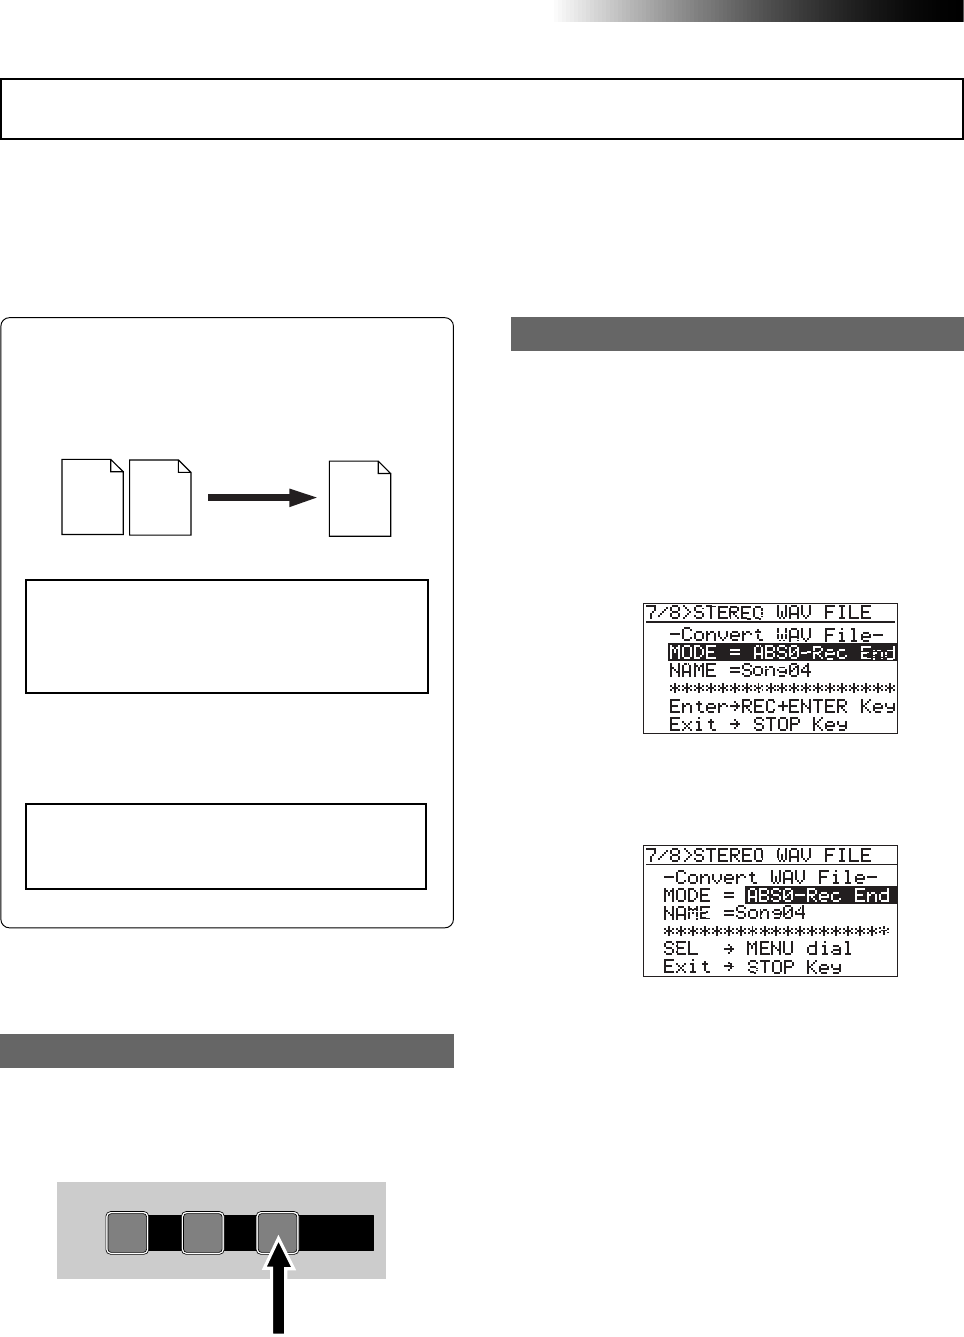
1) While the recorder is stopped, press the
[7/8 > STEREO WAV FILE] key to enable the file
conversion function.
The display shows the "7/8 > STEREO WAV
FILE" screen, on which "ABS0-Rec End" is
highlighted.
Each press of the [7/8 > STEREO WAV FILE]
key enables or disables the conversion func-
tion. The key lights when the conversion func-
tion is enabled.
[7/8 > STEREO WAV FILE] key
Track 7
(L ch)
Track 8
(R ch)
Stereo
(L, R)
Two mono WAV files recorded on tracks 7/8
are converted to a stereo WAV file as shown
below. (Note that only files recorded on tracks
7/8 can be converted to a stereo WAV file.)
You can convert all track data (from ABS ZERO
to REC END) or data of a specified part (be-
tween the LOCATE A and LOCATE B points).
The following assumes that the song whose
track data you want to convert is loaded.
<Note>:
If you want to convert a part of track
data, you have to set the LOCATE A and LO-
CATE B points in advance.
<Note>:
If you are going to make conversion
when no WAV data exists on tracks 7/8, the
error message ("Track 7/8 Empty!") appears
and the operation is canceled.
1-8 >
SONG
NEW
1-6 > 7/8
1-4 > 5/6 STEREO
WAV FILE
BOUNCE
7/8 >
ABC1 DEF2 GHI3
To convert all track data, select "ABS0-Rec End".
To convert a specified range, select "LOCATE
A - LOCATE B".
2) Press the [MENU/ENTER] knob.
"ABS0-Rec End" starts flashing, and you can
now select the conversion range between
"ABS0-Rec End" and "LOCATE A - LOCATE B".
3) Rotate the [MENU/ENTER] knob to select the
conversion range and press the [MENU/ENTER]
knob.
The selection is confirmed and the display
returns to the previous screen.
Enabling the file conversion
Procedure of file conversion
"NAME = *********" shows the name for the con-
verted file, and you can enter a desired name.
Initially, it shows the name of the source file,
therefore, if you do not change the name, the
same file name is given.
The following assumes that the file name is not
changed. For details about how to edit a name,
see "Editing a file name" on the next page.
When you convert data in the same song more
than once, you have to give a different name
for each converted file. See the <Note> on the
next page.
WAV file conversion
