7
9
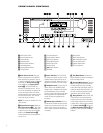
Tuner Band Selector: Pressing this
button will automatically switch the AVR
to the Tuner mode. Pressing it again will
switch between the AM and FM frequency
bands, holding it pressed for some sec-
onds will switch between stereo and
mono receiving and between automatic
and manual tuning mode (see page 31 for
more information on the tuner).
)
Preset Stations Selector: Press this
button to scroll up or down through the
list of stations that have been entered
into the preset memory (see page 31 for
more information on tuner programming).
!
Input Source Selector: Press this
button to change the input by scrolling
through the list of input sources.
@ Tuning Mode Selector: Press this
button to select Auto or Manual tuning.
When the button is pressed so that the
Auto Indicator M lights, the tuner will
search for the next station with an accept-
able signal when the
Tuning Selector
8t is pressed. When the button is
pressed so that
MANUAL appears in the
Main Information Display K, each
press of the
Tuning Selector 8t will
increase the frequency. This button may
also be used to switch between Stereo
and Mono modes for FM radio reception.
When weak reception is encountered,
press the button so that
MANUAL
appears in the Main Information
Display
K to switch to Mono reception.
Press it again to switch back to Stereo
mode. (See page 31 for more information
on using the tuner.)
#
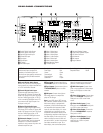
Video 3 Input Jacks: These audio/
video jacks may be used for temporary
connection to video games or portable
audio/video products such as camcorders
and portable audio players.
$
Volume Control: Turn this knob
clockwise to increase the volume, coun-
terclockwise to decrease the volume. If
the AVR is muted, adjusting the volume
control will automatically release the unit
from the silenced condition.
%
‹/› Selector Buttons: When you
are establishing the AVR480’s configuration
settings, use these buttons to select from
the choices available, as shown in the
Main Information Display
(
.
^
Set Button: When making choices
during the setup and configuration
process, press this button to enter the
desired setting as shown in the
Main
Information Display
(
into the
AVR480’s memory. The set button may also
be used to change the display brightness
(see page 30).
&
Delay Button: Press this button to
begin the sequence of steps required to
enter delay time settings (see page 31 for
more information on delay times).
*
Digital Input Selector: When play-
ing a source that has a digital output,
press this button to select between the
Optical
2
and Coaxial
1
Digital
inputs (see pages 26–27 for more infor-
mation on digital audio).
(
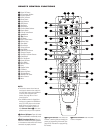
Main Information Display: This
display delivers messages and status
indications to help you operate the
receiver (see page 8 for a complete expla-
nation of the Information Display).
Ó
Channel Select Button: Press this
button to begin the process of trimming
the channel output levels using an exter-
nal audio source (for more information
on output level trim adjustment, see
page 30).
Ô
Speaker Select Button: Press this
button to begin the process of configuring
the speakers that are used in your listen-
ing room (see page 19 for more informa-
tion on setup and configuration).
Test Tone Selector: Press this but-
ton to begin the process of adjusting the
channel output levels using the internal
test tone as a reference (for more infor-
mation on output level adjustment, see
page 22).


