1
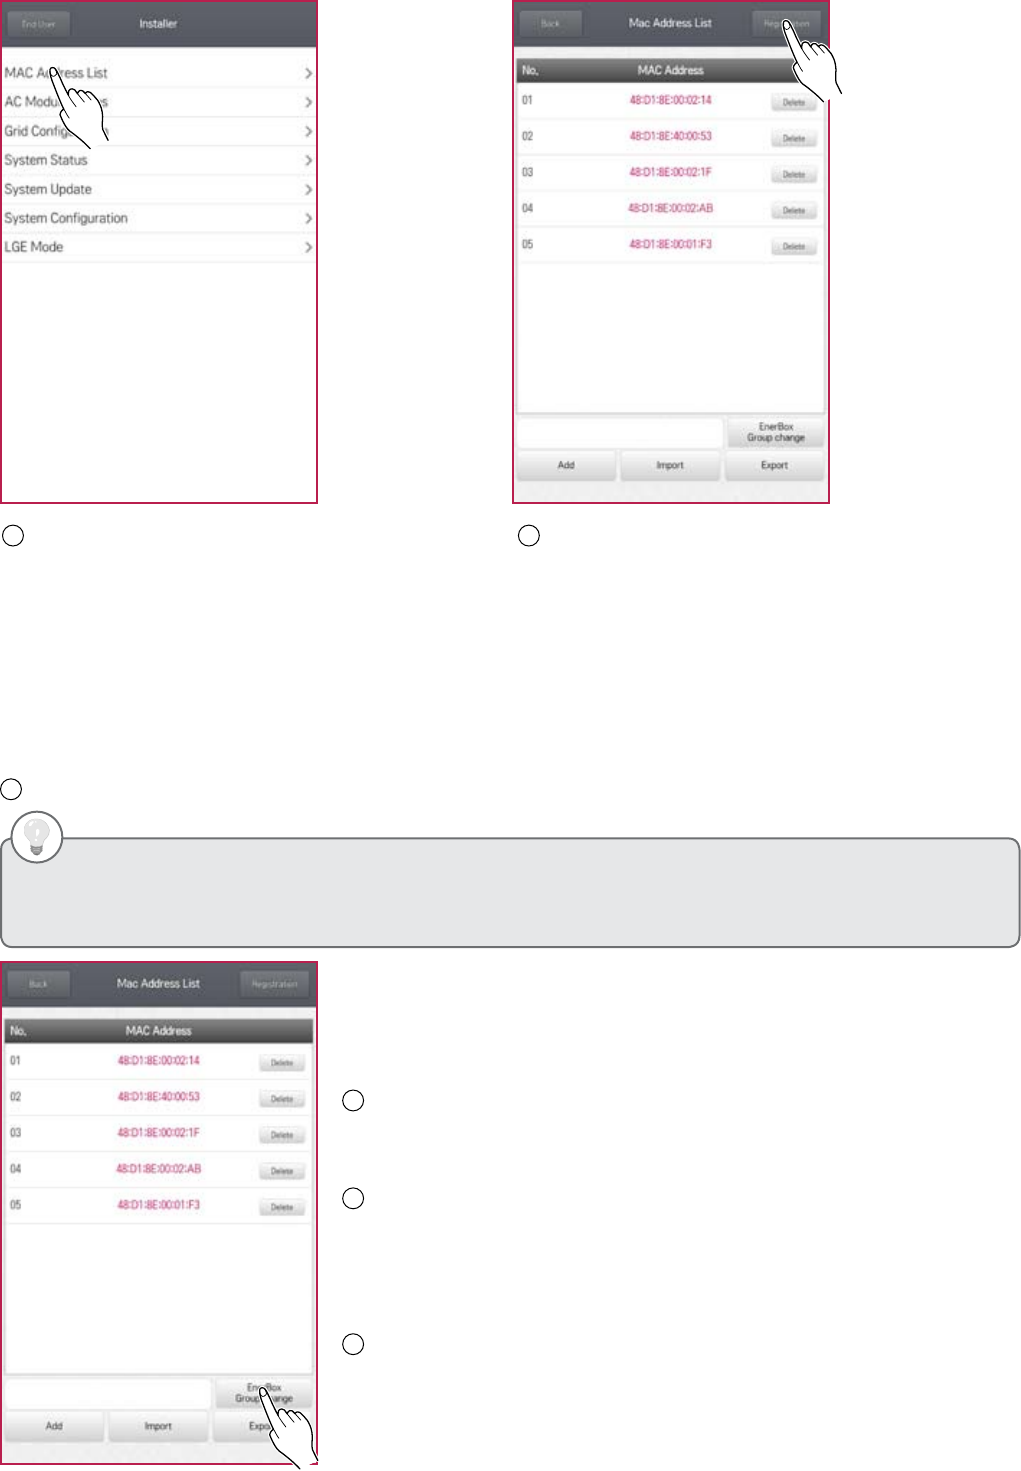
After connecting the AC module system at the grid,
press MAC Address List. Within 15 minutes,
check that all installed AC modules are displayed.
After 15 minutes, the AC modules may enter sleep
mode.
2
If all are displayed, press the Registration button.
Otherwise, press Back button. After waiting 2~3
minutes, check that all modules are synced.
Step 3. Checking installed AC modules
※ The PLC LED will turn to orange during updates. Do not press the Registration button. Allow about 5 seconds
per module for update.
※ If modules are still not detected, turn off then turn back on the circuit breaker for AC module system to wake up
modules in sleep mode. If this does not work, try plugging in the PLC cable to a different outlet near the
distribution panel.
3
Go to the next step and check that all modules have been registered.
Note 1.
Adding AC modules:
If you pressed Registration button before listing all AC modules, or you
need to add the unlisted AC module, follow steps below.
1
Enter LGElectronics (initial password) on the blank box in figure and
press EnerBox Group chage button to return the gateway into the initial
condition.
Check PLC LED. It should turn red.
2
Press the Back button. Wait for a minute and check that the PLC LED
has changed green. Then, press MAC Address List and check if the
additional AC modules have been listed.
※ If you can’t check the additional AC modules, connect the gateway to
another outlet near the distribution panel and search for the unlisted AC
modules.
3
Press Registration button to finish.
• Hitting the Registration button will configure the AC module system group that is visible to that gateway only. Any AC
modules not registered to the group need to be re-registered after returning the gateway into the initial condition.
• Add, Import, Export buttons can be used when replacing the gateway.
LGElectronics
LGElectronics
