


13
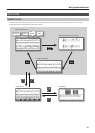
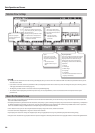
Panel Descriptions
12
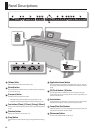
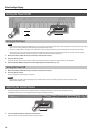
[Play/Stop] ( ) button
This button starts or stops song playback or recording.
• Start or stop playback of an internal song or a performance you’ve
recorded (p. 39).
• Start or stop recording (p. 47 – p. 51).
13
[Rec] ( ) button
This button lets you record your own keyboard performance (p. 46).
14
[Bwd] ( ) button
Rewinds the song.
15
[Fwd] ( ) button
Fast-forwards the song.
16
Track buttons
([Accomp], [User], [Left], [Right])
These buttons let you play back individual tracks of a song, or record
your playing on the selected track.
• “Playing Back Individual Tracks” (p. 40)
• “Recording Each Hand Separately” (p. 49)
• “Saving User Programs” (p. 53)
By holding down the [Right] button for several seconds, you can
disable all button operations (Panel Lock) (p. 37).
17
[Power] button
Turns the power on/o (p. 16).
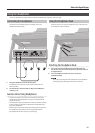
18
Display
Notation and various settings are shown here (p. 19).
19
Phones jacks
Here you can connect headphones (p. 17).
20
Input jacks (L/Mono, R)
You can connect your digital audio player here, and listen to it on the
HPi-6F (p. 64).
21
MIDI connectors (Out, In)
You can connect these to external MIDI devices to transfer
performance data (p. 65).
22
USB connector
You can connect this to your computer for transferring performance
data (p. 67).
23
Pedals
You can use these pedals while performing.
• Use the pedals while playing the piano (p. 26).
• Assign various functions to the pedals (p. 58).
24
External memory connector
Here you can connect USB memory or a CD drive, and use them to
save or recall songs.
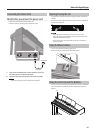
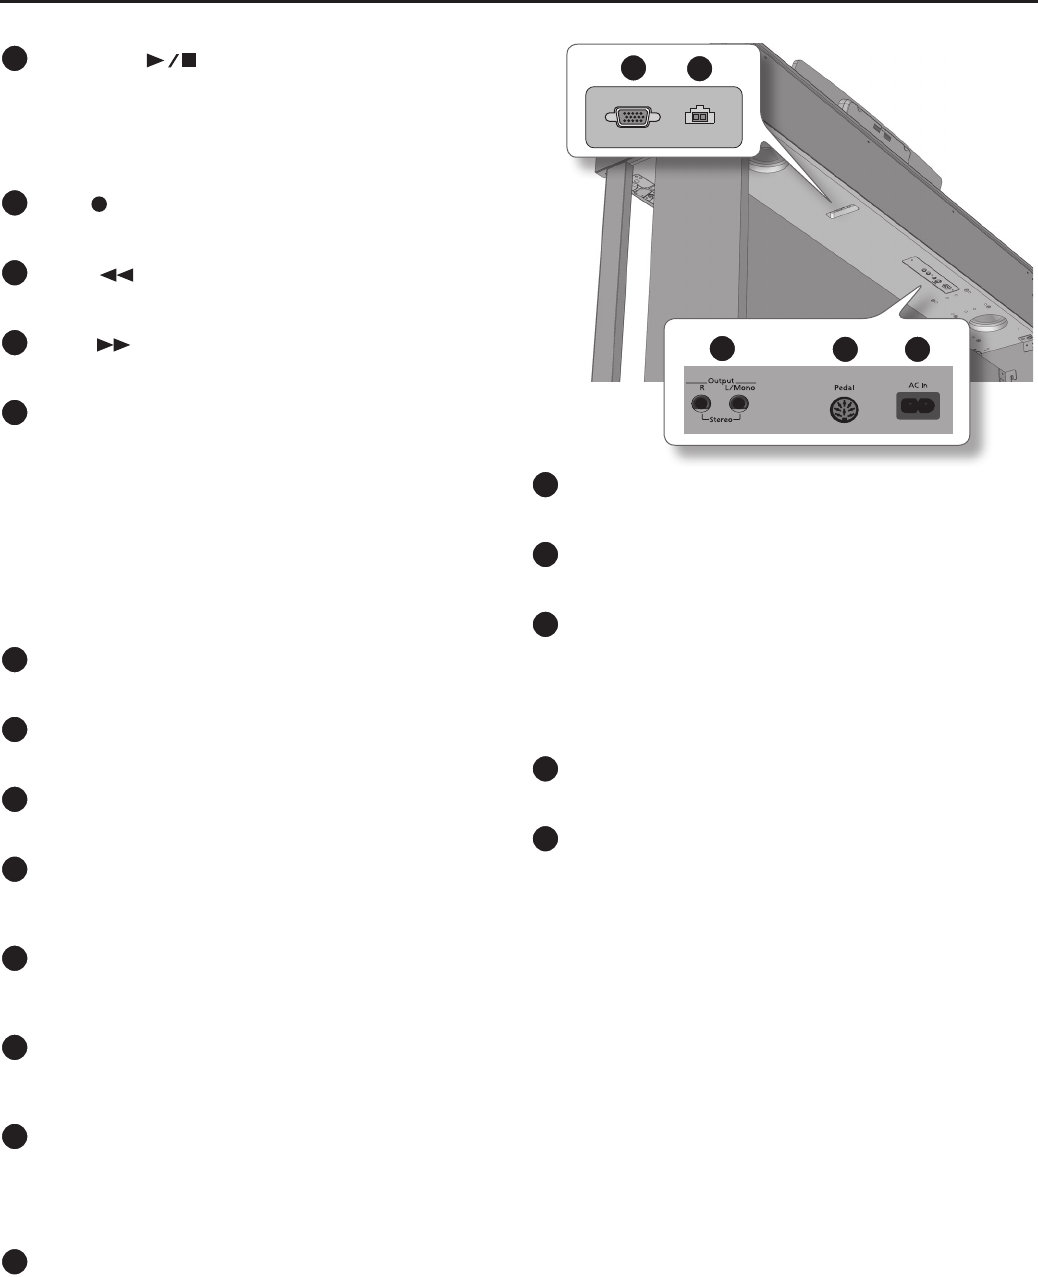
Analog RGB
Display Out
Backlight
25
26
27
28 29
25
Analog RGB connector
Connect the analog RGB cable of the music rest to this connector (p. 14).
26
Backlight connector
Connect the backlight cable of the music rest to this connector (p. 14).
27
Output jacks (L/Mono, R)
These jacks can output the HPi-6F’s sound to an external sound system
(p. 64).
• You can listen to the HPi-6F’s sound through amplied speakers.
• You can output the HPi-6F’s sound to your audio system or mixer.
28
Pedal connector
Connect the pedal cord of the dedicated stand to this connector (p. 14).
29
AC In (AC Connector)
Connect the included power cord here (p. 15).