


31
Manual Punch-in
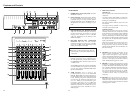
8. Press the AUTO PUNCH switch. "RHSL" will turn off and "AUTO"
will start blinking in the display.
9. Press PLAY.
What you have anticipated in REHEARSAL will automatically
occur in sequence: preroll, punch in, punch out, postroll, rewind,
and stop.
"AUTO" will be solidly displayed when the 424 MKIII punches out
of record.
10. Press PLAY (or the optional footswitch). The tape will play the
entire length of insert and rewind to the START point.
After completing auto review if you want to re-do the auto
punch-in and out using the same settings, press the AUTO
PUNCH switch once more and "AUTO", which was lit steadily,
starts flashing as before, showing that the auto punch-in process
will restart when pressing PLAY.
● To Disable AUTO PUNCH Mode, press CLEAR. The memory
points will be cleared and "AUTO" will turn off in the display.
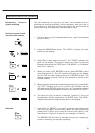
The 424 MKIII lets you manually punch in, too. There are 2 ways to
initiate the punch-in recording. The first is with the transport RECORD
button, and the second is with the optional footswitch.
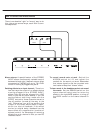
We always use track 2 as the punch-in track in the following example.
Perform the "Preliminary" on page 28, if you haven't yet done so.
1. Check to see that the REC 2 indicator is blinking showing track 2
is in Rec Ready mode. Locate the tape a little behind the expected
punch-in point. Then press PLAY.
2. When you reach JUST BEFORE the error, press RECORD. The
REC 2 indicator that was blinking will be solidly displayed and
track 2 enters Record mode.
3. To punch-out of record, press PLAY. The REC 2 indicator that was
solidly displayed again blinks to indicate that recording is over.
4. To stop the tape, press STOP.
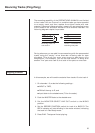
Auto Review
Punching-in/out with
RECORD