


Chapter 19 Master Class 2 — Advanced Music Production
104
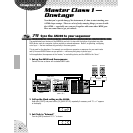
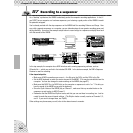
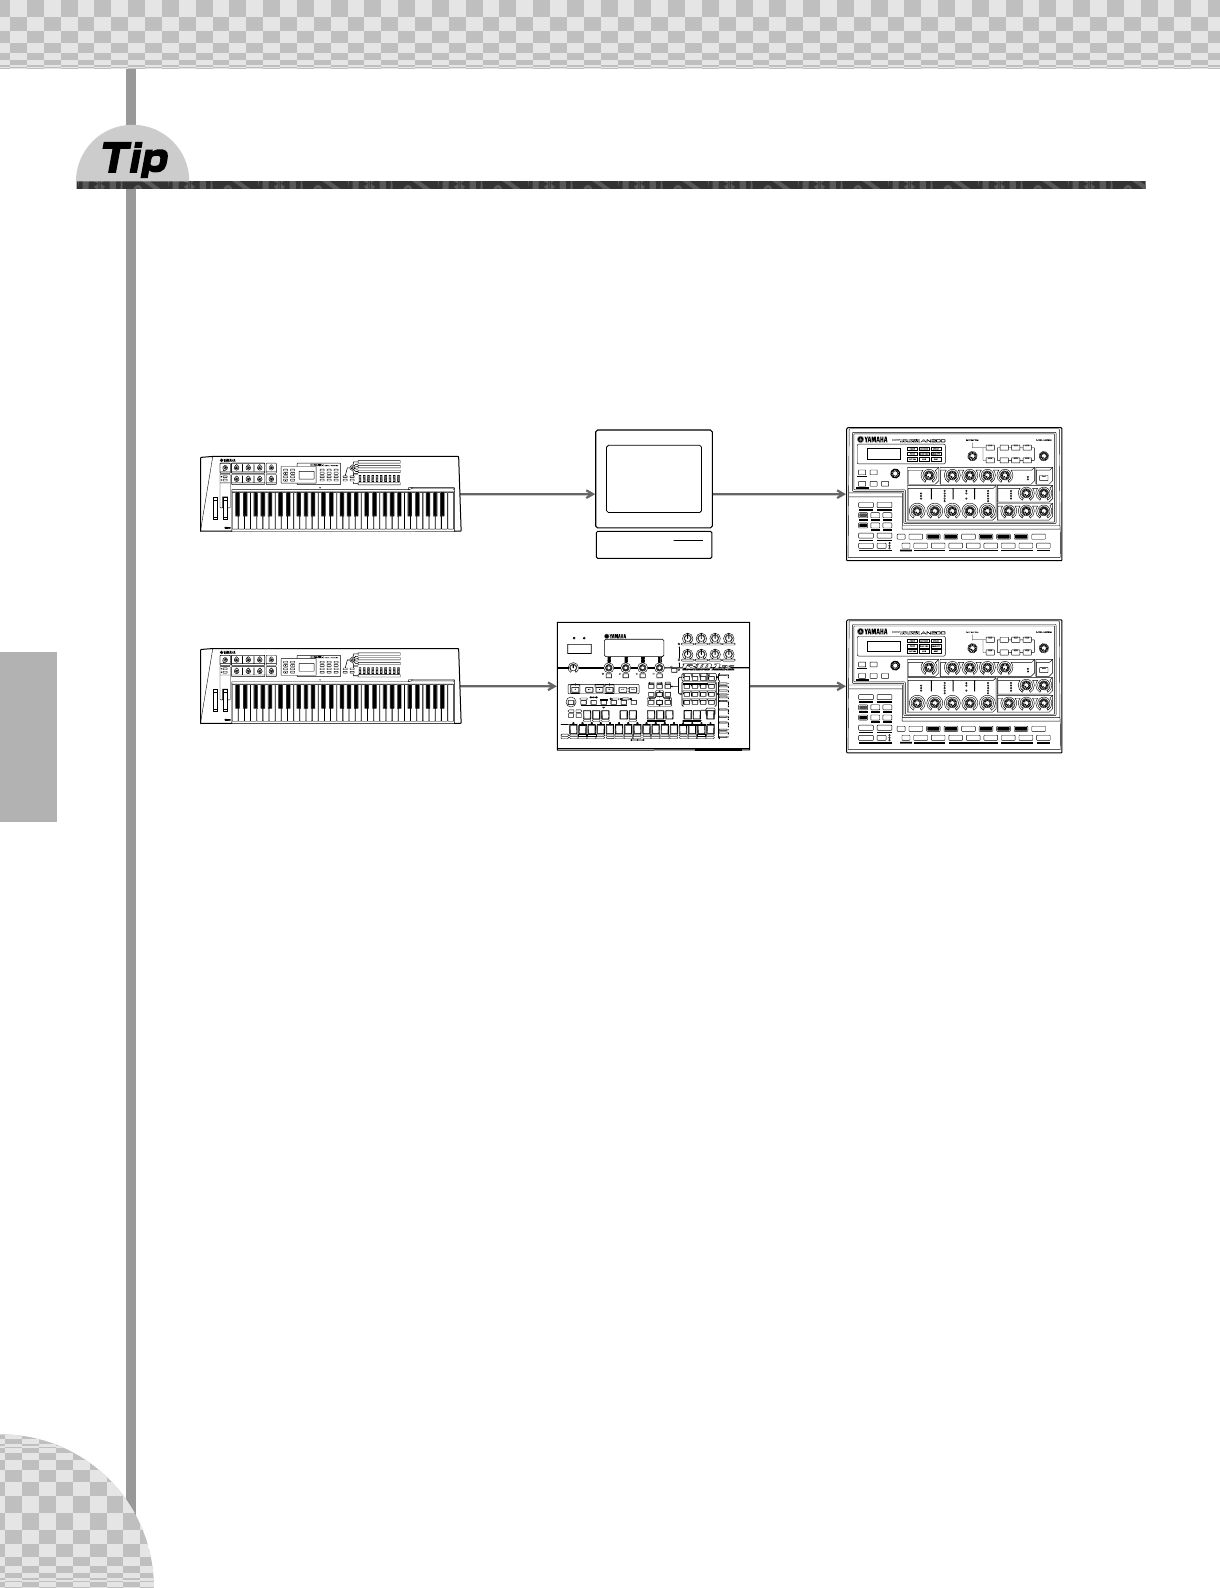
87 Recording to a sequencer
As a “desktop” synthesizer, the AN200 is absolutely perfect for computer recording applications. In fact, if
you DON’T have a computer or a hardware sequencer, you’re leaving a good portion of the AN200’s incredi-
ble potential untapped.
You’ve already worked with the step sequencer on the AN200 itself for recording Patterns and Songs. How-
ever, with a separate sequencer or a computer, you can take advantage of even greater recording power and
editing flexibility. Use one of the example setups below to record songs to a sequencer and play them back
with the sounds of the AN200.
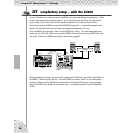
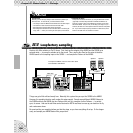
In the top example, the computer has a MIDI interface and is running sequencing software, such as
XGworks lite — which you can find in the included CD-ROM. In the bottom example, the RM1x Sequence
Remixer is used for recording.
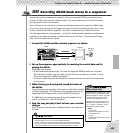
A few important points:
• Make sure all MIDI connections are correct — the INs go to the OUTs, and the OUTs to the INs.
• Set the MIDI keyboard to match the receive channel of the AN200. (This may be controllable from the
computer. You can also change the receive setting on the AN200; see page 97.)
• Make sure that MIDI Thru (or MIDI Echo) on the computer or sequencer is set to “on.” This lets you
hear the sound of the AN200 as you play the keyboard.
• Since the Synth Voices of the AN200 play on Channel 1, make sure that any recorded tracks on the
sequencer are set to play via MIDI Channel 1.
• Remember that the AN200 has Rhythm tracks, and that you can use these in recording, too. Just be
careful to make the correct channel settings. (The Rhythm tracks normally receive on Channels 2, 3,
and 4. If you want to change these, see Tip 80.)
Other settings may be necessary as well; refer to the relevant owner’s manuals.
MIDI
IN
MIDI
OUT
MIDI
IN
MIDI
OUT
MIDI
IN
MIDI
OUT
MIDI
IN
MIDI
OUT
MIDI keyboard
Computer
with MIDI interface
AN200
MIDI keyboard
RM1x AN200