


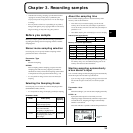

34
Chapter 2. Using the internal effects
* You can have any one effect turned on at a given
time. Multiple effects cannot be on simultaneously.
If you do want to use multiple effects on a sample, or if you
need to have a different effect applied to each individual effect,
then use “resampling.” Resampling allows you to use a sample
that has effects added to it as a new sample. For more detailed
information, refer to “Re-sampling samples (Resampling)” (p.
42).
* The effect settings are not remembered when the power is
turned off.
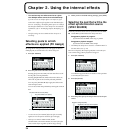
Selecting pads to which
effects are applied (FX Assign)
By using the FX Assign function you can apply an effect to
multiple pads, or turn the effect on/off for each pad.
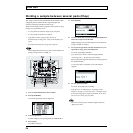
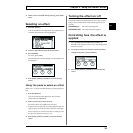
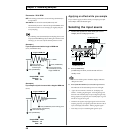
1. Press [FX ASSIGN].
fig.02-01
2. Press the pads to turn the effect on/off.
Pressing [F1] (ALL ON/OFF) will turn the effect on/off
for the pads of all 32 pad banks.
Pressing [F2] (BANK ON/OFF) will turn the effect on/
off for the 16 pads of the currently selected pad bank.
You can press [EXT SOURCE] to apply the effect to the
external input sound.
You can also switch the pad bank by turning the VALUE
dial.
fig.02-02
* You can also use [FX ASSIGN] before the effect is actually
applied, to select the pads to which the effect will apply.
* When you use VINYL SIMULATOR, NOISE
GENERATOR, or RADIO TUNING, the sound of the effect
(noise) will be output regardless of the FX assign settings.
3. When you have finished making settings, press [EXIT].
Selecting the pad that will be the
effect synchronization source
(SYNC SOURCE)
The delay and slicer effects can be synchronized to the BPM.
● About BPM synchronization for delay and slicer
Song/pattern playback in progress:
Synchronized to the BPM of the song or pattern
Song/pattern playback stopped:
Synchronized to the BPM of the sample
* The BPM of the sample can be viewed in “SAMPLE BPM” in
the Wave Edit screen. (p. 44)
Here we will specify the sample (pad) that is to be the sync
source while song/pattern playback is stopped.
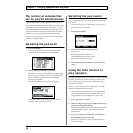
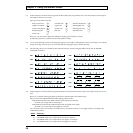
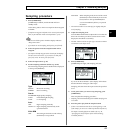
1. Press [FX ASSIGN].
fig.02-01
An underline appears below the number of the pad that
is currently the sync source.
2. Press [F3] (SYNC).
fig.02-03
3. Press the pad to specify the sample that is to be the sync
source.
fig.02-04
No sample is assigned (dotted line)
The effect will be used (black)
The effect will not be used (white)
No sample is assigned (dotted line)
Specified as the sync source (black)
Sample is assigned (white)