


53
Chapter 6. Applying special processing to a sample
6
6
Never turn off the power while the display indicates
“Keep Power On!”
Making fine adjustments to the
dividing points
1. In step 5 of the “Chop” procedure (p. 51), press [F3]
(EDIT).
The sample waveform will be displayed.
2. Use the VALUE dial to move to the dividing point
whose location you want to adjust.
You can also press a pad to move to the dividing point
whose location you want to adjust.
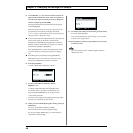
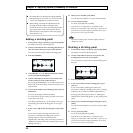
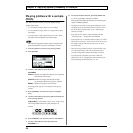
3. Press [F1] (ADJUST).
fig.06-102
4. Use the VALUE dial to move the wave pointer to the
dividing point whose location you want to adjust.
You can use CURSOR [←][→] to move the screen.
By pressing [F3] (PREVIEW) you can listen to the sound
at the current location of the wave pointer.
5. To finalize the edited location of the dividing point,
press [F1] (EXECUTE).
To cancel, press [F2] (CANCEL) or [EXIT].
* It is not possible to set a dividing point in a way that would
create a sample shorter than 70 ms.
6. If you want to make additional fine adjustments to the
dividing point, repeat steps 2–5.
If you want to add another dividing point, follow the
procedure in “Adding a dividing point” (p. 52), starting
with step 2. If you want to delete a dividing point, follow
the procedure in “Deleting a dividing point” (p. 52),
starting with step 2.
7. When you have finished adjusting the location of the
dividing points, press [EXIT].
You will be asked whether you want to save the divided
samples.
8. To save, press [F1] (YES).
To cancel, press [F2] (NO) or [EXIT].
* If pad banks 13–14 (Chop banks; p. 29) already contain
samples, you will be asked “OK to Overwrite?” If you are sure
you want to overwrite the samples of pad banks 13–14, press
[F1] (YES). To cancel, press [F2] (NO).
Never turn off the power while the display indicates
“Keep Power On!”