


Basic functions
18
Since the “DB Preset's Perc” parameter is set inde-
pendently for each program, you will have to check
each program to see whether percussion can be used
for that program.
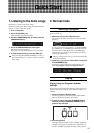
3. Press the [EDIT] key.
You will enter Normal Edit mode.
4. Press the PROGRAM [2] key, and then press the
[®] key twice.
The “DB Preset's Perc” parameter will appear.
5. Press the [-] key once to change the setting to Ena
(Enable).
6. Press the [EXIT] key to return to Normal mode.
7. Now you can assign the PERCUSSION section to
the upper keyboard.
EX mode
Regardless of the settings of the DRAWBAR SELECT
section, you can also use the front panel PERCUSSION
SECTION keys to add percussion to the upper keyboard.
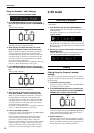
1. In the PERCUSSION section, press the [ON] key.
The key LED will light. The PERCUSSION effect is
now on.
2. Press the [FAST] key.
When the key LED is lit, the percussion will decay
more quickly. When the key LED is dark, the percus-
sion will decay more slowly.
3. Press the [SOFT] key.
The volume of the percussion will decrease when the
key LED is lit, and will return to normal when the key
LED goes dark.
The values for these percussion controls can be
accessed in EX Edit mode Group 3, and may be stored
independently for each program.
For these parameters, you can specify the following.
• The volume for Soft and Normal settings
• The decay speed for Fast and Slow settings
EX Percussion in Drawbar 2
If the upper DRAWBAR SELECT section [DRAWBAR 2]
key is selected, the percussion can be adjusted by the
front panel Drawbar 2 bars as well as by the front panel
PERCUSSION section keys.
EX Percussion (the five right bars of Drawbar 2) controls
the percussion levels assigned to these bars. For details,
refer to “Using the Drawbar 1 and 2 settings” (p.13).
2-2/3': 2-2/3' or 4' (depending on the setting of the
PERCUSSION section [3rd] key)
2': 16'
1-3/5': 5-1/3'
1-1/3': The footage assigned to EX Drawbar 16'
1': The footage assigned to EX Drawbar 5-1/3'
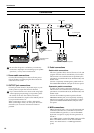
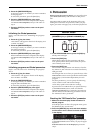
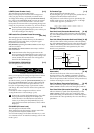
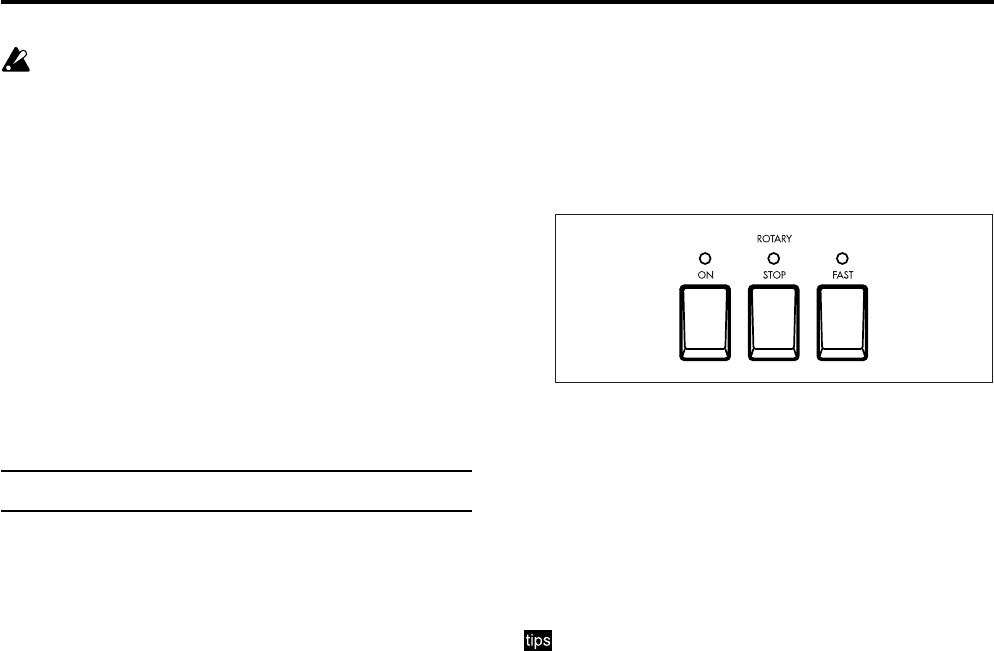
5. Rotary
The ROTARY Speaker section replicates the sound of the
classic rotating drum and horn speaker system associated
with the tone wheel organ. Controls are available to
simulate different amplification and microphone place-
ment.
1. In the front panel ROTARY section, press the [ON]
key.
The key LED will light.
If when you press the ROTARY section [ON] key, the
LED blinks three times and then goes dark, the
program's “Amp Type” parameter (Group 4 of
Normal Edit mode or EX Edit mode) has been set to
Pre Amp. With this setting, the rotary speaker effect
cannot be obtained. Either select another program, or
change the setting of the “Amp Type” parameter.
Even if the “Amp Type” parameter is set to Pre Amp,
you can select the ROTARY section [STOP] key and
[FAST] key. We recommend that you use the [STOP]
key and [FAST] key to pre-select the settings you
want for the next time you select a Type 1 or Type 2
program.
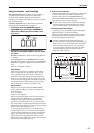
2. Use the [FAST] key and [STOP] key to control the
rotation of the rotary speaker.
To switch between fast and slow, make the [STOP] key
LED go dark, and operate the [FAST] key.
When you press the [FAST] key to make the LED light,
the rotary speaker will turn rapidly. When you make
the LED go dark, the rotary speaker will turn slowly.
To switch between fast and stopped, make the [STOP]
key LED light, and operate the [FAST] key.
When you press the [FAST] key to make the LED light,
the rotary speaker will turn rapidly. When you make
the LED go dark, the rotary speaker will stop turning.
To switch between slow and stopped, make the [FAST]
key LED go dark, and operate the [STOP] key.
When you press the [STOP] key to make the LED light,
the rotary speaker will stop turning. When you make the
LED go dark, the rotary speaker will turn slowly.
Rotary speaker settings are made in Group 6 of
Normal Edit mode or EX Edit mode, and are saved as
part of each program.
The following rotary speaker parameters can be
adjusted.
•Volume balance between the horn and rotor of the
rotary speaker
• Slow and fast rotational speeds of the horn and
rotor
•Transition time from slow to fast, and from fast to
slow, for the horn and rotor
•Time from when the rotation of the horn and rotor is
stopped until it actually comes to a stop, and the
time from when rotation is started until it reaches
the specified speed
• The distances from the horn and rotor to the mic
• The spread of the sound from the horn and rotor