


Basic functions
20
4. Press the [WRITE/ENTER] key.
When the data has been written, the display will
indicate Write Completed.
Writing the Global parameters
Settings that affect all programs in common, such as MIDI
settings, are made in Global mode.
When you turn on the power, the Global mode data will
be called into the internal Global mode memory area.
When you edit a parameter in Global mode, the data in
this memory area will change.
If you want the edited data to be saved in internal
memory, you must write it.
If you turn off the power before writing the Global
parameters, the edited data in the memory area will
be lost. If this occurs, the data prior to your editing
will be recalled the next time the power is turned on.
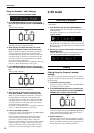
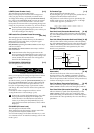
Writing procedure
1. Make sure that you are in Global mode, and that
the Enter icon is not displayed. Then press the
[WRITE/ENTER] key.
The left side of the display will indicate WRITE.
GLOBAL.
At this time you can press the [EDIT] key to write
program data. To return to the writing the Global
parameters, press the [GLOBAL] key.
2. Press the [WRITE/ENTER] key.
A message will ask you whether it is OK to write.
If you decide to cancel, press the [EXIT] key.
3. Press the [WRITE/ENTER] key.
When the data has been written, the display will
indicate Write Completed.
MIDI data dump
The programs and global settings in internal memory can
be transmitted as MIDI exclusive data, and saved on a
connected external device such as a data filer. For details,
refer to “MIDI data dump” (p.37).
8. Editing
You can edit the tone or name of the selected program.
When editing a program, it is a good idea to start by
selecting the program that is closest to what you have in
mind, and make your changes from there.
This section explains some simple ways to edit.
If you select another program or turn off the power
before writing your edited settings, the changes will
be lost. For details, refer to “Writing a program”
(p.19).
Editing the sound
The BX-3 has several parameters that simulate the sound
of the a tone wheel organ, and these can be set indepen-
dently for each program.
As an example, here's how to edit the parameters of
group 1.
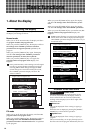
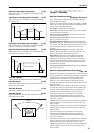
1. Press the [EDIT] key to enter either Normal Edit
mode or EX Edit mode.
2. Press the PROGRAM [1] key, and then press the
[®] key once to access the “Wheel Type” param-
eter.
This selects the type of tone wheel.
The tone wheel is the mechanism that produces the
pitches used to create the sound.
3. Use the [-] [+] keys to select the desired setting.
Vintage includes leakage noise. This is noise caused
by signal leakage from the tone wheel, and is a
characteristic part of the sound of a tone wheel organ.
Clean contains no leakage noise.
4. Press the [®] key once to access the “DB
LevelCurve” parameter, and use the [-] [+] keys to
adjust the setting.
This adjusts the tone of the drawbars.
Bright produces a brighter sound as you play higher
on the keyboard, and Mellow produces a more
mellow sound in the upper octaves.
5. Press the [®] key once to access the “Over Tone
Level” parameter, and use the [-] [+] keys to adjust
the setting.
This parameter adjusts the overtone level of the tone
wheel. Higher settings will produce a greater amount
of overtones.
6. Press the [®] key once to access the “Leakage
Level” parameter, and use the [-] [+] keys to adjust
the setting.
This adjusts the leakage noise. Higher settings will
increase the volume of the leakage noise.
7. Press the [®] key once to access the “Noise
Level” parameter, and use the [-] [+] keys to adjust
the setting.
This adjusts the noise that will occur regardless of
whether notes are being played. Higher settings will
increase the volume of the noise.
8. Press the [®] key once to access the “On Click
Level” parameter, and use the [-] [+] keys to adjust
the setting.