


6
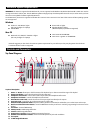
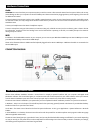
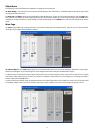
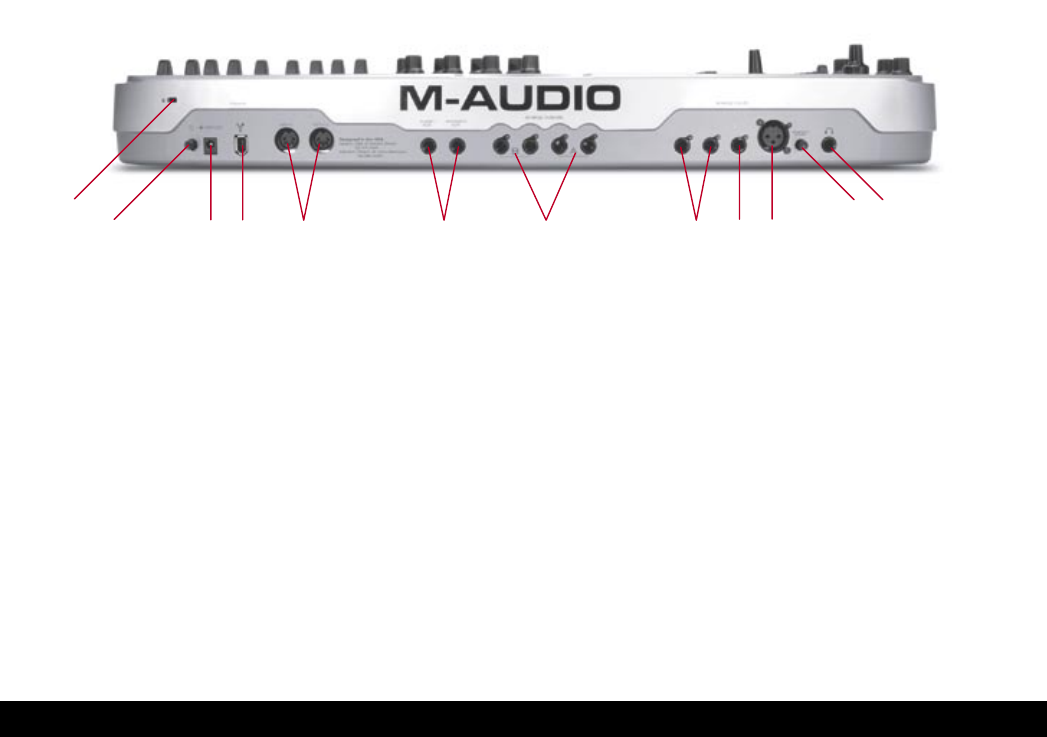
Back Panel Descriptions
1. Mic Input: This connection will accept a low-impedance microphone connected on a standard three-pin balanced XLR. The
microphone input supports the standard 48V phantom power used in professional condenser microphones.
2. Instrument Input: This connection allows you to plug in an instrument, such as a guitar, bass. The input is balanced, and supports
unbalanced (TS) jacks.
3. Line Inputs: These two connections allow for line-level inputs, such as those from a CD or tape player. You can use them for two
separate mono devices or a single stereo unit.
4. Headphone Output: The Headphone Output is rated to accept headphones in a broad range of impedances—between 32 and
600 ohms.
5. Line Outputs: The first two line outputs are balanced (TRS) while the third and fourth line outputs are unbalanced (TS).
6. Phantom Power
: This switch allows you to turn phantom power on and off on the microphone input (see number 1, above).
7. MIDI Input and Output
: These are standard 5-Pin DIN MIDI In and Out jacks.
8. FireWire Port:
The FireWire (IEEE 1394) port allows you to connect to your computer. We recommend connecting the Ozonic at the
end of any chain of FireWire devices and connecting only self-powered devices to the input.
9. DC Power Supply Port: Connect the 12VDC 1000mA power supply to this jack when using the Ozonic with a four-pin FireWire
connection. Use only the power supply provided with the unit or a power supply of equivalent quality with a positive center pin.
10. On/Off Switch:
Powers the Ozonic on and off.
11. Kensington Lock Hole:
This connector is compatible with Kensington
®
security cables to protect your device from theft.
12. Sustain /Expression Pedals
Driver Installation
Windows XP
NOTE:
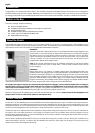
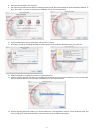
Do NOT connect the Ozonic to your computer before you have run the installer application and shut down your computer. If you are going to
use bus power (systems with IEEE1394 6-pin connectors) make sure you make the cable connection first, then turn the FireWire device power
switch on, and turn the computer system on last.
For the Ozonic to function properly, you need to have installed Service Pack 1 or higher if using Windows XP. To install a Service Pack, please
consult http://www.microsoft.com for instructions.
Additionally, you’ll need DirectX 9.0b or higher. The Ozonic driver installer will detect whether or not you have the proper version of DirectX
installed. If you need to upgrade, you will be prompted to do so. DirectX 9.0b can be found on the included driver CD-ROM.
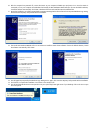
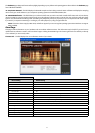
During the course of installation, messages about the Microsoft Digital Signature for the driver will appear. Microsoft tests drivers to ensure
they work properly with their operating systems. While driver signing makes installation and operation more streamlined, it is not a necessity
for a device to function properly with the operating system. Currently, M-Audio’s FireWire drivers are not digitally signed. However, M-Audio
is committed to providing the best possible drivers for our products and we constantly evaluate and test our drivers to ensure that they work
properly. As a result, there is no need to worry about the driver not being signed.
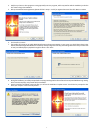
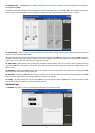
1. Insert the Driver CD-ROM into your computer’s CD-ROM drive.
2. From the Start menu, select “Run…” then click the Browse button. Browse to the CD drive, locate the “Ozonic” folder, then select the
Ozonic installer from within that folder.
3. Double click on the installer icon to begin the installation.
11
10 9 8 7 12 5 3 2 1
6
4