130
Creating Original Patterns
Creating Patterns in Step
Recording
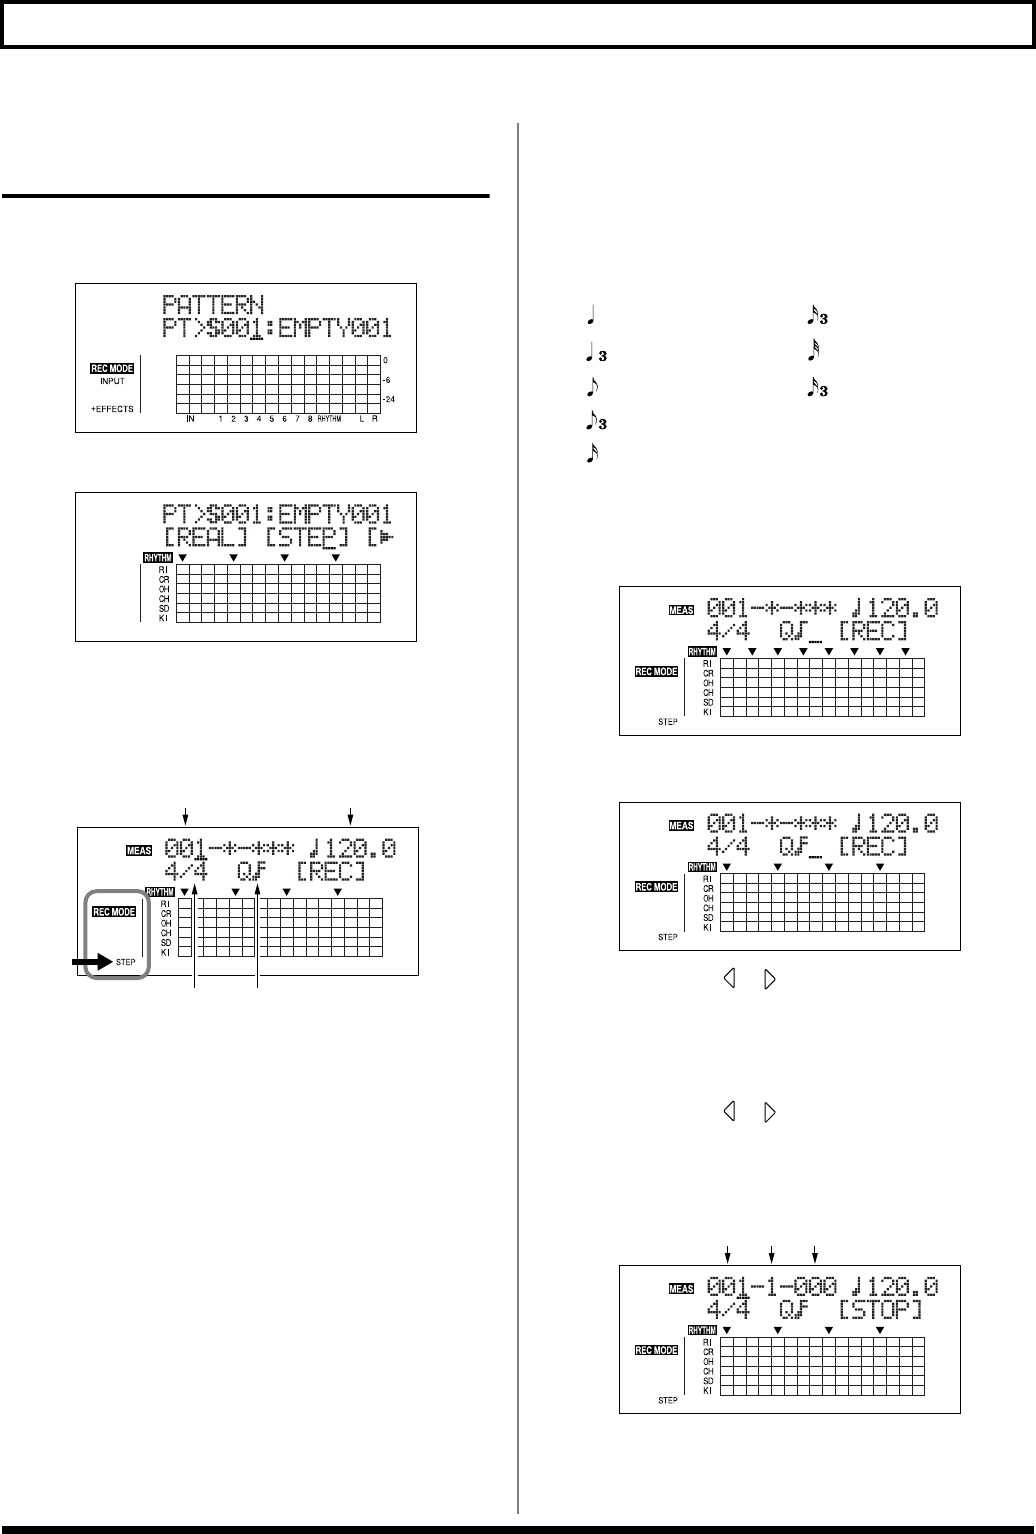
1. Press [ARRANGE/PATTERN/OFF] repeatedly until the
indicator is flashing.
fig.03-415d
2. Press [EDIT].
fig.03-416d
3. Press [CURSOR] to move the cursor to “STEP,” and
press [ENTER].
“STEP” appears in REC MODE at the left of the screen.
The recording standby screen appears in the display.
fig.03-417d
4. Use [CURSOR] and the TIME/VALUE dial to set the
measure, beat, and quantize from which to start
recording of the pattern.
Measure
This sets the number of measures in the pattern to be
recorded.
Valid Settings: 1–999
Tempo
When recording, this sets the tempo for confirming the
pattern.
Valid Settings: 25.0–250.0
* The tempo setting here is exclusively for confirmation of the
pattern recording. This tempo is not stored in the pattern (you
cannot make any individual tempo settings for the patterns
themselves).
Time Signature
This sets the time signature (i.e., the beat) for the pattern
to be recorded.
Valid Settings: 1/1–8/1, 1/2–8/2, 1/4–8/4, 1/8–8/8
Quantize
This sets the resolution for the steps being input.
Quarter note (96)
Sixteenth-note triplet
(16)
Quarter-note triplet
(64)
Thirty-second note
(12)
Eighth note (48)
Thirty-second-note triplet
(8)
Eighth-note triplet
(32) HI (1)
Sixteenth note (24)
Numerals in parentheses indicate the clock. The lower
the value set, the finer the resolution each beat becomes.
(Ex.) :
Here you can input sounds in eighth-note lengths.
fig.03-418d
(Ex.) :
Here you can input sounds in sixteenth-note lengths.
fig.03-419d
5. Press CURSOR [ ] [ ] to move the cursor to “REC,”
and press [ENTER].
Step Recording starts.
* You can also start recording by pressing [REC].
6. Press CURSOR [ ] [ ] to move the cursor to the
measure, beat, and clock, then turn the TIME/VALUE
dial to specify the time at which the drum sound is to
be input.
fig.03-420d
TempoMeasure
Time Signature Quantize
Measure Beat Clock
