


Direct Pro 24/96 Owner’s Manual
INSTALLING THE DIRECT PRO 24/96 HARDWARE
1. Please unplug you PC before connecting or disconnecting the Direct Pro 24/96 interface box and
PCI host card . Connecting or disconnecting the hardware with electricity present will cause physi-
cal damage to the Direct Pro 24/96 or your computer. It is best to disconnect the power cable
completely before proceeding. If you are unfamiliar with installation of computer peripherals, please
seek assistance from qualified computer technician. Aardvark will not be held responsible nor liable
for damages resulting from improper installation.
2. Remove the cover from your computer. Most computers have a series of screws on the back of the
case that keeps the cover in place.
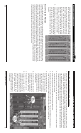
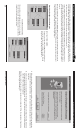
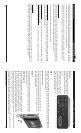
3. Choose an empty PCI slot, it will look like the PCI slots show below.
4. Remove the small outer cover from the chosen PCI slot. This cover will likely be held in place by a
screw. Ground yourself by touching an empty slot on the computer’s metal chassis.
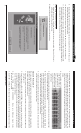
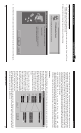
5. Gently align the Direct Pro 24/96
PCI Host Card with the chosen
PCI slot and press it slowly but
firmly into place. It should be
seated tightly, with the metal con-
nection bracket matching up per-
fectly through the hole in the back
of the computer.
6. Use the screw from the small
outer cover to lock the Direct Pro
24/96 Host Card in place while
providing maximum grounding.
7. Replace the computer’s cover.
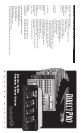
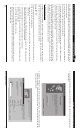
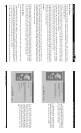
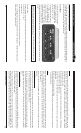
8. Connect one end of the 6-ft
shielded cable to the 25 pin con-
nector on the Direct Pro 24/96
Host Card, and the other end on
the back of the Direct Pro 24/96
interface box labeled To Aark
Host. Tighten the screws to as-
sure a firm connection and maxi-
mum grounding for the Direct Pro
24/96 system.
532
Sound Forge and Wave Lab Installing the Direct Pro 24/96 Hardware
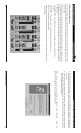
mixer will bring up a menu that provides the op-
tion to add an audio track. Repeat this command
until you have your desired number of tracks. A
new strip will appear on the mixer for each track
you add. At the bottom of each strip, there is a
button that indicates what inputs are used to
record that track. To change inputs, simply click
that button. To arm a track for recording, simply
click the R button above a track’s volume slider.
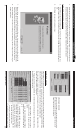
5. Initiate recording by clicking the record button near
the top of the screen. Do not confuse this with the
record mixer automation button, which looks simi-
lar. The correct button has a black box with a red
circle in it.
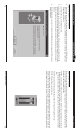
Sound Forge and WaveLab
To prepare Sound Forge or Wavelab for recording, open the Preferences dialog from the Options menu.
Click on the Wave tab in Sound Forge, or the AudioCard tab in WaveLab, and select a Direct Pro 24/96
stereo pair for playback and recording. Since Sound Forge and WaveLab can only record or play one
stereo file at a time, you will only utilize one input and one output pair with these programs. In sound
Forge/ WaveLab, click the red Record button. Enable Monitor in Sound Forge or Meter in WaveLab with a
check mark to view the input level meter, hit record then play your audio. When the recording is complete,
click the Stop button and save the file with Save As from the file menu. Clicking the play button will play the
sound file back through the stereo output set in the Preferences dialog.